VMware Data Services Manager (DSM) offers modern database and data services management for vSphere. It is a solution that provides a data-as-a-service toolkit for on-demand provisioning and automated management of PostgreSQL and MySQL databases in a vSphere environment.
In this blog, I will try to walk through the installation and configuration of the vSphere client plugin.
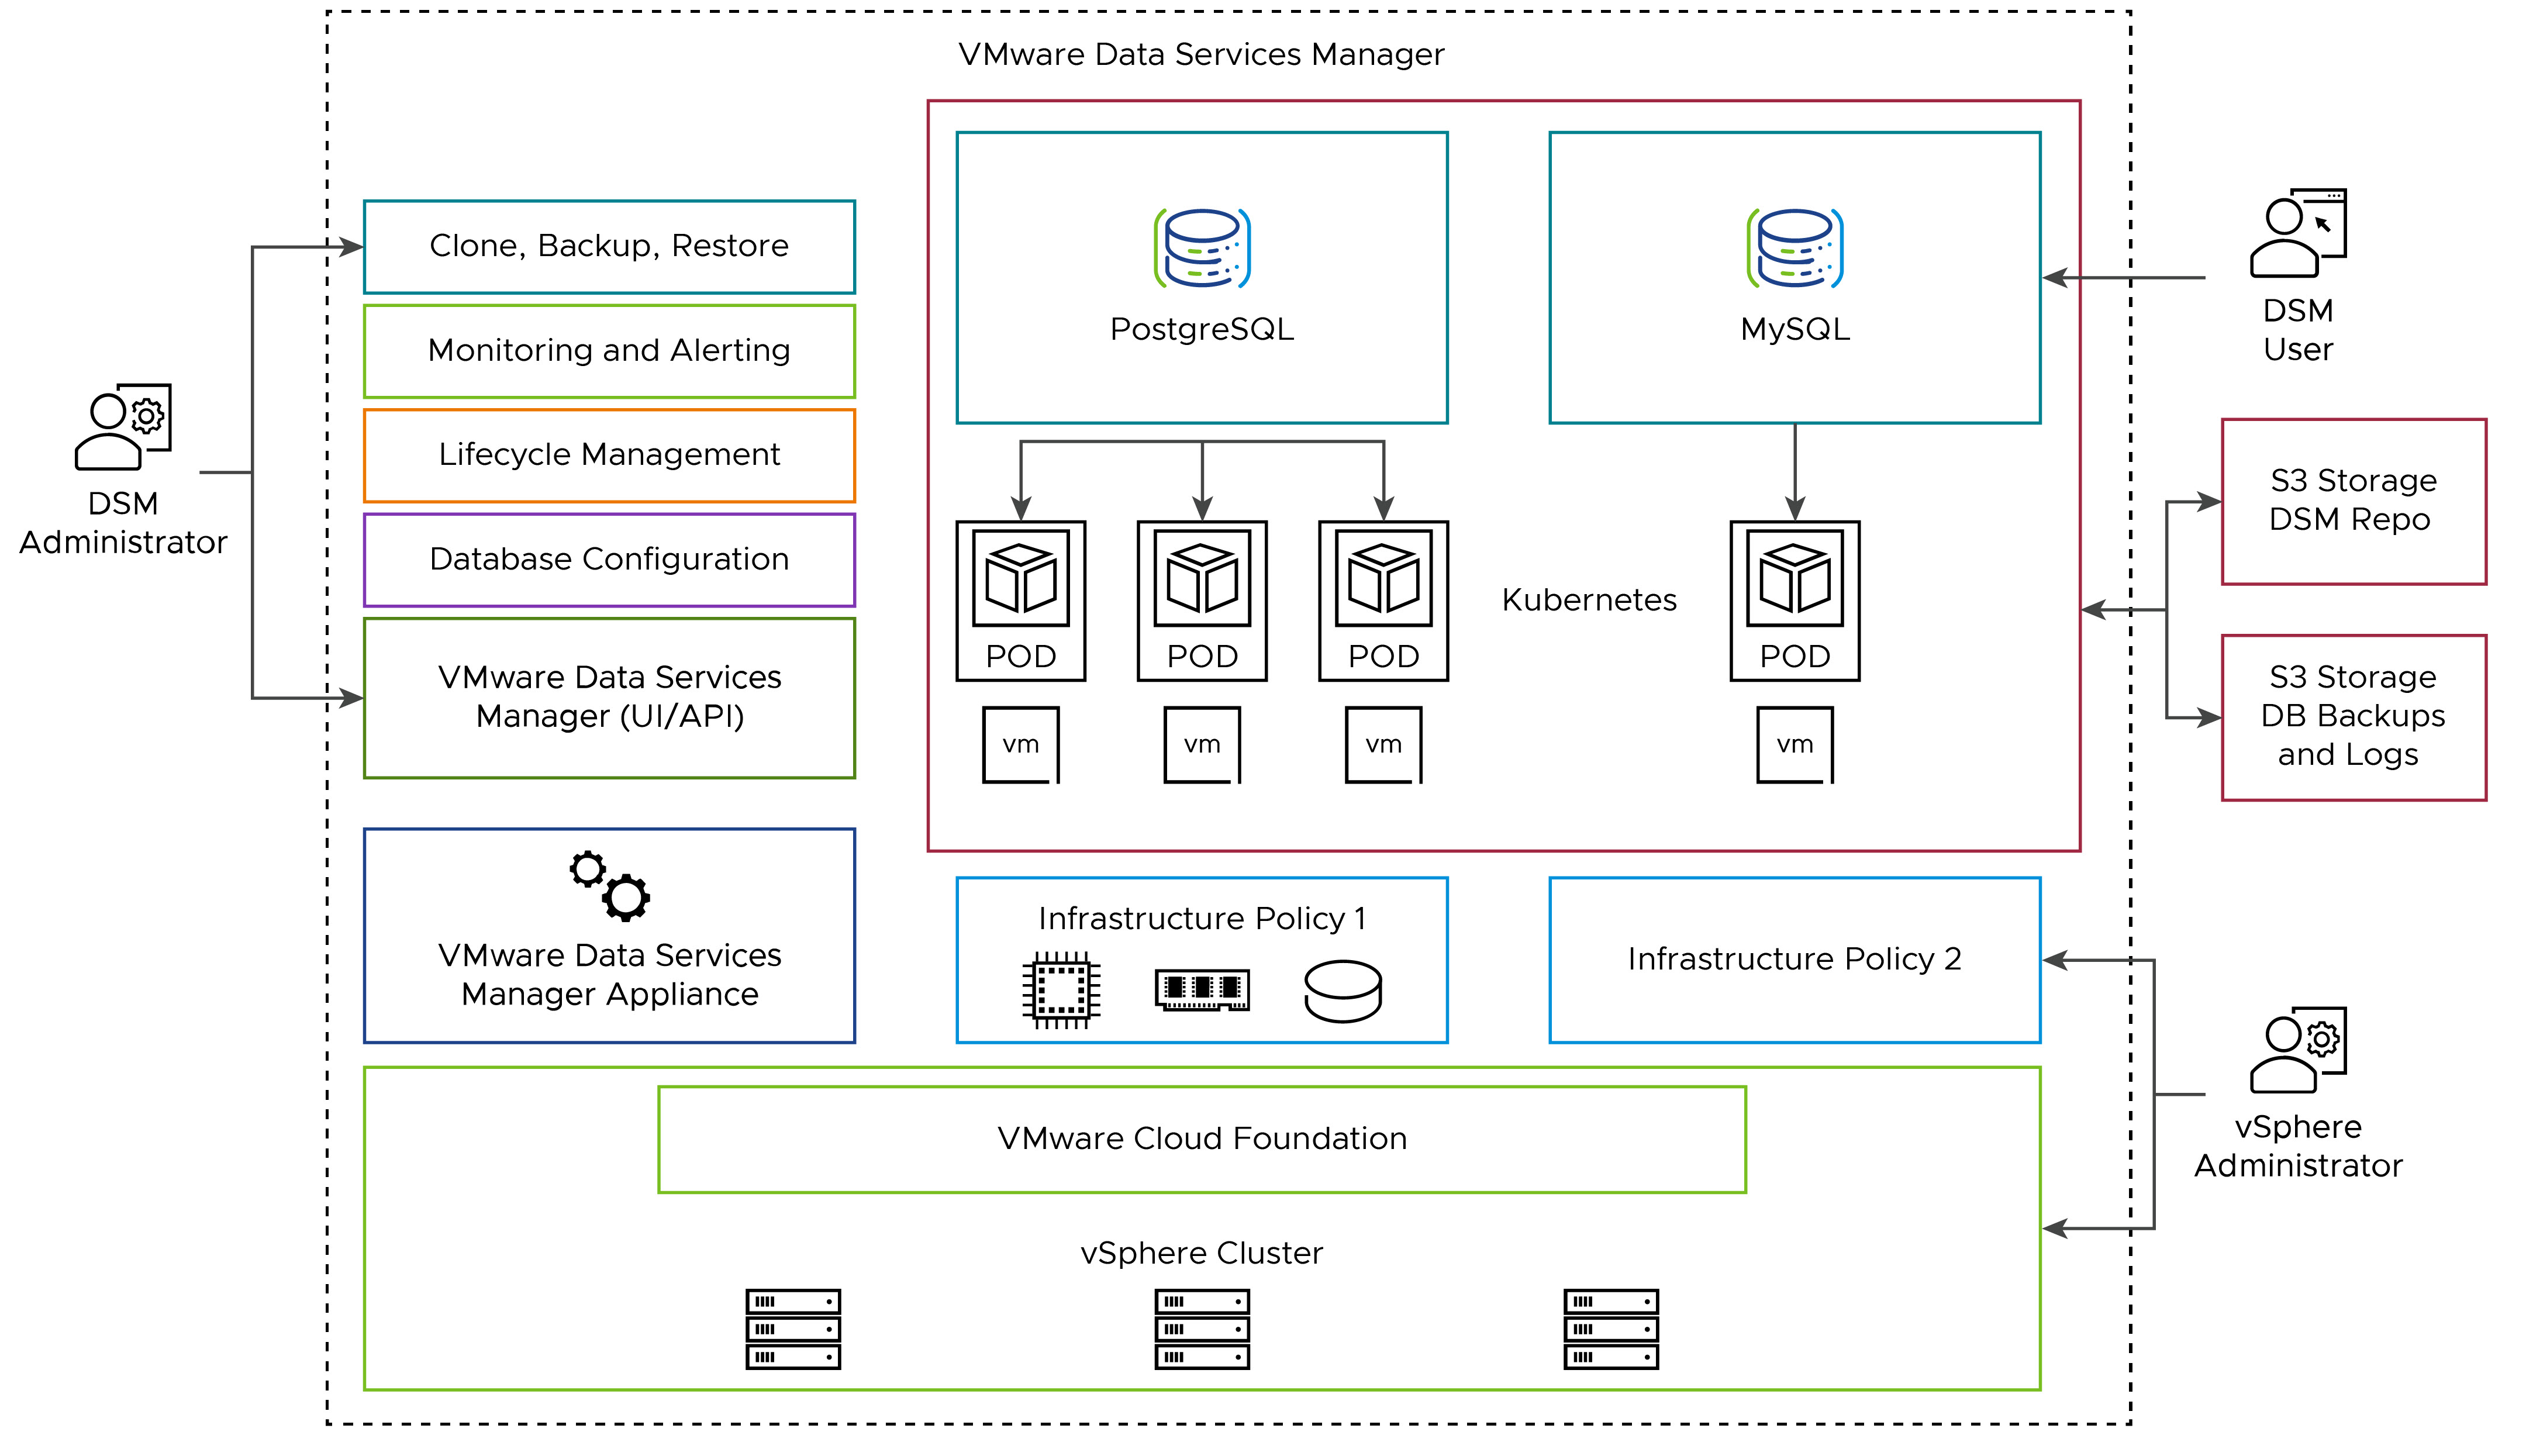
VMware Data Services Manager (DSM) Architecture
Pre-requisites
Please ensure to refer to the hardware and software requirements doc
In my lab, I am using the following
- vSphere 8.x SDDC
- MinIO as Object Storage. This is required to create the following buckets:
- A bucket for Provider Repo
- A bucket for Provider Logs
- A bucket for Provider Backups
- Database backup storage
For MinIO I am using Self Signed Certificates and have the following in the certificate
- Common Name (CN) as IP of the MinIO VM
- IP address and DNS in Subject Alternative Name (SAN) as IP of the MinIO VM
For more details please refer the following document
Deploying vSphere Client Plugin for DSM
Step 1 – Downloading the DSM Plugin .ova
Navigate to VMware Data Services Manager on VMware Tanzu Network (https://network.tanzu.vmware.com/products/data-management-tanzu#), locate and select Provider Virtual Appliance, and download the file.
The format of the plugin virtual appliance download file name is:
dms-va-<version>-<build>.ova
Step 2 – Installing the DSM Plugin .ova
In the vSphere Client, login to the vCenter instance and select Menu > Administration > Client Plugins > ADD
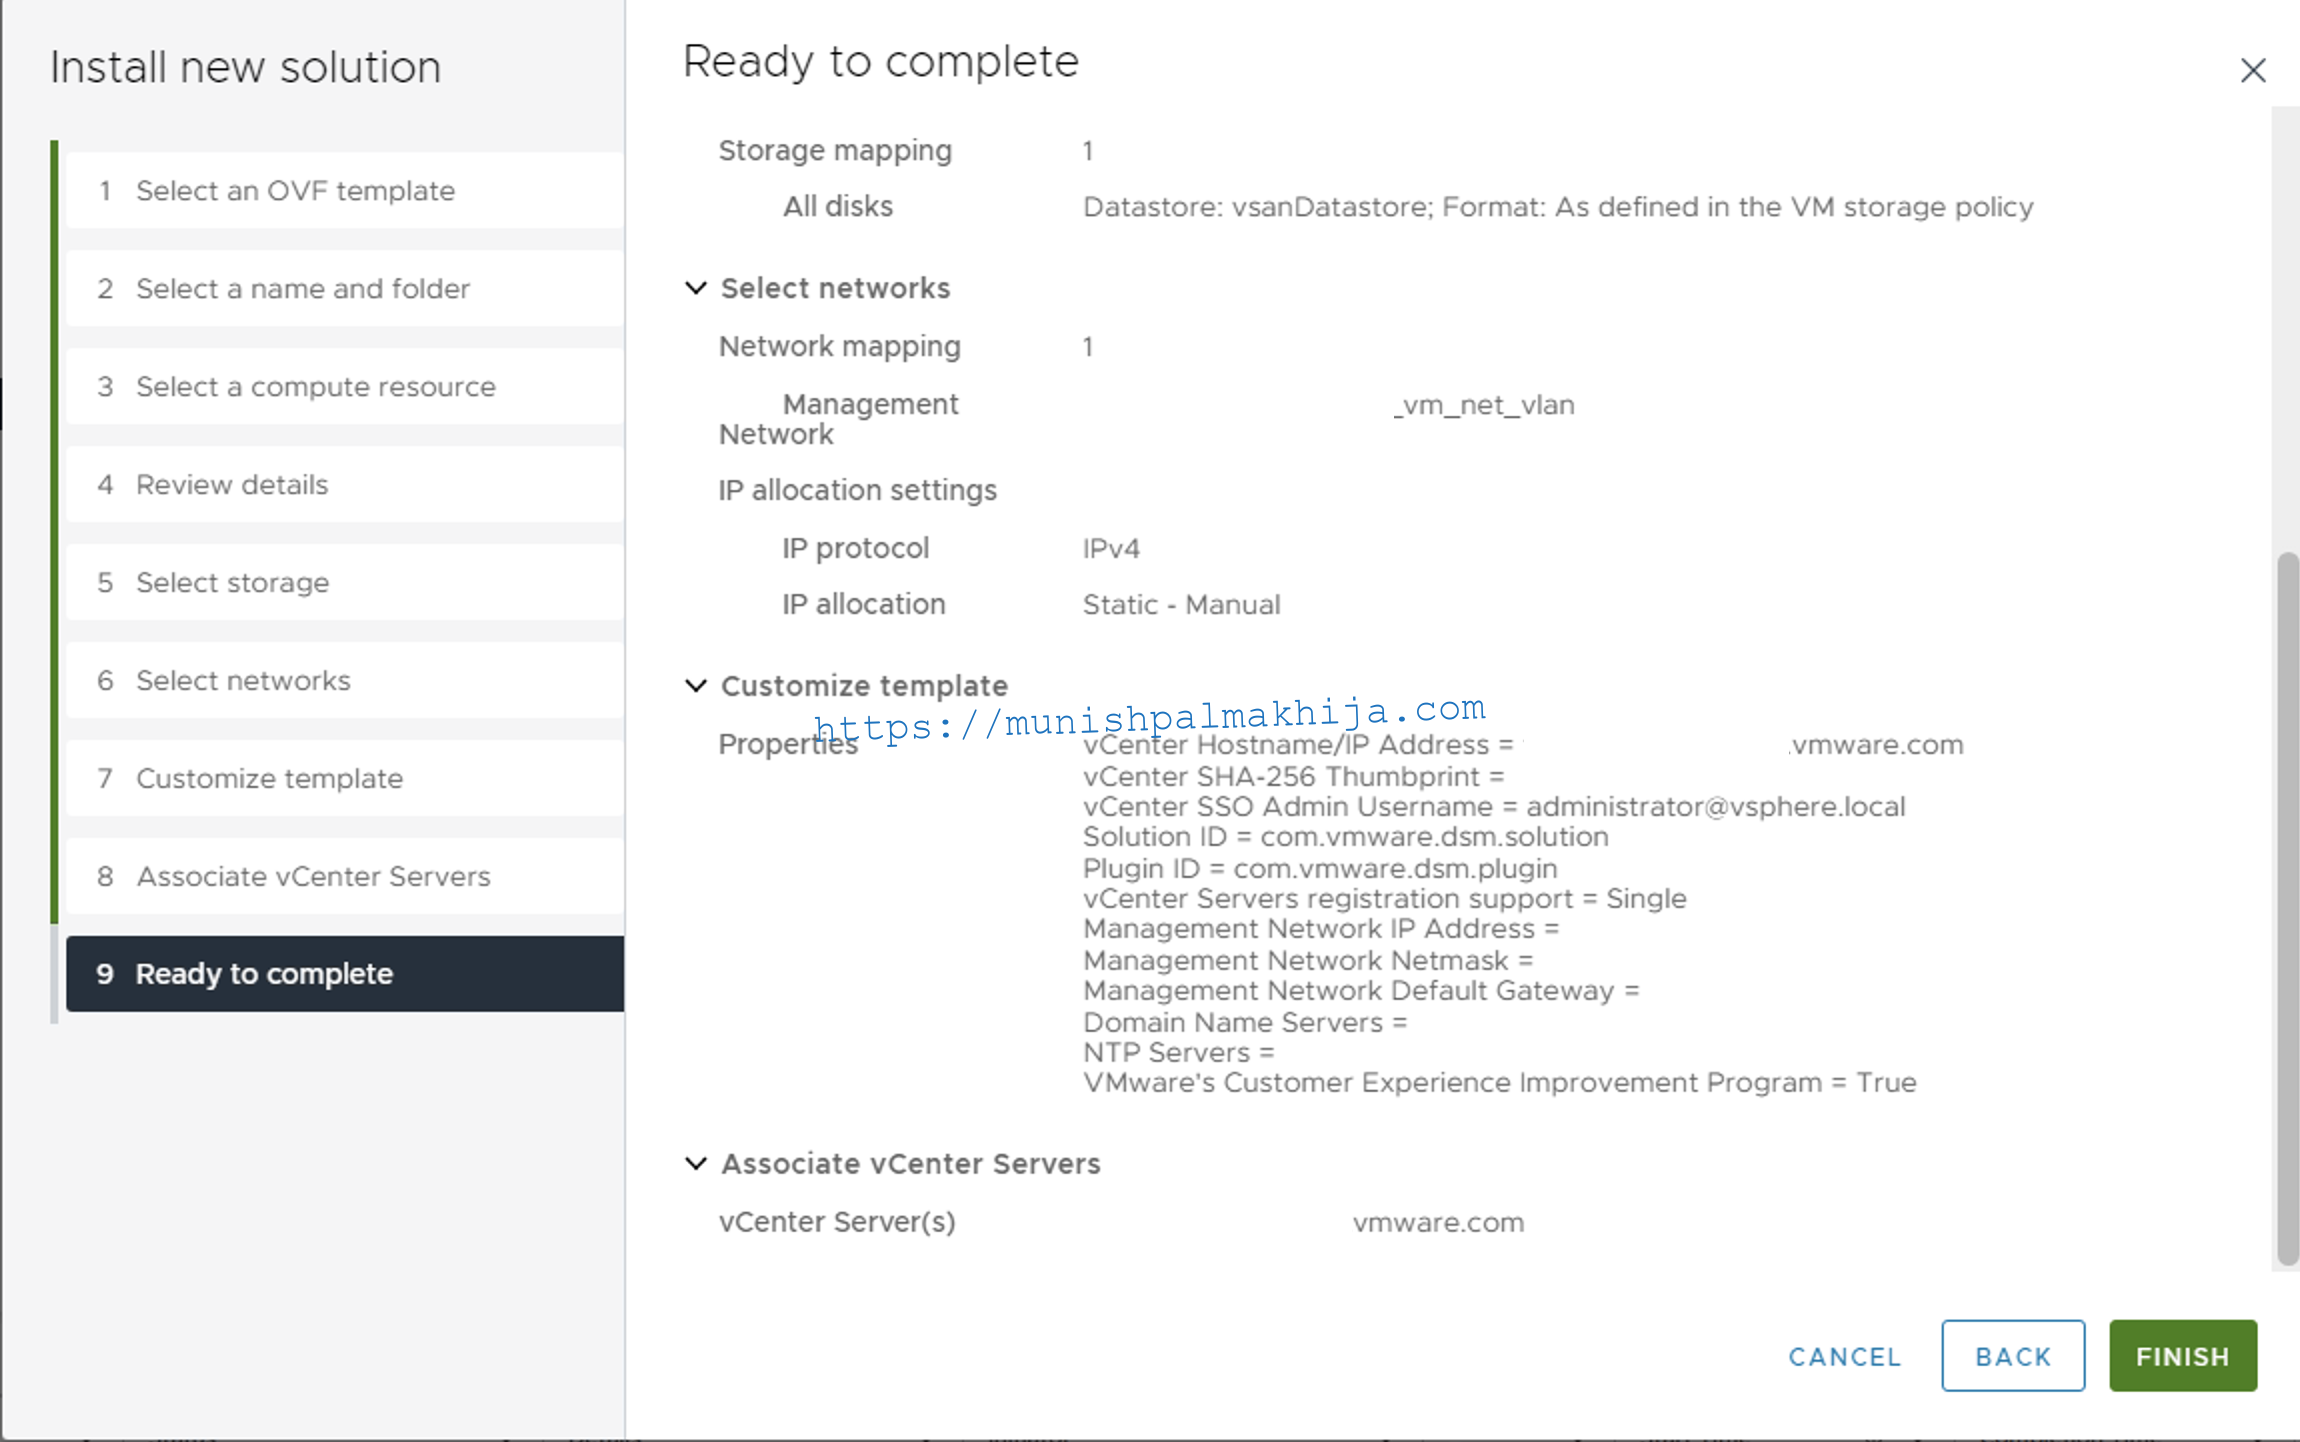
In the Select an OVF template form, either select the URL and enter the URL of the location to download the .ova file, or select Local file and browse your local directory to download the .ova file.
Navigate through the self-explanatory wizard to finish the OVA deployment and Power on the VM. For more details, you can refer to the following doc https://docs.vmware.com/en/VMware-Data-Services-Manager/2.0/data-services-manager/GUID-vsphere-deploy_provider_vm.html


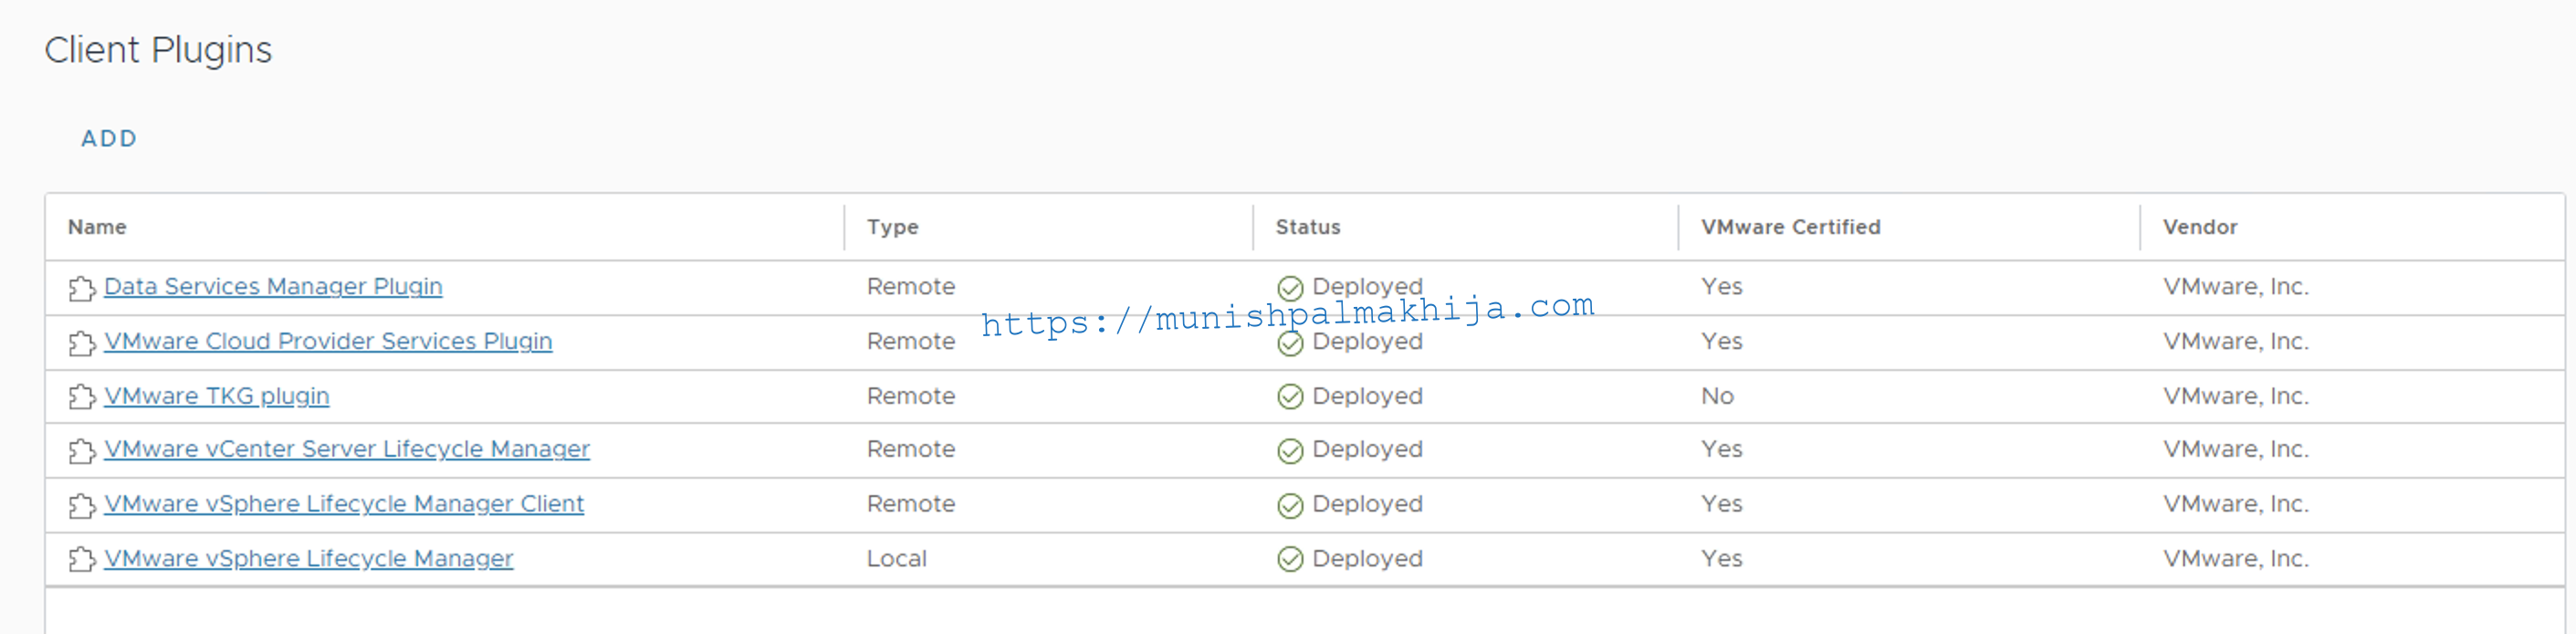
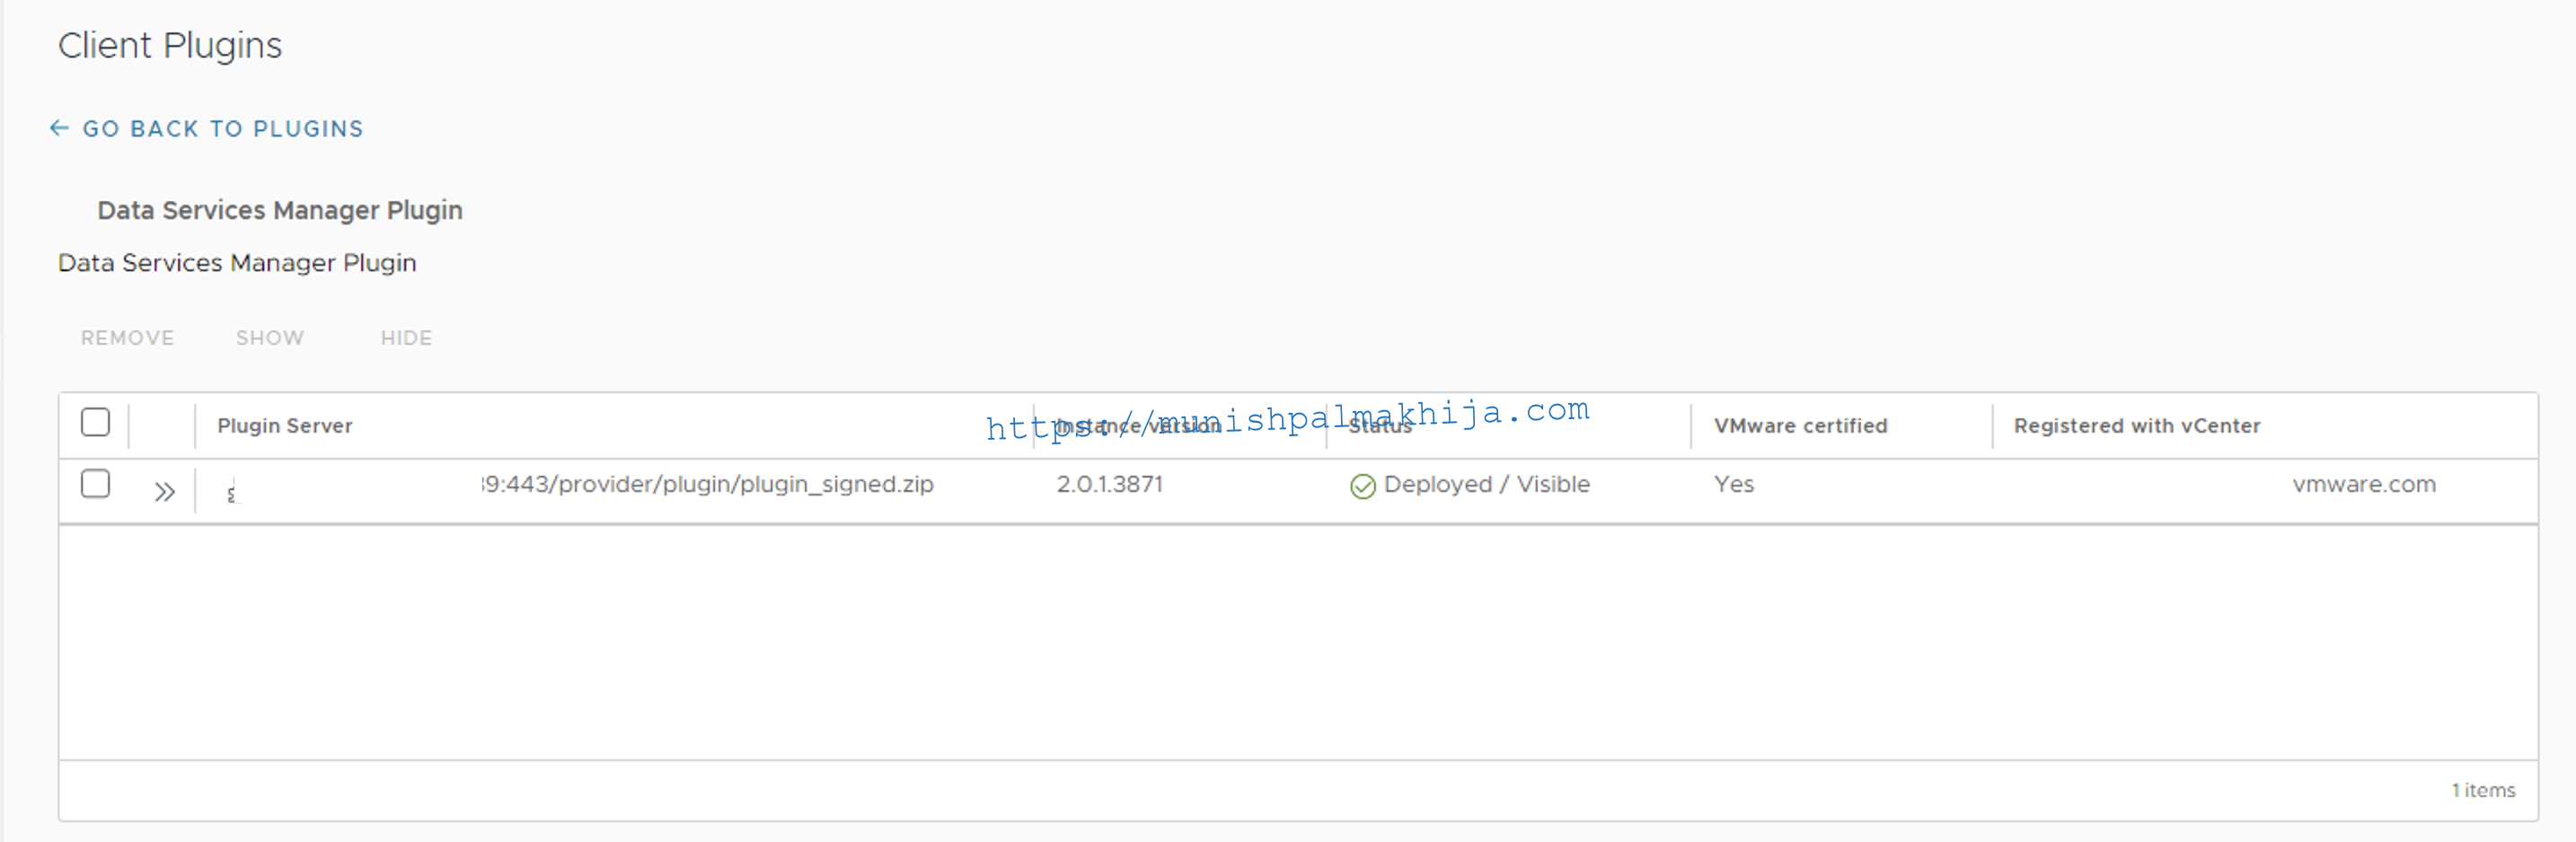
After the installation is complete, you will need to refresh your browser running the vSphere Client to see the new features that DSM 2.0 introduces
Configuring DSM client plugin
Configure the VMware Data Services Manager in the vSphere Client. It includes:
- Configuring IP pools.
- Defining a VM class.
- Configuring user permissions.
- Creating infrastructure policies.
Step 1 – Configure IP Pools
IP pools are a collection of available IP addresses used for dynamic IP assignment for databases.
Navigate to the vCenter server, click the Configure tab, click IP Pools under VMware Data Services Manager, and click Create

Step 2 – Defining a VM Class
A VM class specifies the compute and memory resources allotted to a provisioned database VM. Default VM classes are available, but you can also configure custom VM classes.
Navigate to vCenter server, click the Configure tab, click VM Classes under VMware Data Services Manager, and click Create

Step 3 – Choosing the User Identity Source and Configuring Permissions
A vSphere administrator assigns DSM Admin and DSM User roles to users so that they can access Data Services Manager (DSM).
Users can be from two different identity sources:
1. the DSM local database (Local user)
2. Configured LDAP server (LDAP user).
In my lab I have created 2 users
- provideradmin@lab.local
- provideruser@lab.local

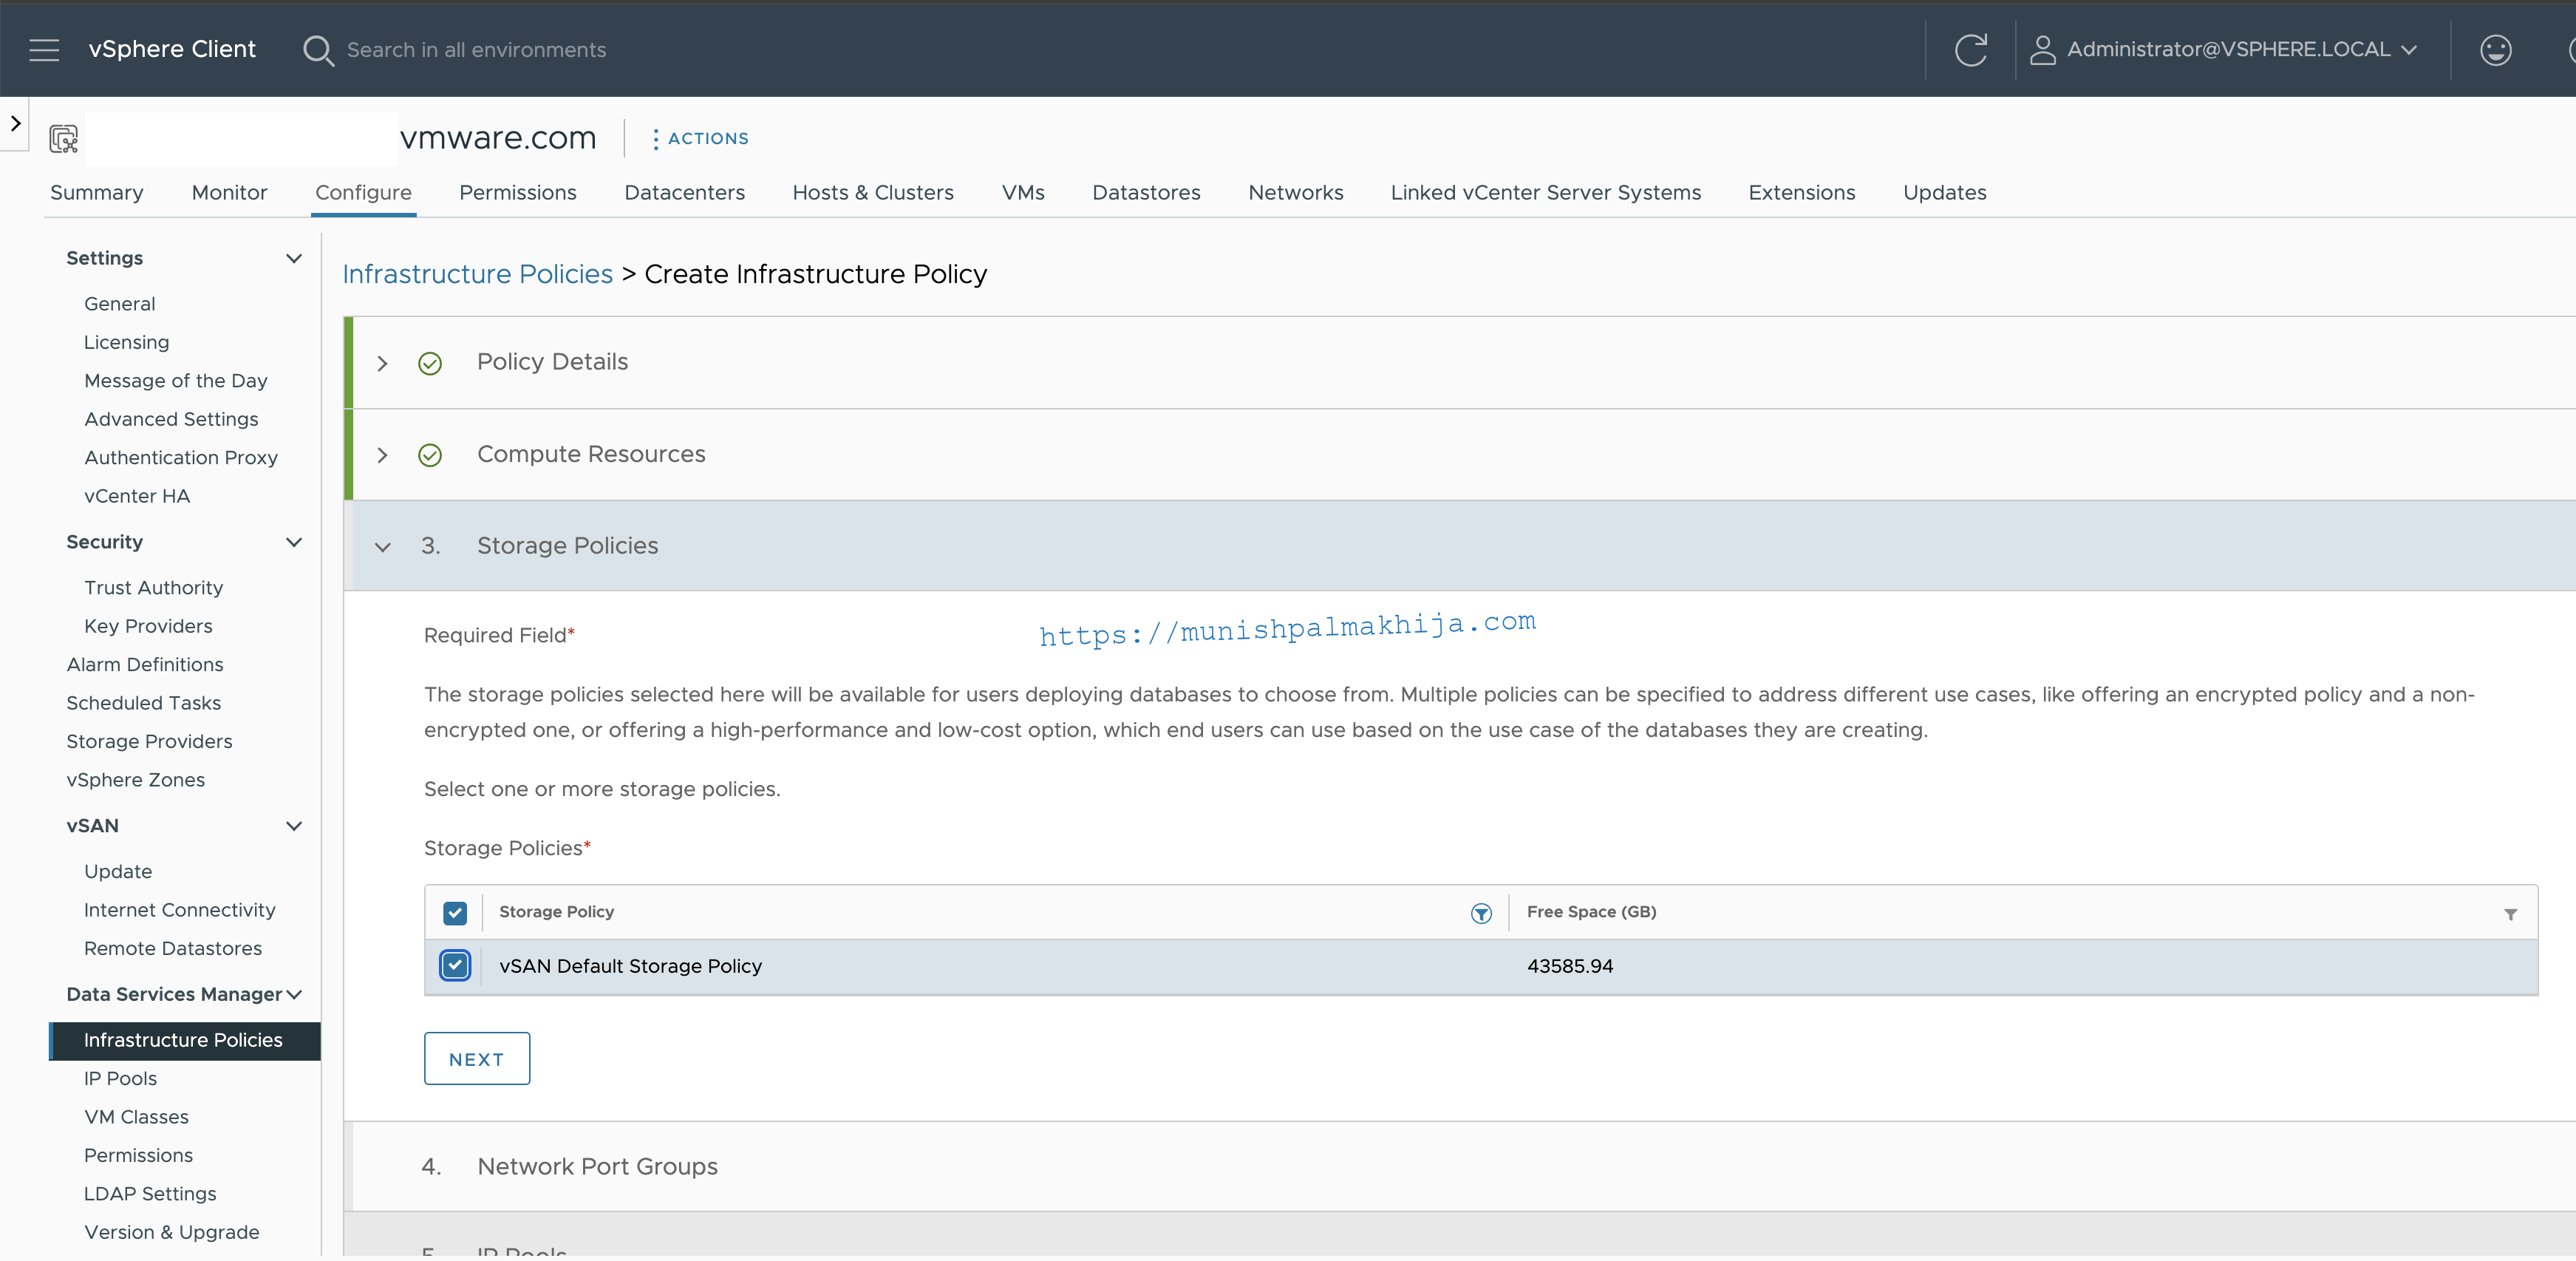
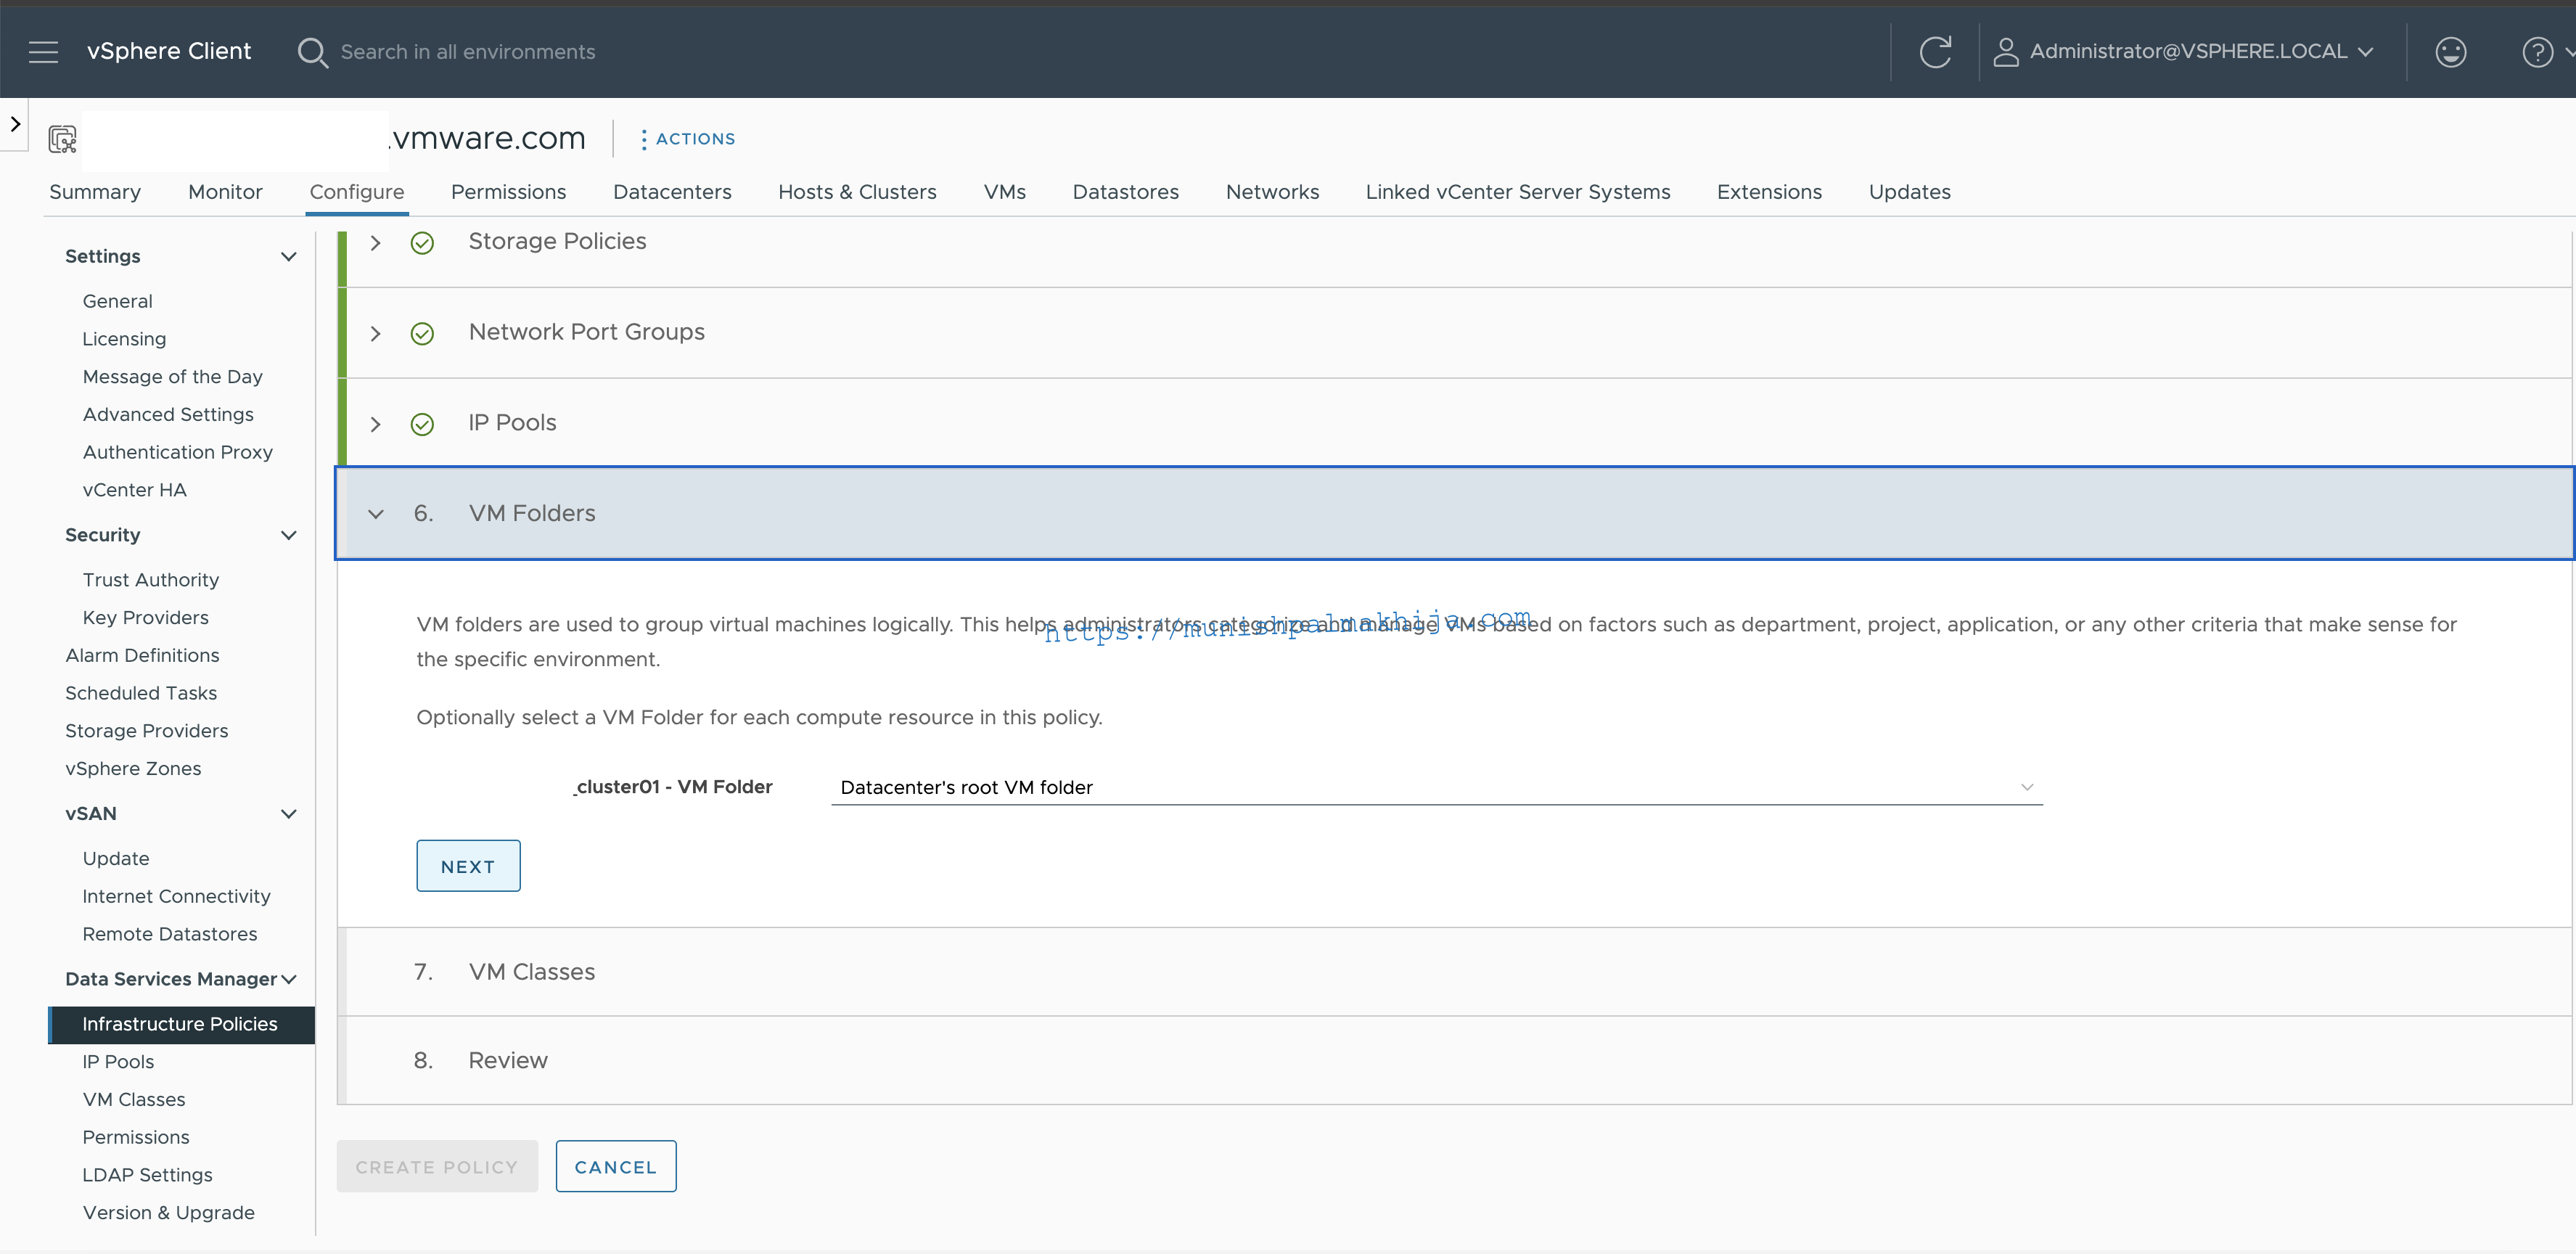
Step 4 – Creating Infrastructure Policies
With Infrastructure Policies, you create guardrails that restrict the quality and quantity of resources the DSM users can consume from vSphere clusters while having full visibility into how this infrastructure is getting used.
It allows to configure
- Compute Resources (Cluster or Resource Pool
- Storage Policies
- Network Portgroups
- IP pools
- VM Folders
- VM Classes


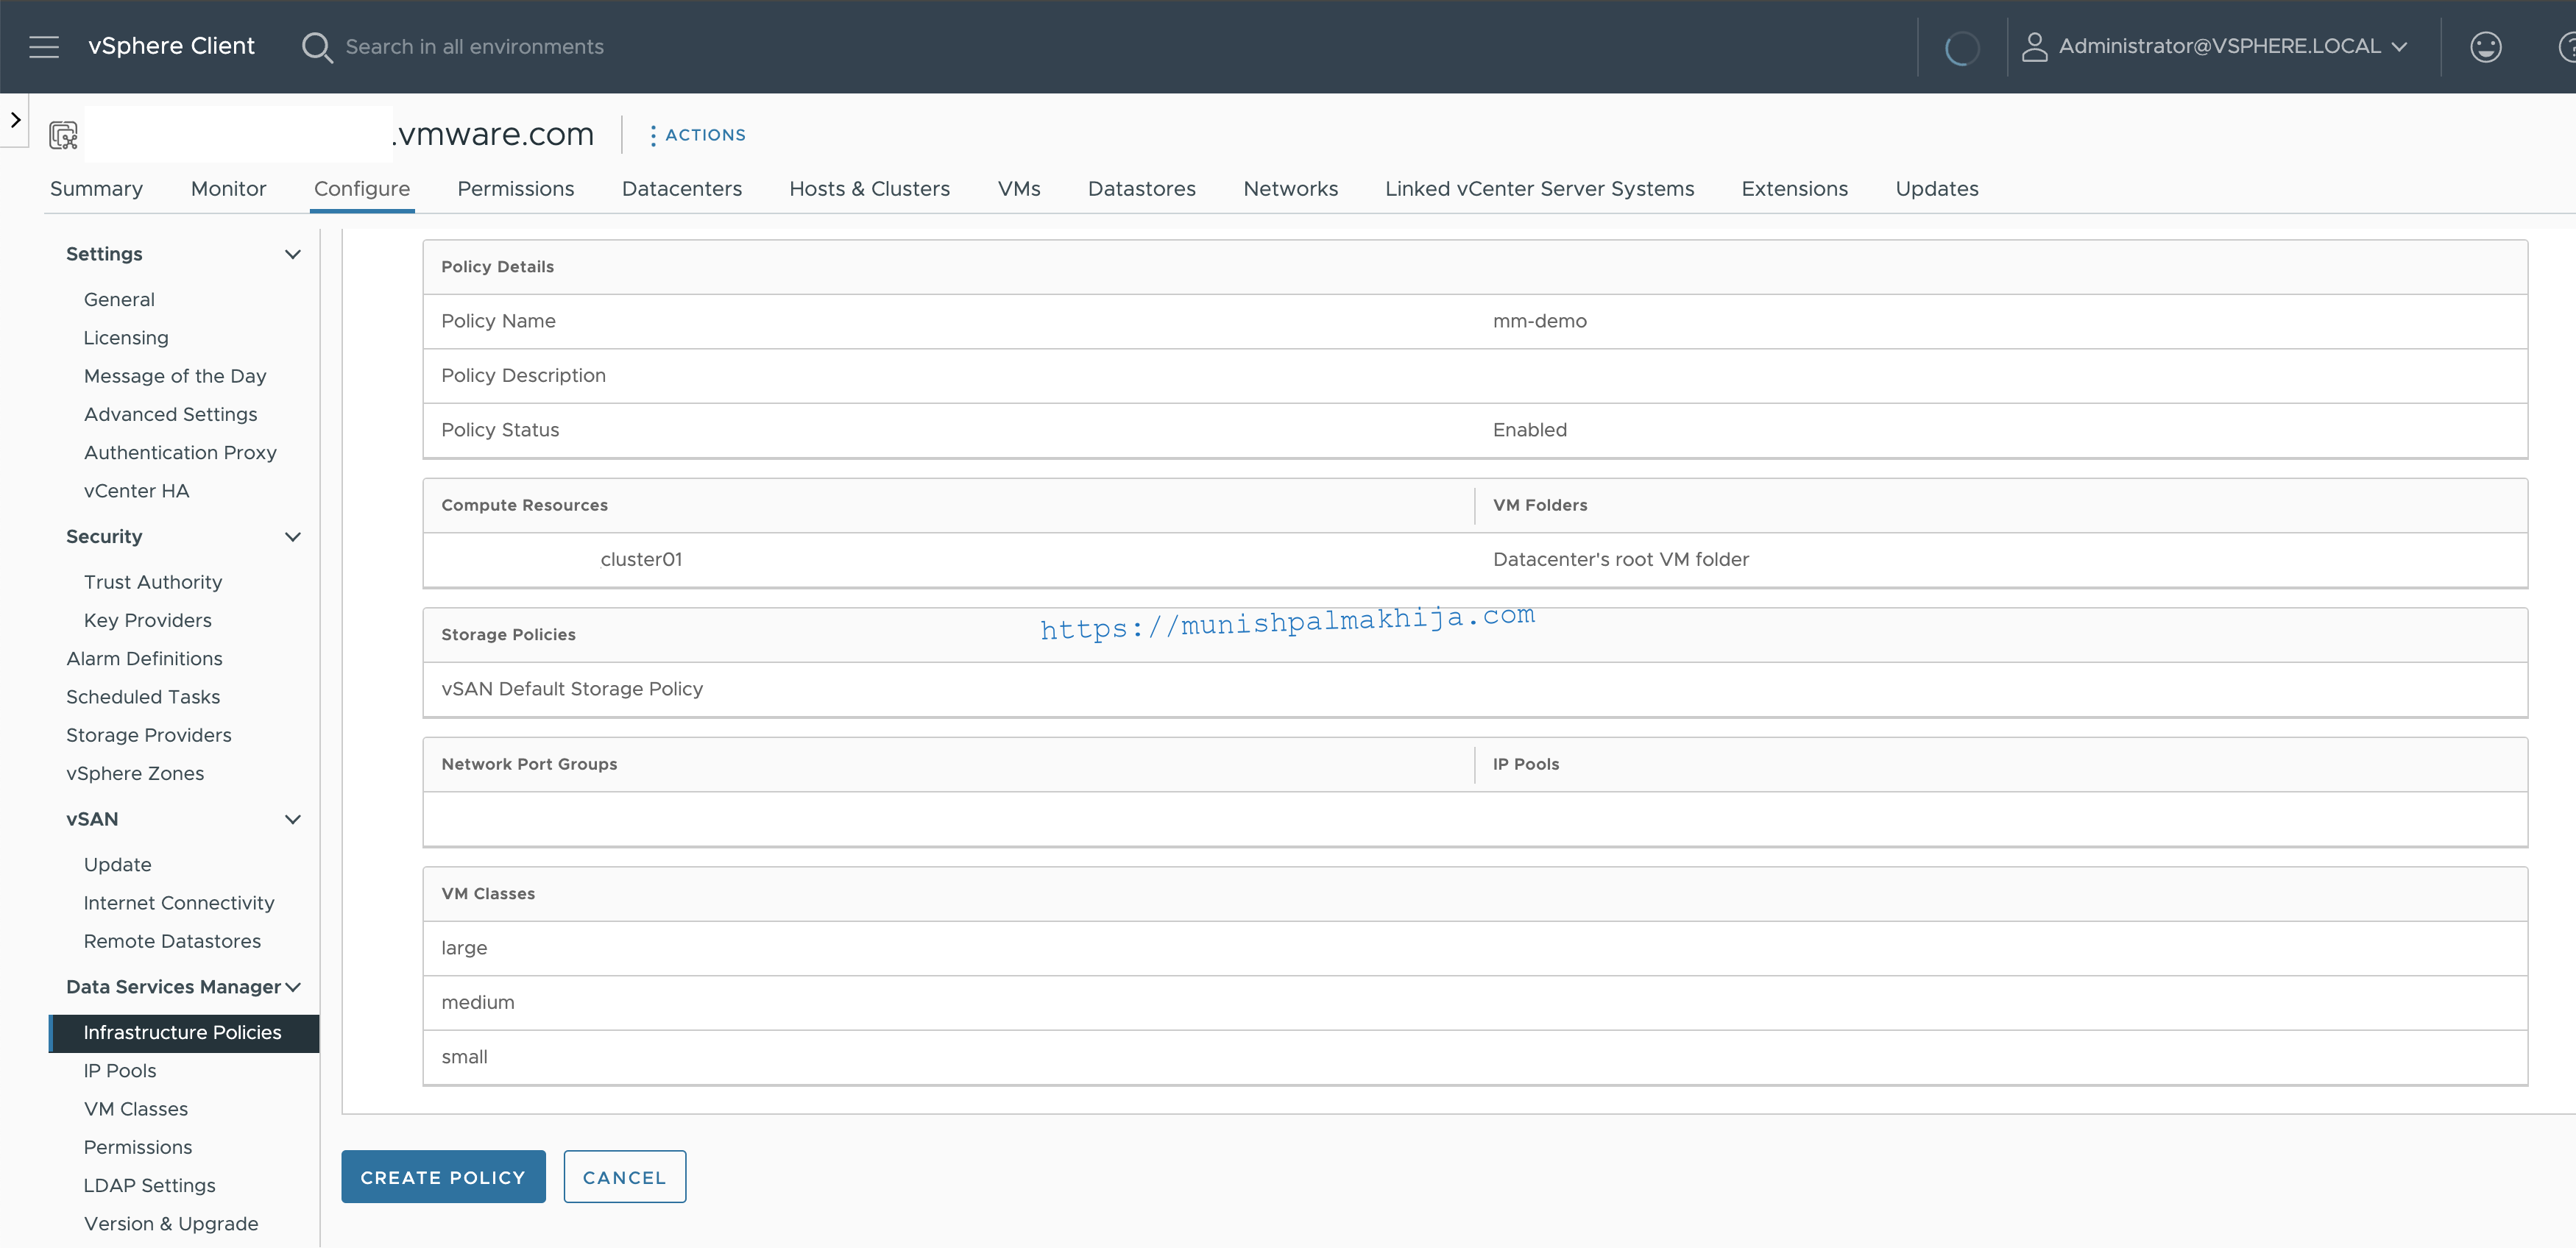
Once the policy is created you can also log in as a provider admin user to see the policy showing up on the DSM portal as well.
In the next blog, I will showcase how to configure Data Services Manager to deploy data services such as Postgres DB
