In my previous blogs, I showed the
- Installation and configuration of the vSphere client plugin.
- Configuration of settings to deploy data services
In this blog, I will showcase how to deploy the actual data service such as Postgres DB using
- Data Services Manager console UI
- Kubernetes API exposed
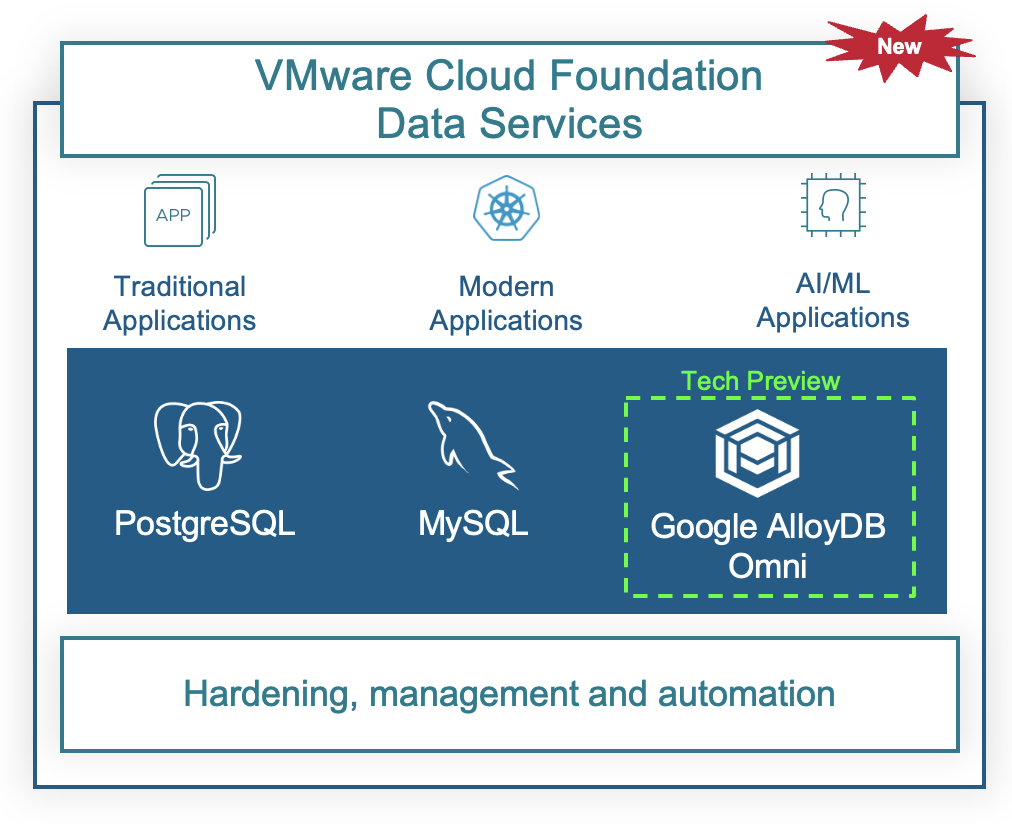
Currently, VMware Data Services Manager supports 2 databases
- VMware SQL with Postgres
- VMware SQL with MySQL
Enable the Data Services
Navigate to Data Services under Version & Upgrade
Click on 3 dots and select enable
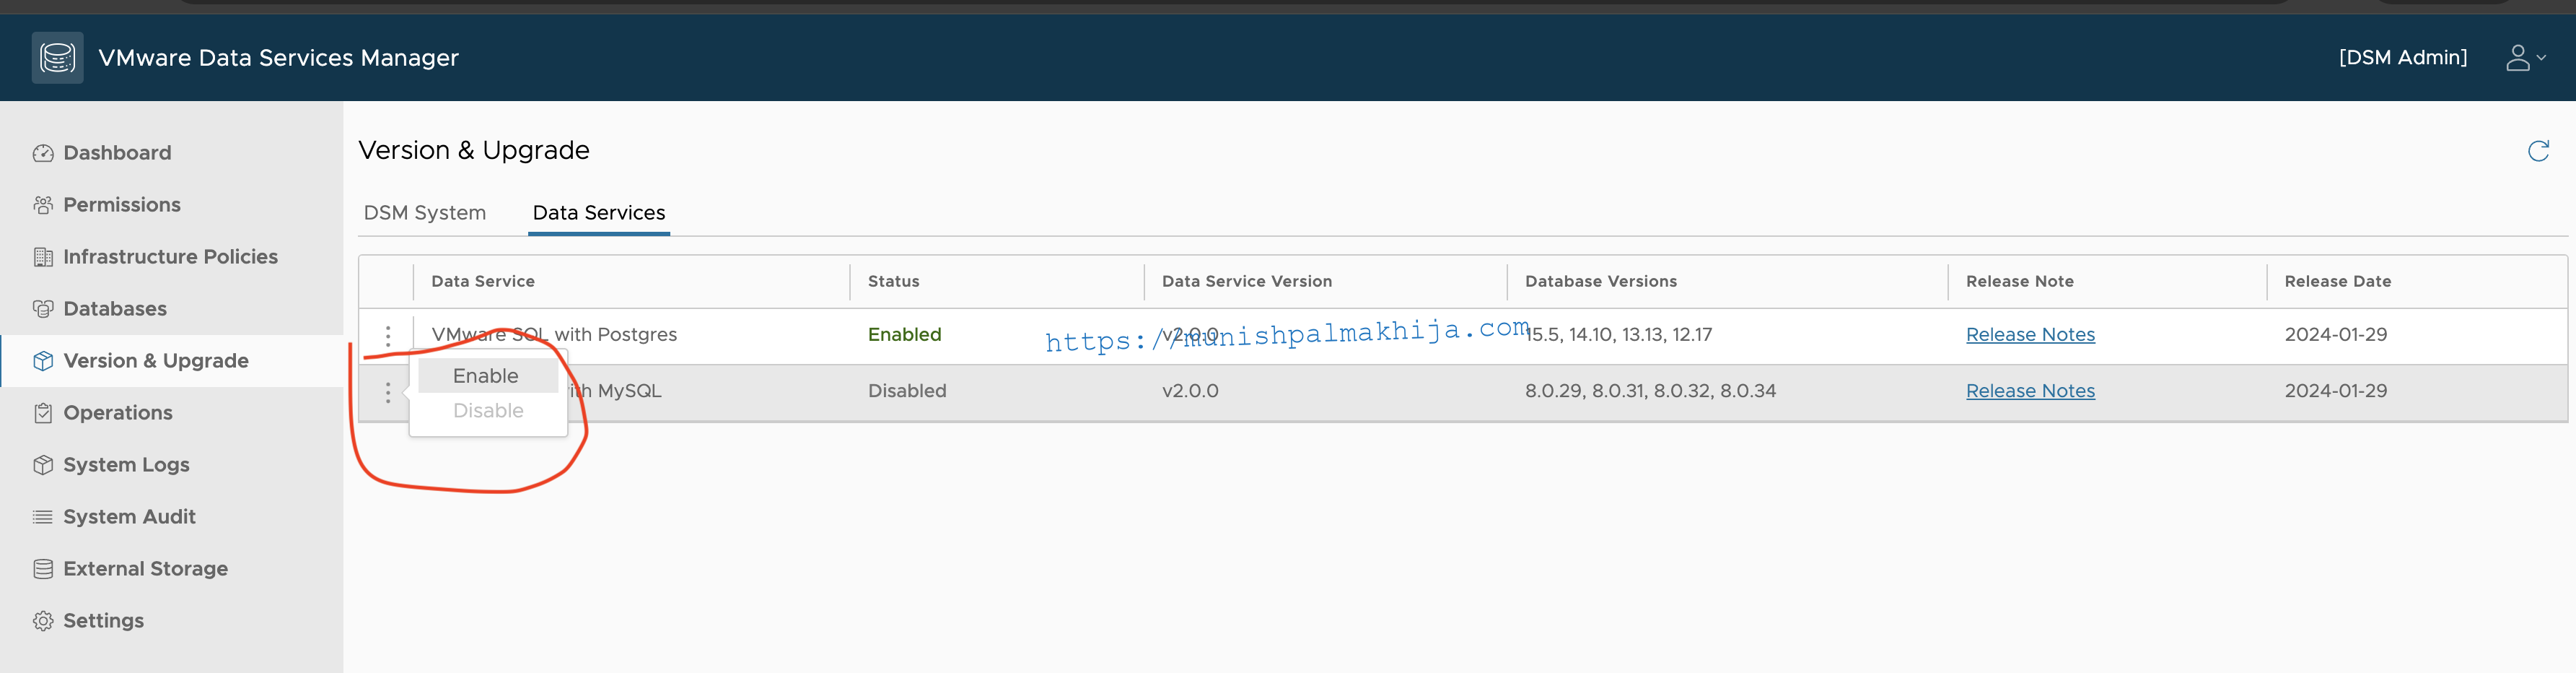
It will take about 15-20 mins to enable the services. Once enabled you can select the versions when creating the database

Create Database from Data Services Manager Console UI
Navigate to Databases in the left navigation menu and click Create Database

Select the Database Engine. In our case, we will be deploying Postgres
Currently it supports PostgreSQL versions 12.x, 13.x, 14.x, and 15.x. It does not support PostgreSQL version 10.x and 11.x.
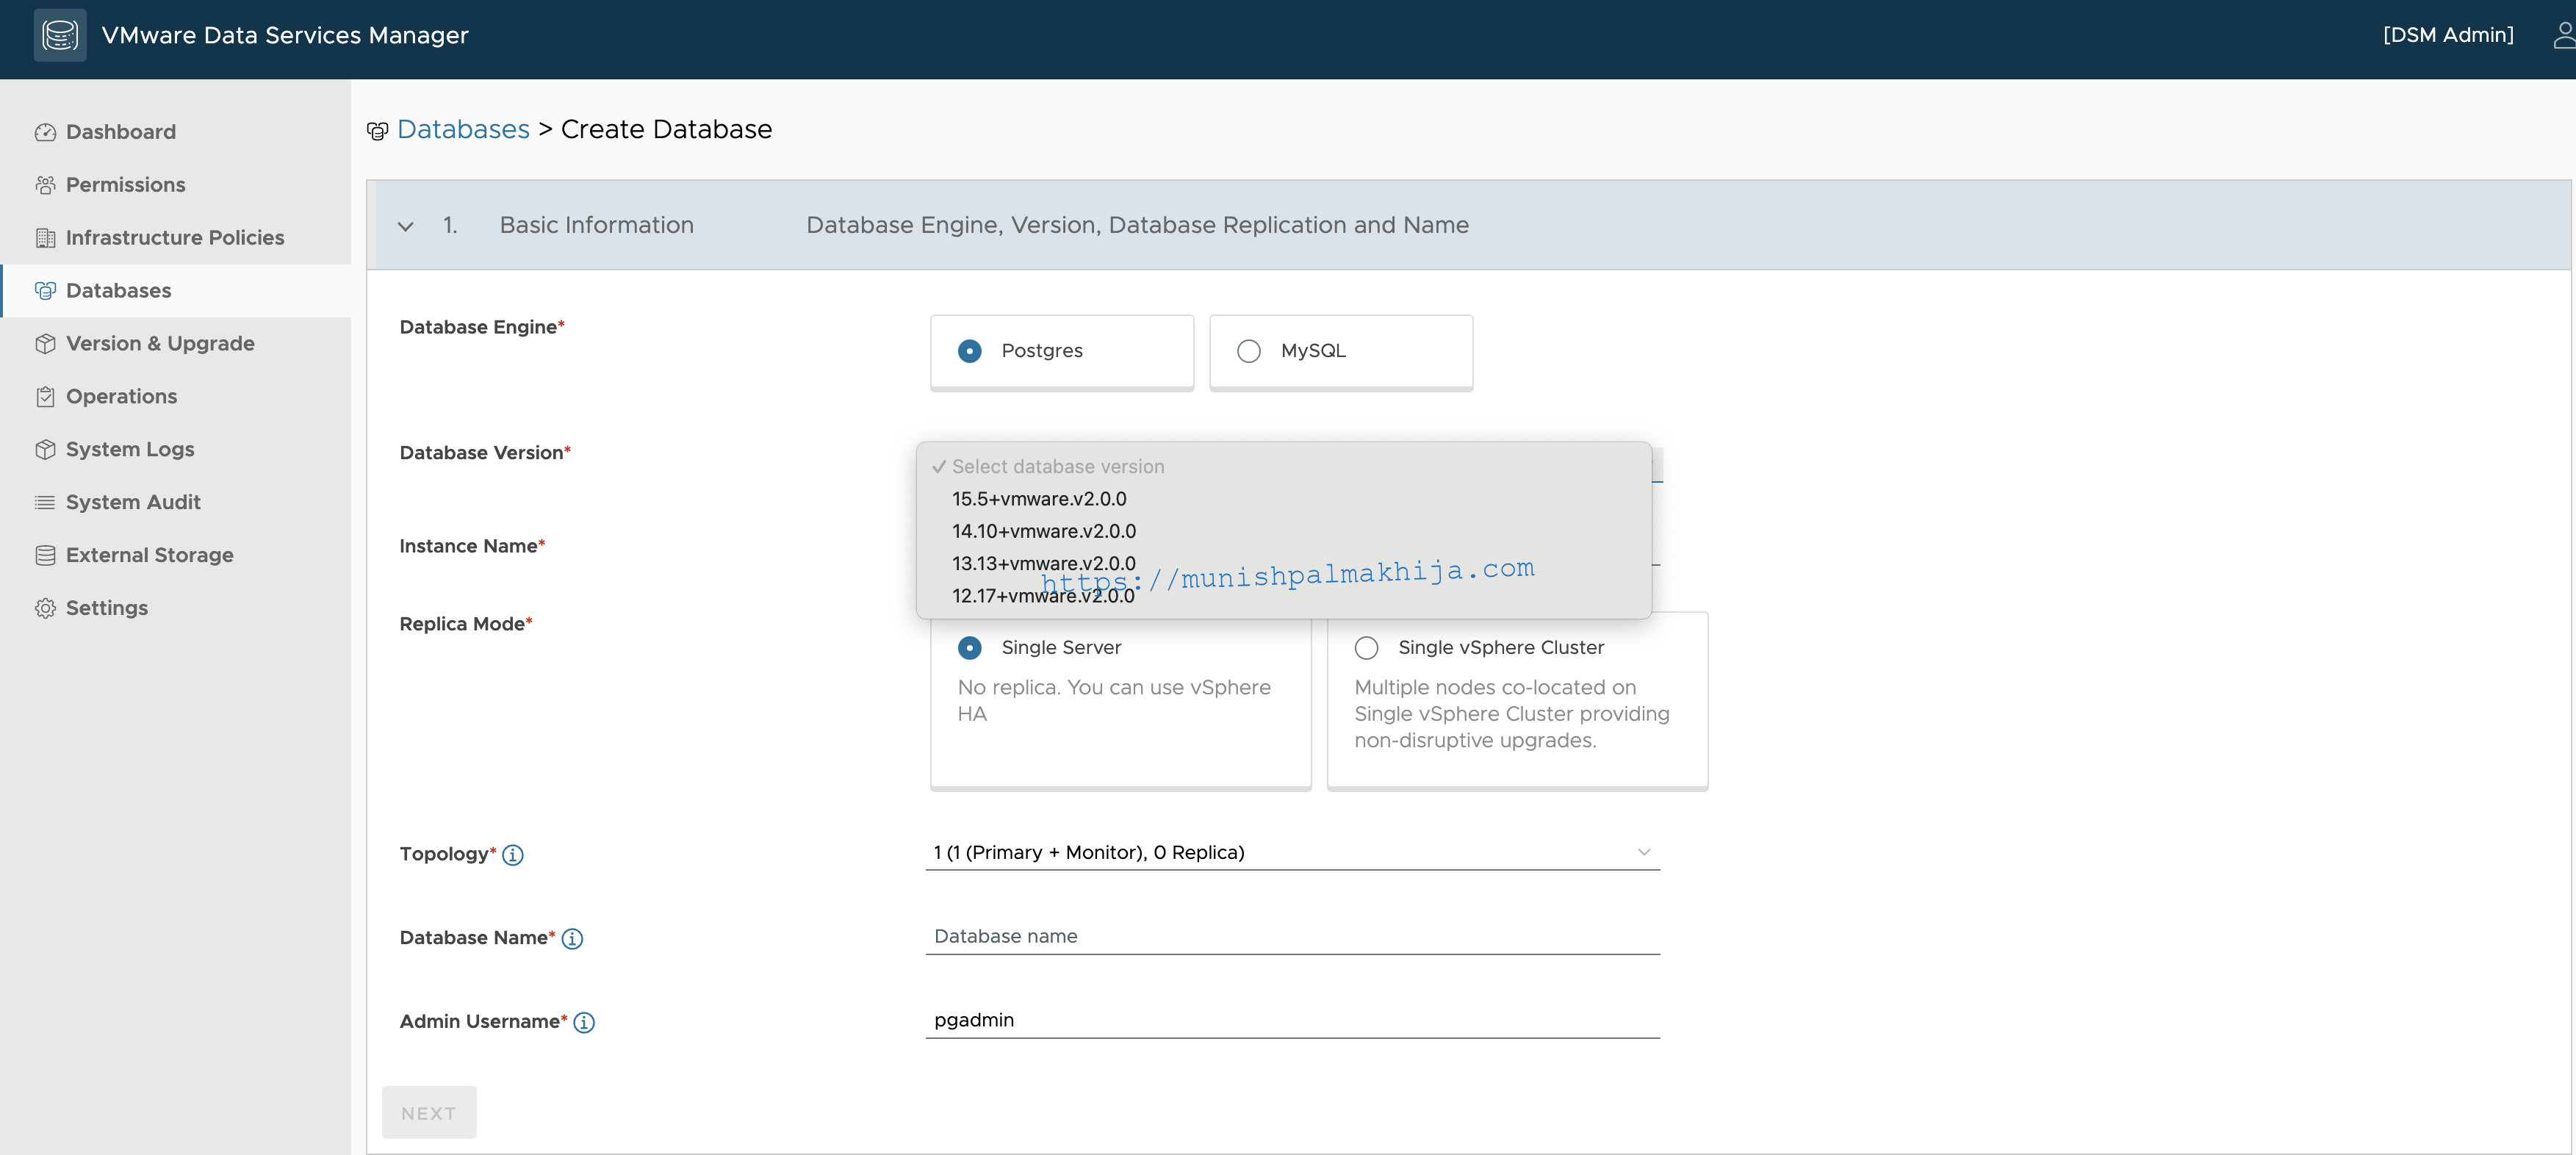
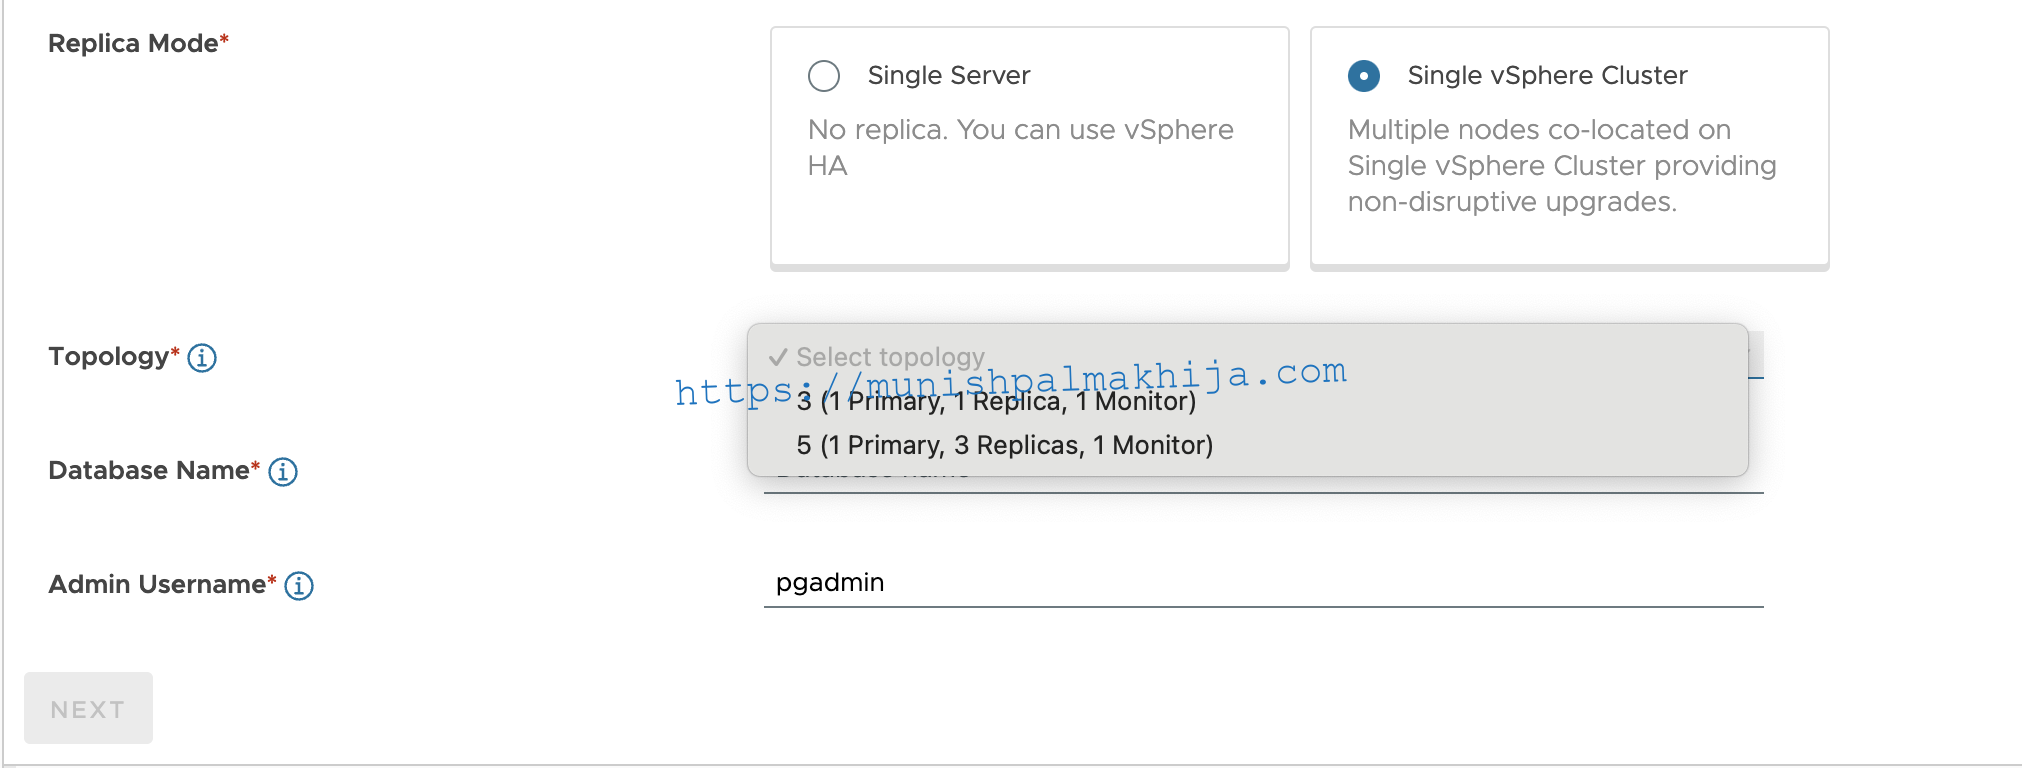
Now you will need to select the Replica Mode and the topology, which will decide the number of nodes
- Single Server – One node with no replicas.
- Single vSphere Cluster – Multiple nodes co-located on a single vSphere cluster providing non-disruptive upgrades. You can select a three-node or five-node topology.
Next, you will need to specify the Database and Admin user name.
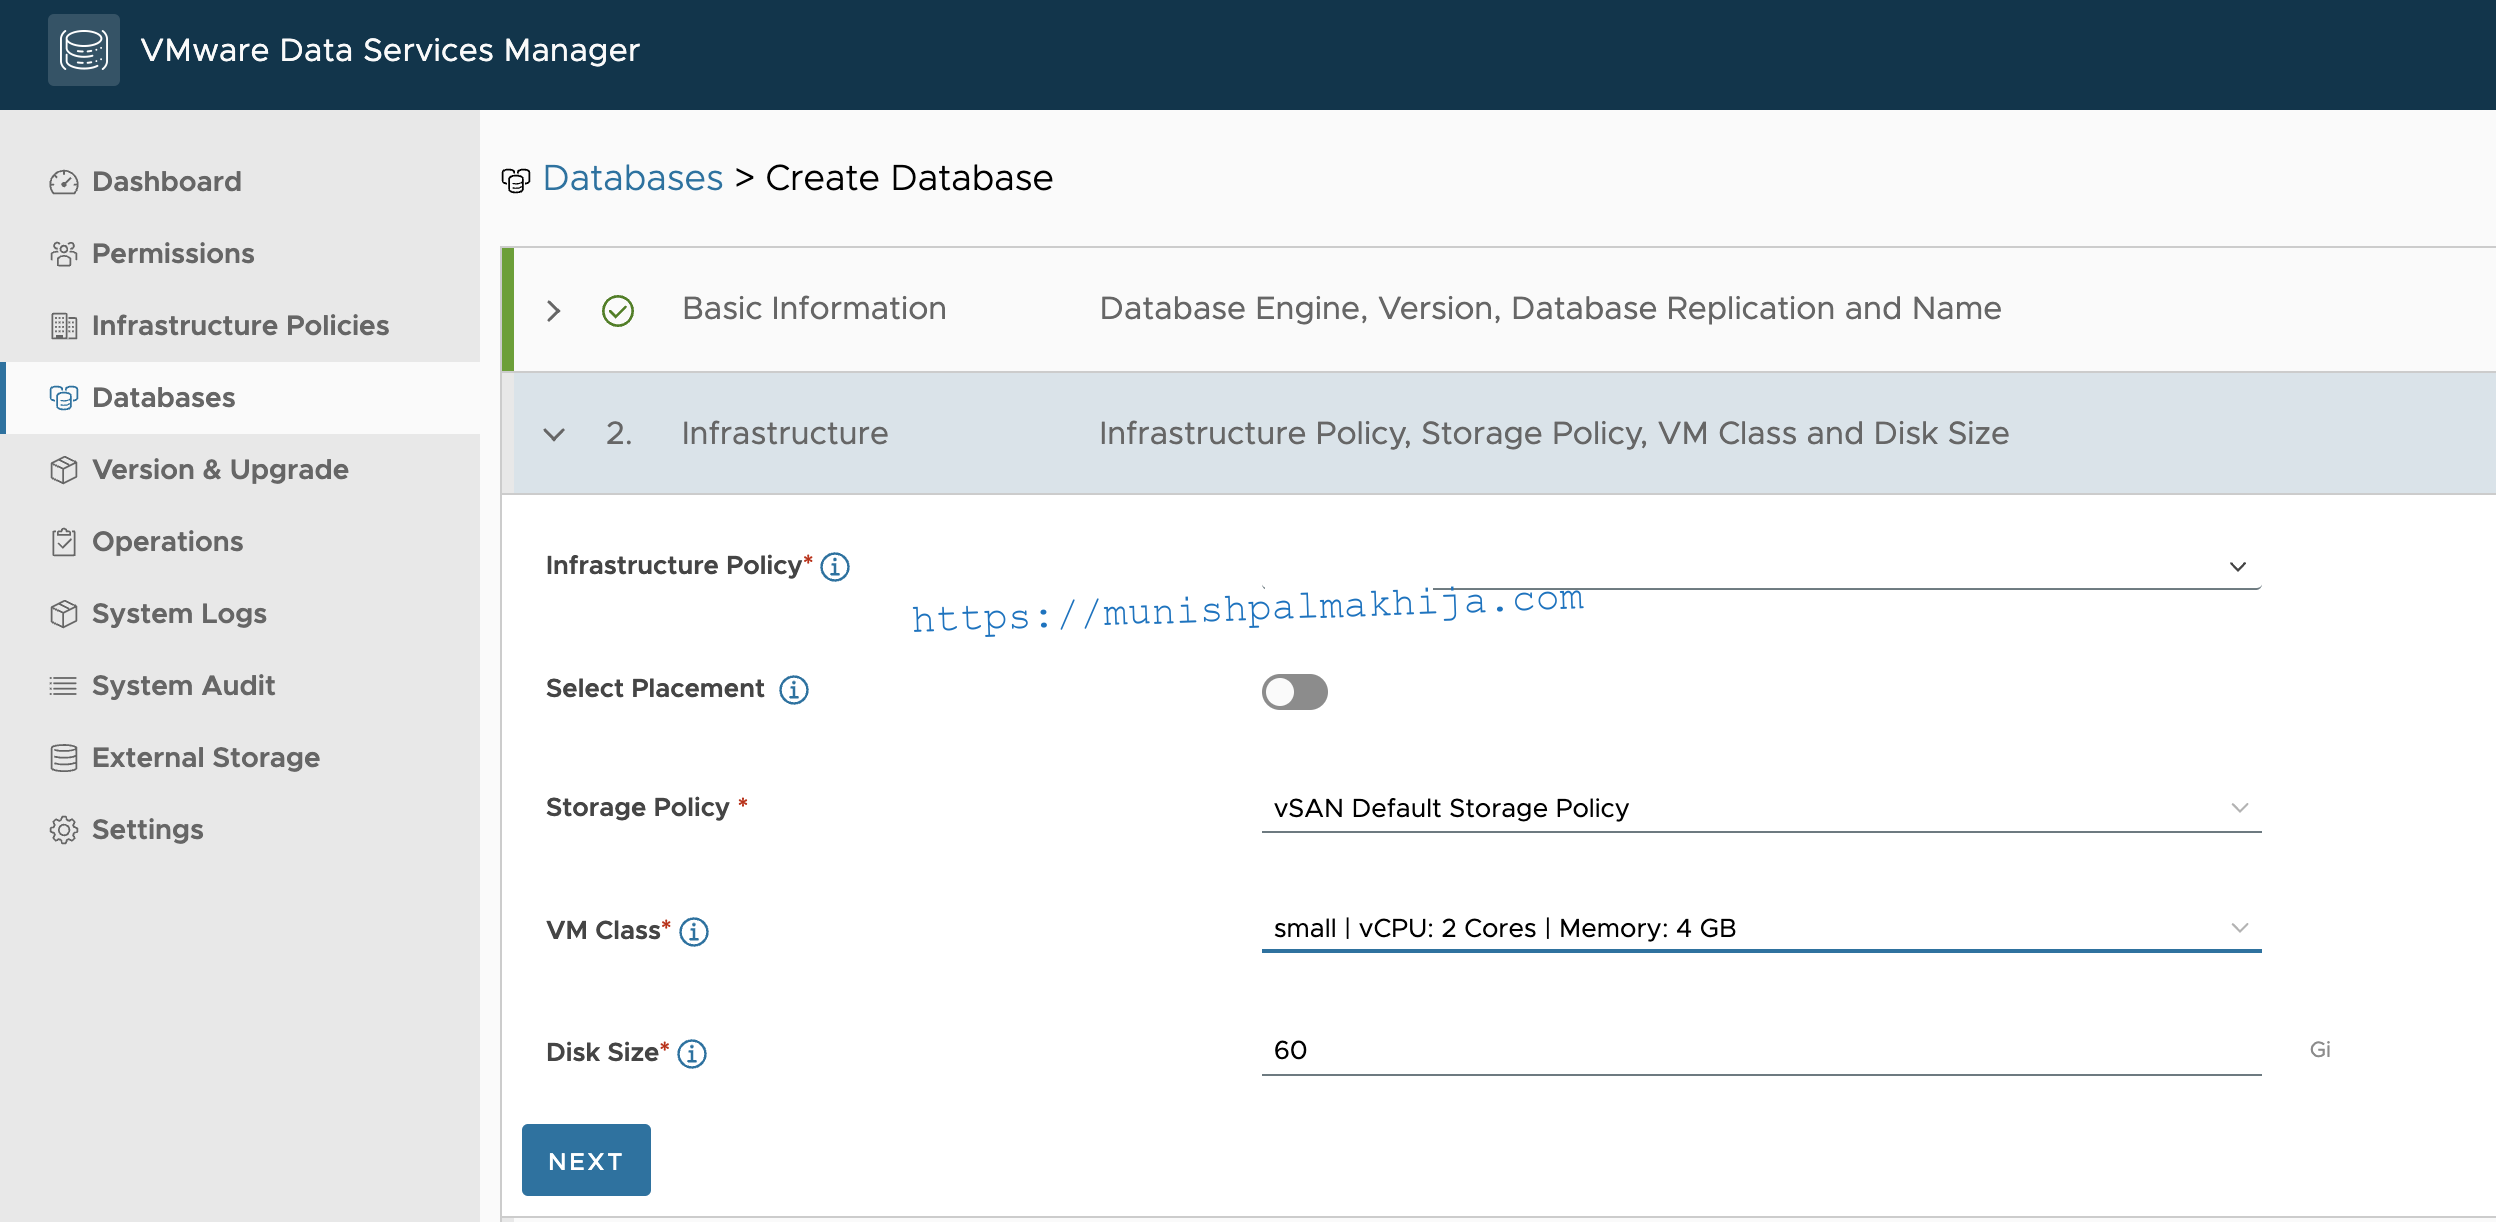
Verify the config and click Next to proceed to the Infrastructure section
This section lets you configure the Infrastructure details that were configured in the vSphere Client Plugin. It includes
- Infrastructure Policy
- Storage Policy
- VM Class
- Disk Size
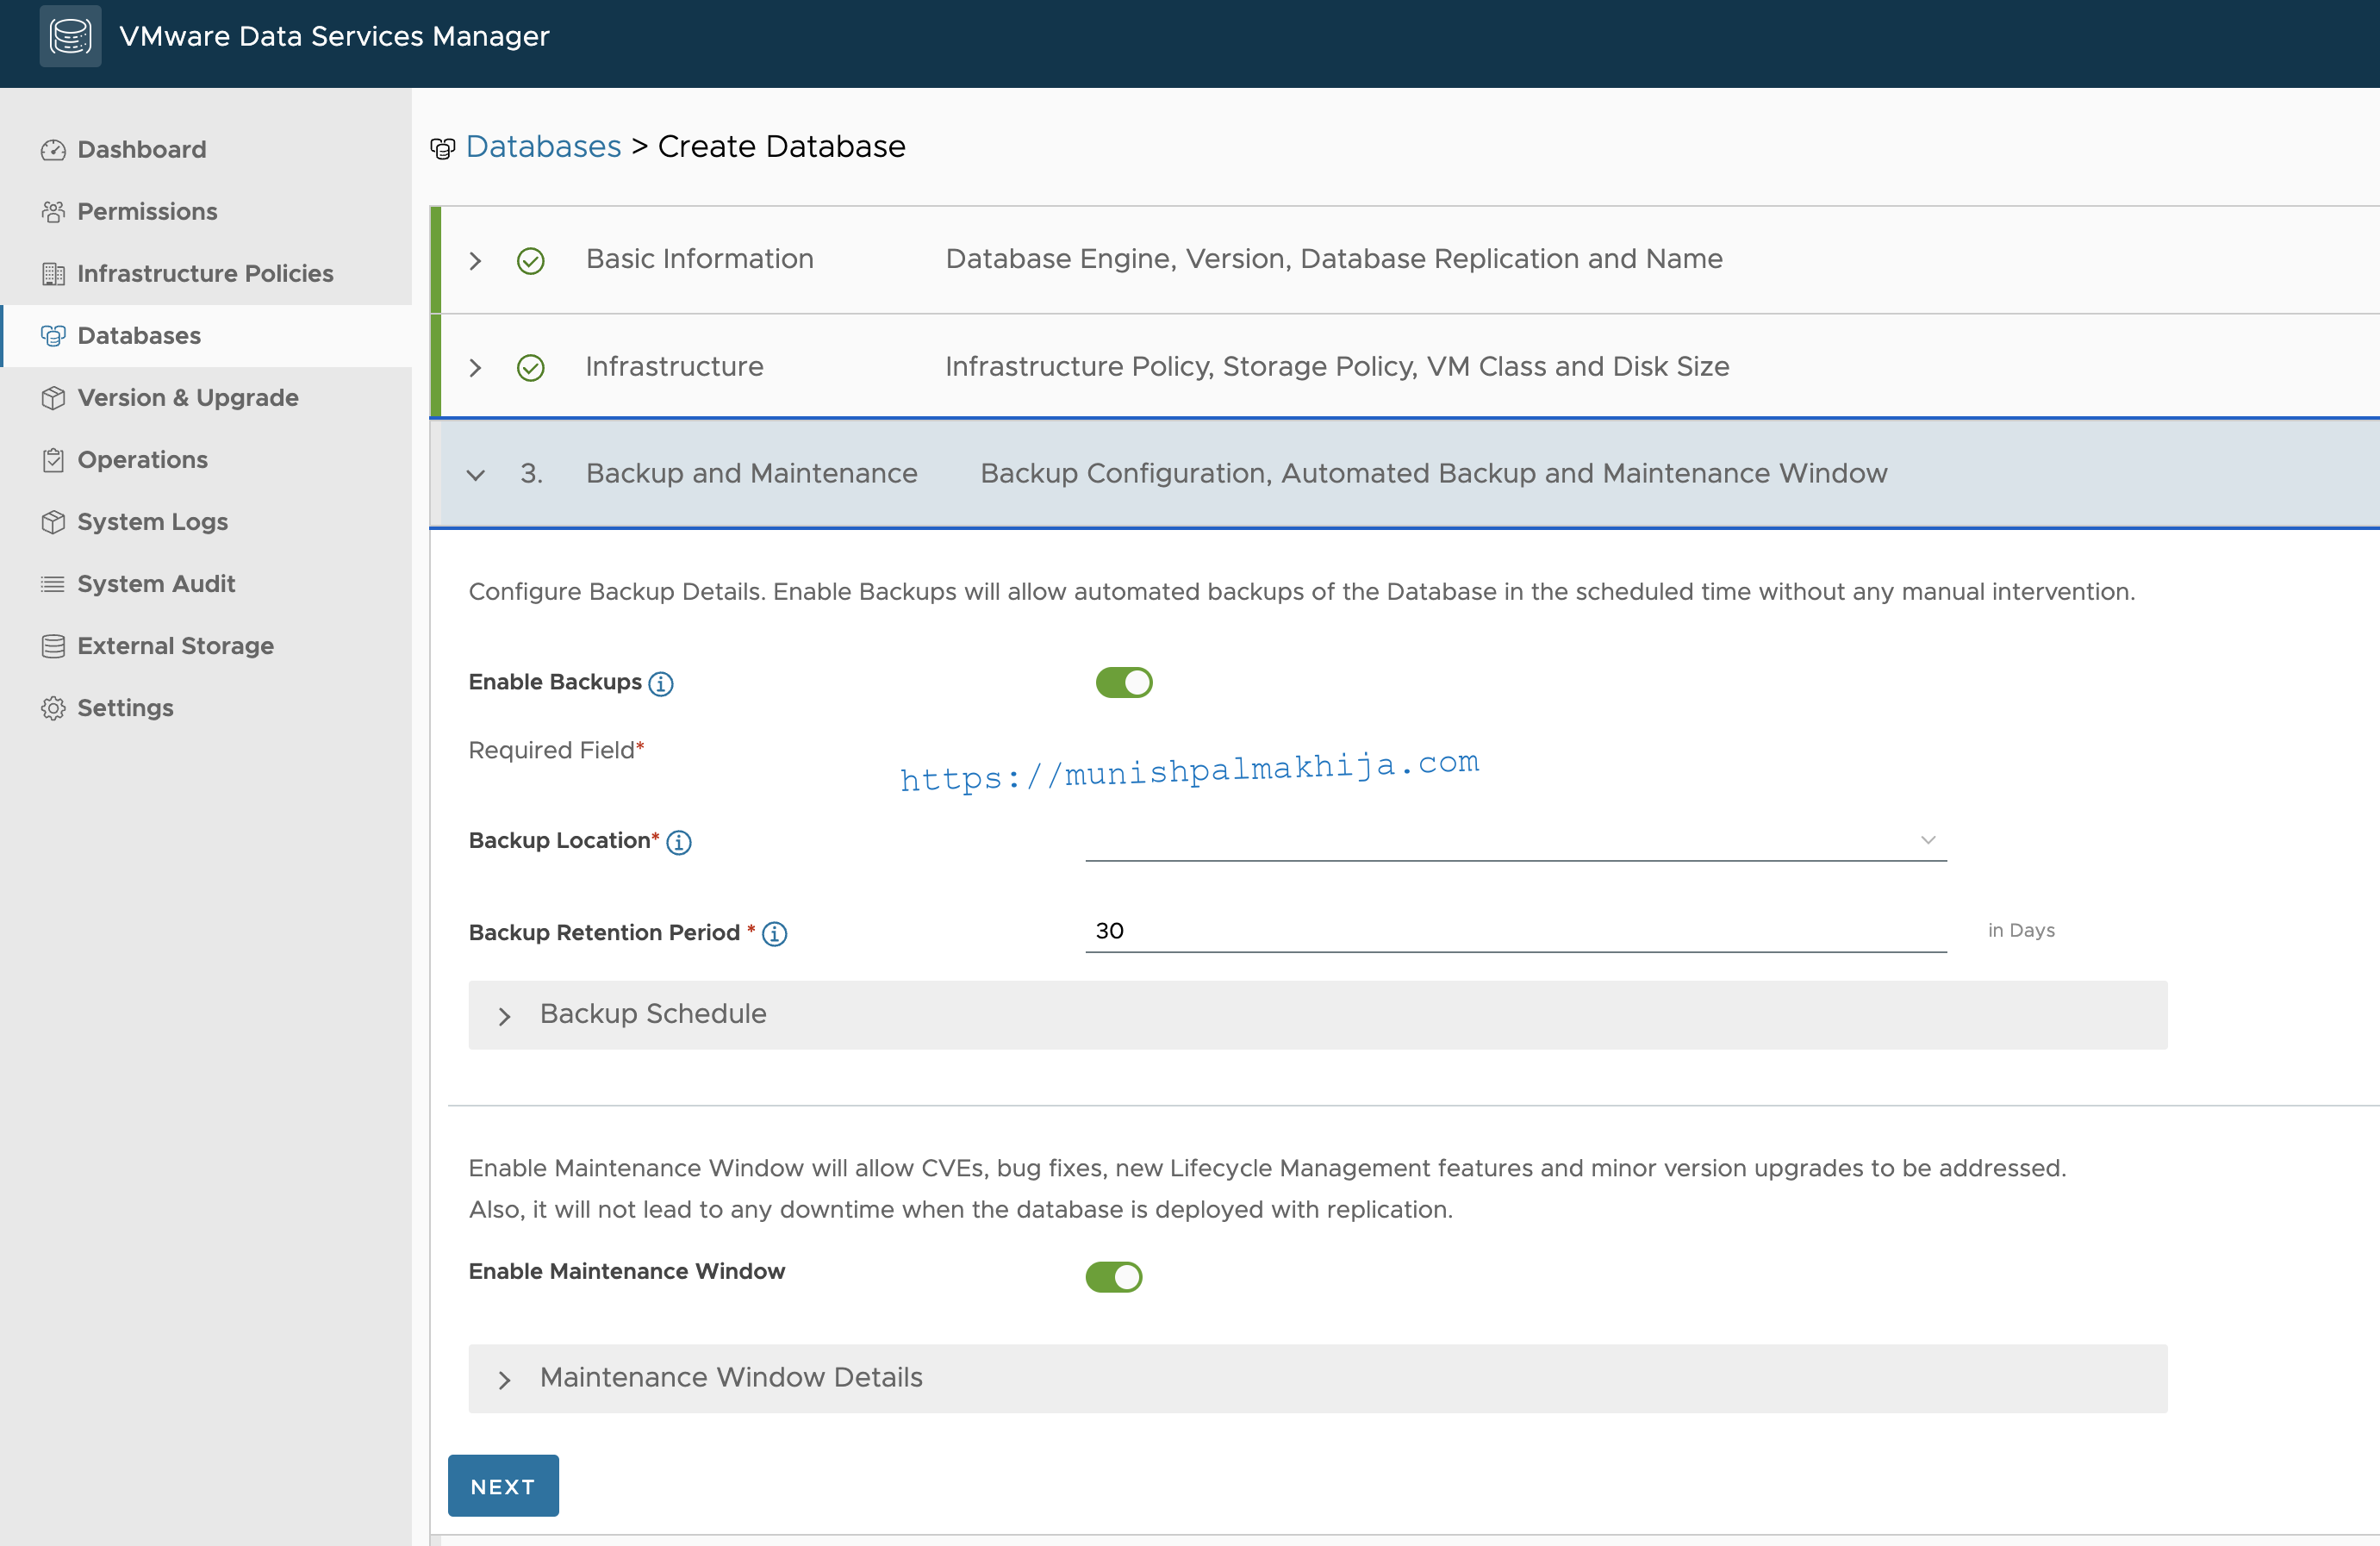
Click Next after specifying the details to proceed with the Backup and maintenance section
This section lets you configure Backup and maintenance properties. For our purpose, we will select the default
The backup location would be the S3 compatible (In my case it is MinIO) bucket which we created in the previous post.
Click Next to proceed with advanced database options (optional).
This section allows to specify runtime characteristics such as
- TimeZone
- max_connections
- log_connections
- locale
- shared_buffers
You can refer the following document as a reference.
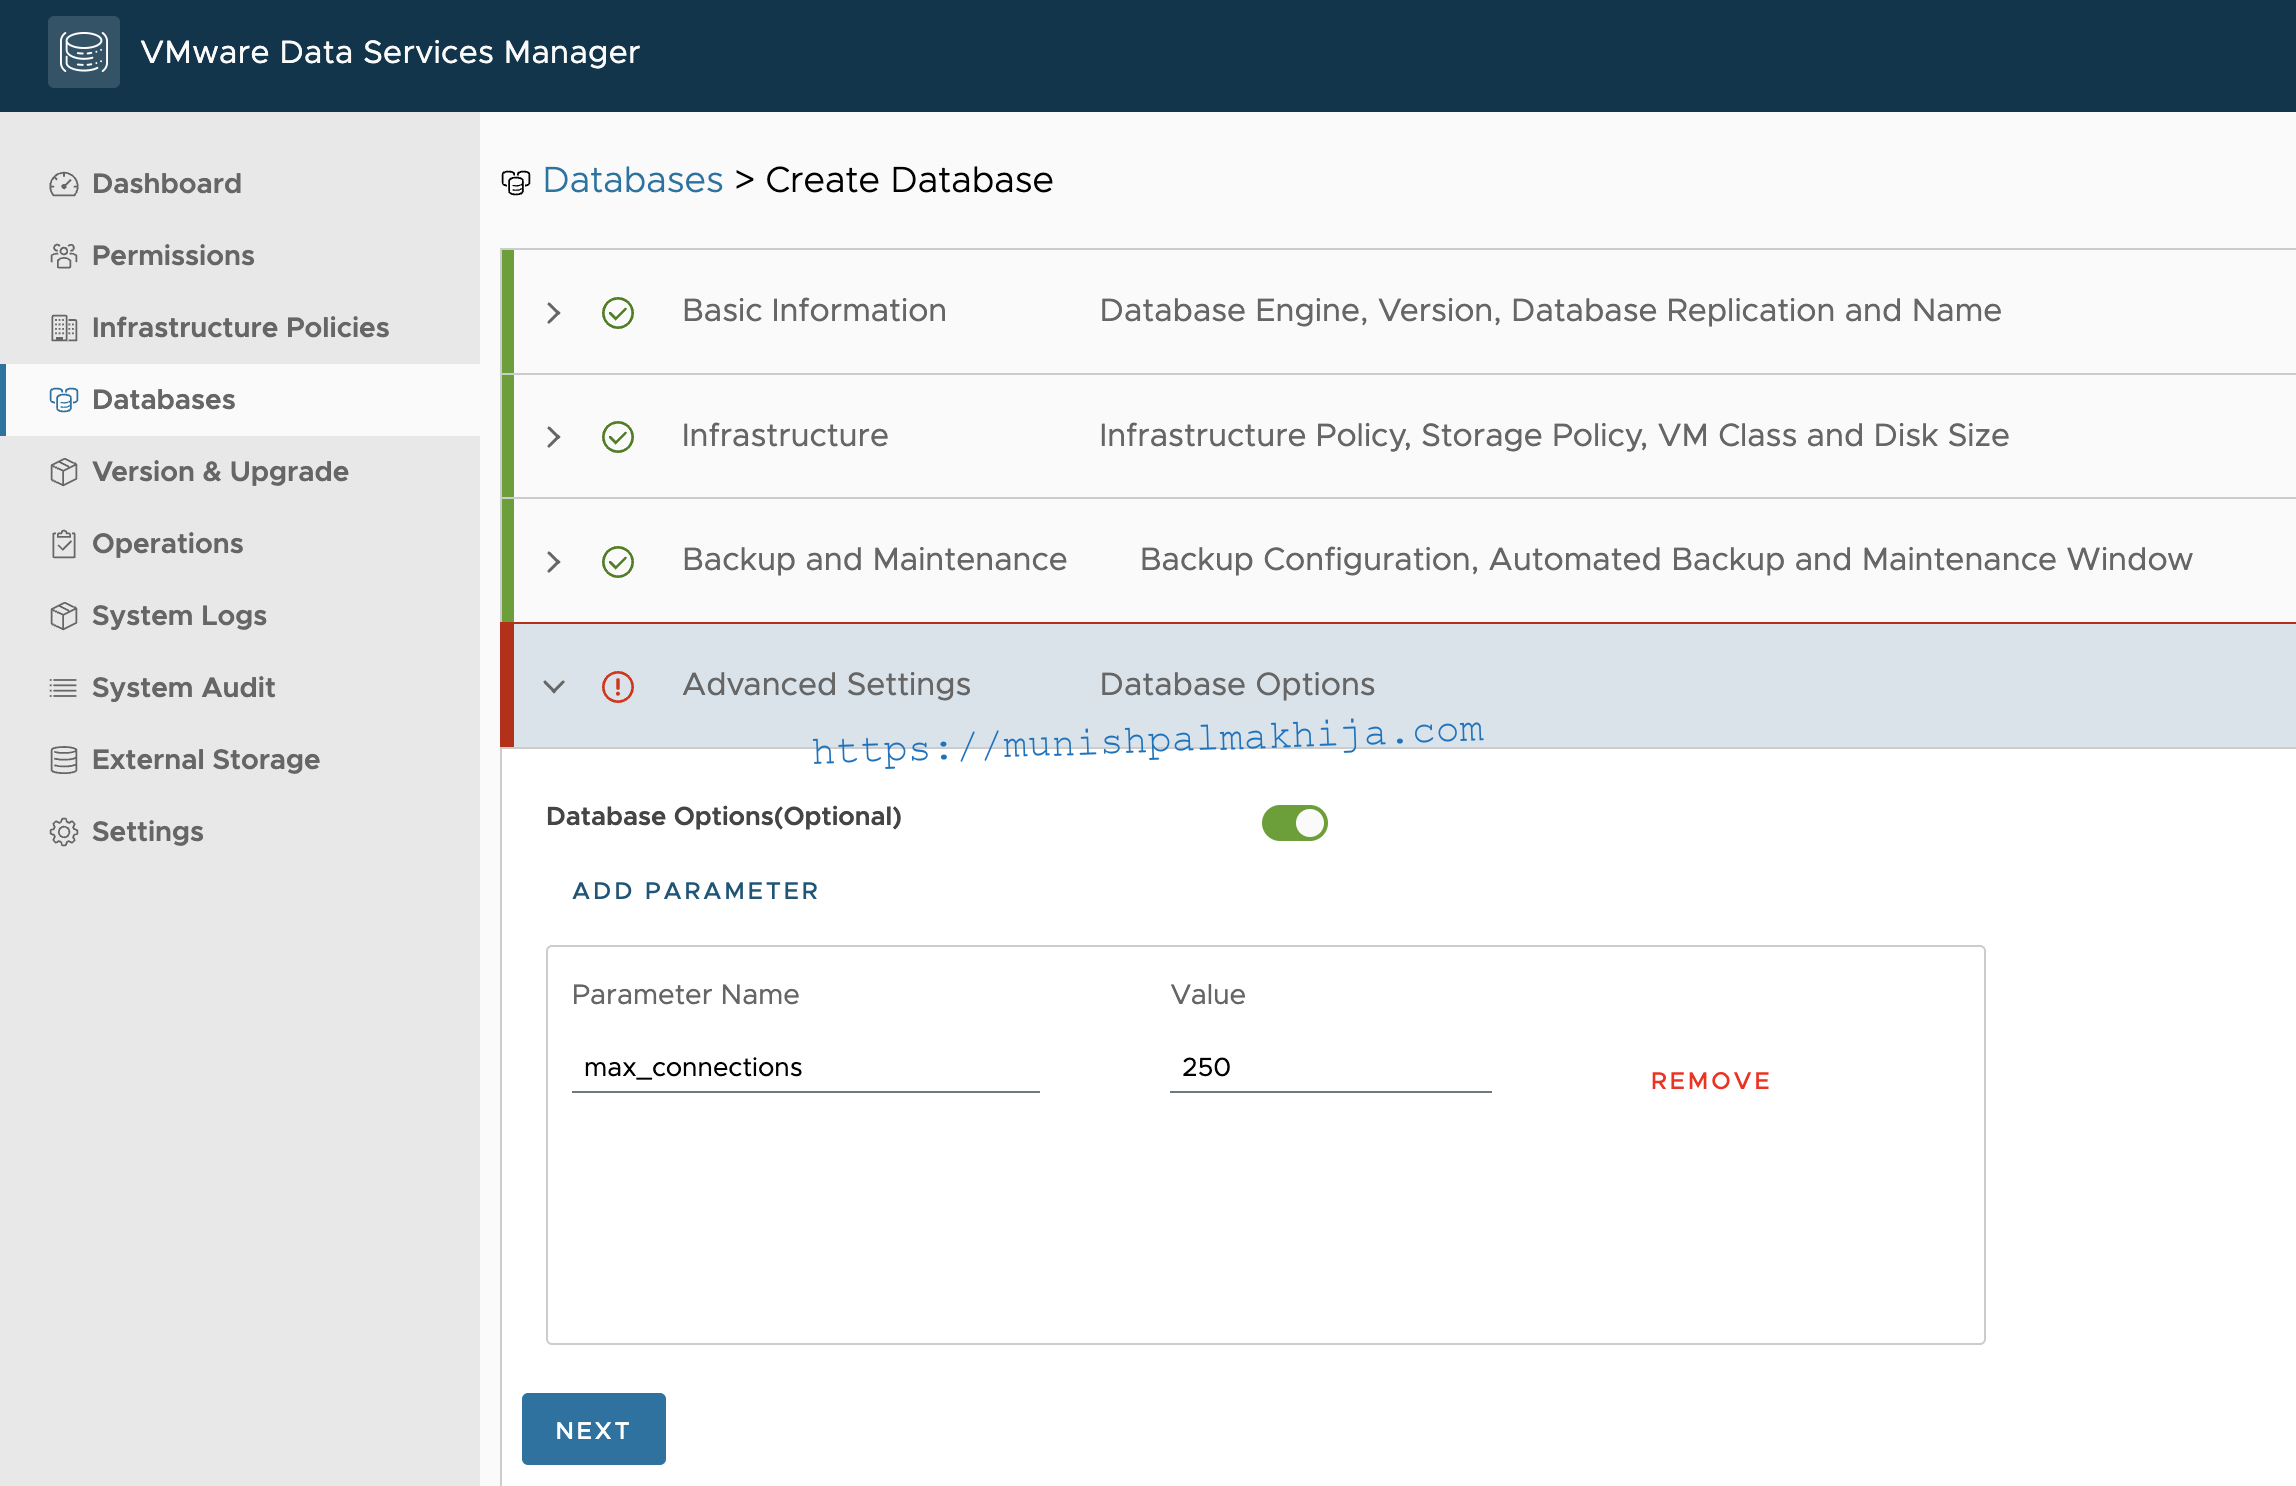
Click Next to review your configuration to proceed with Creating a database

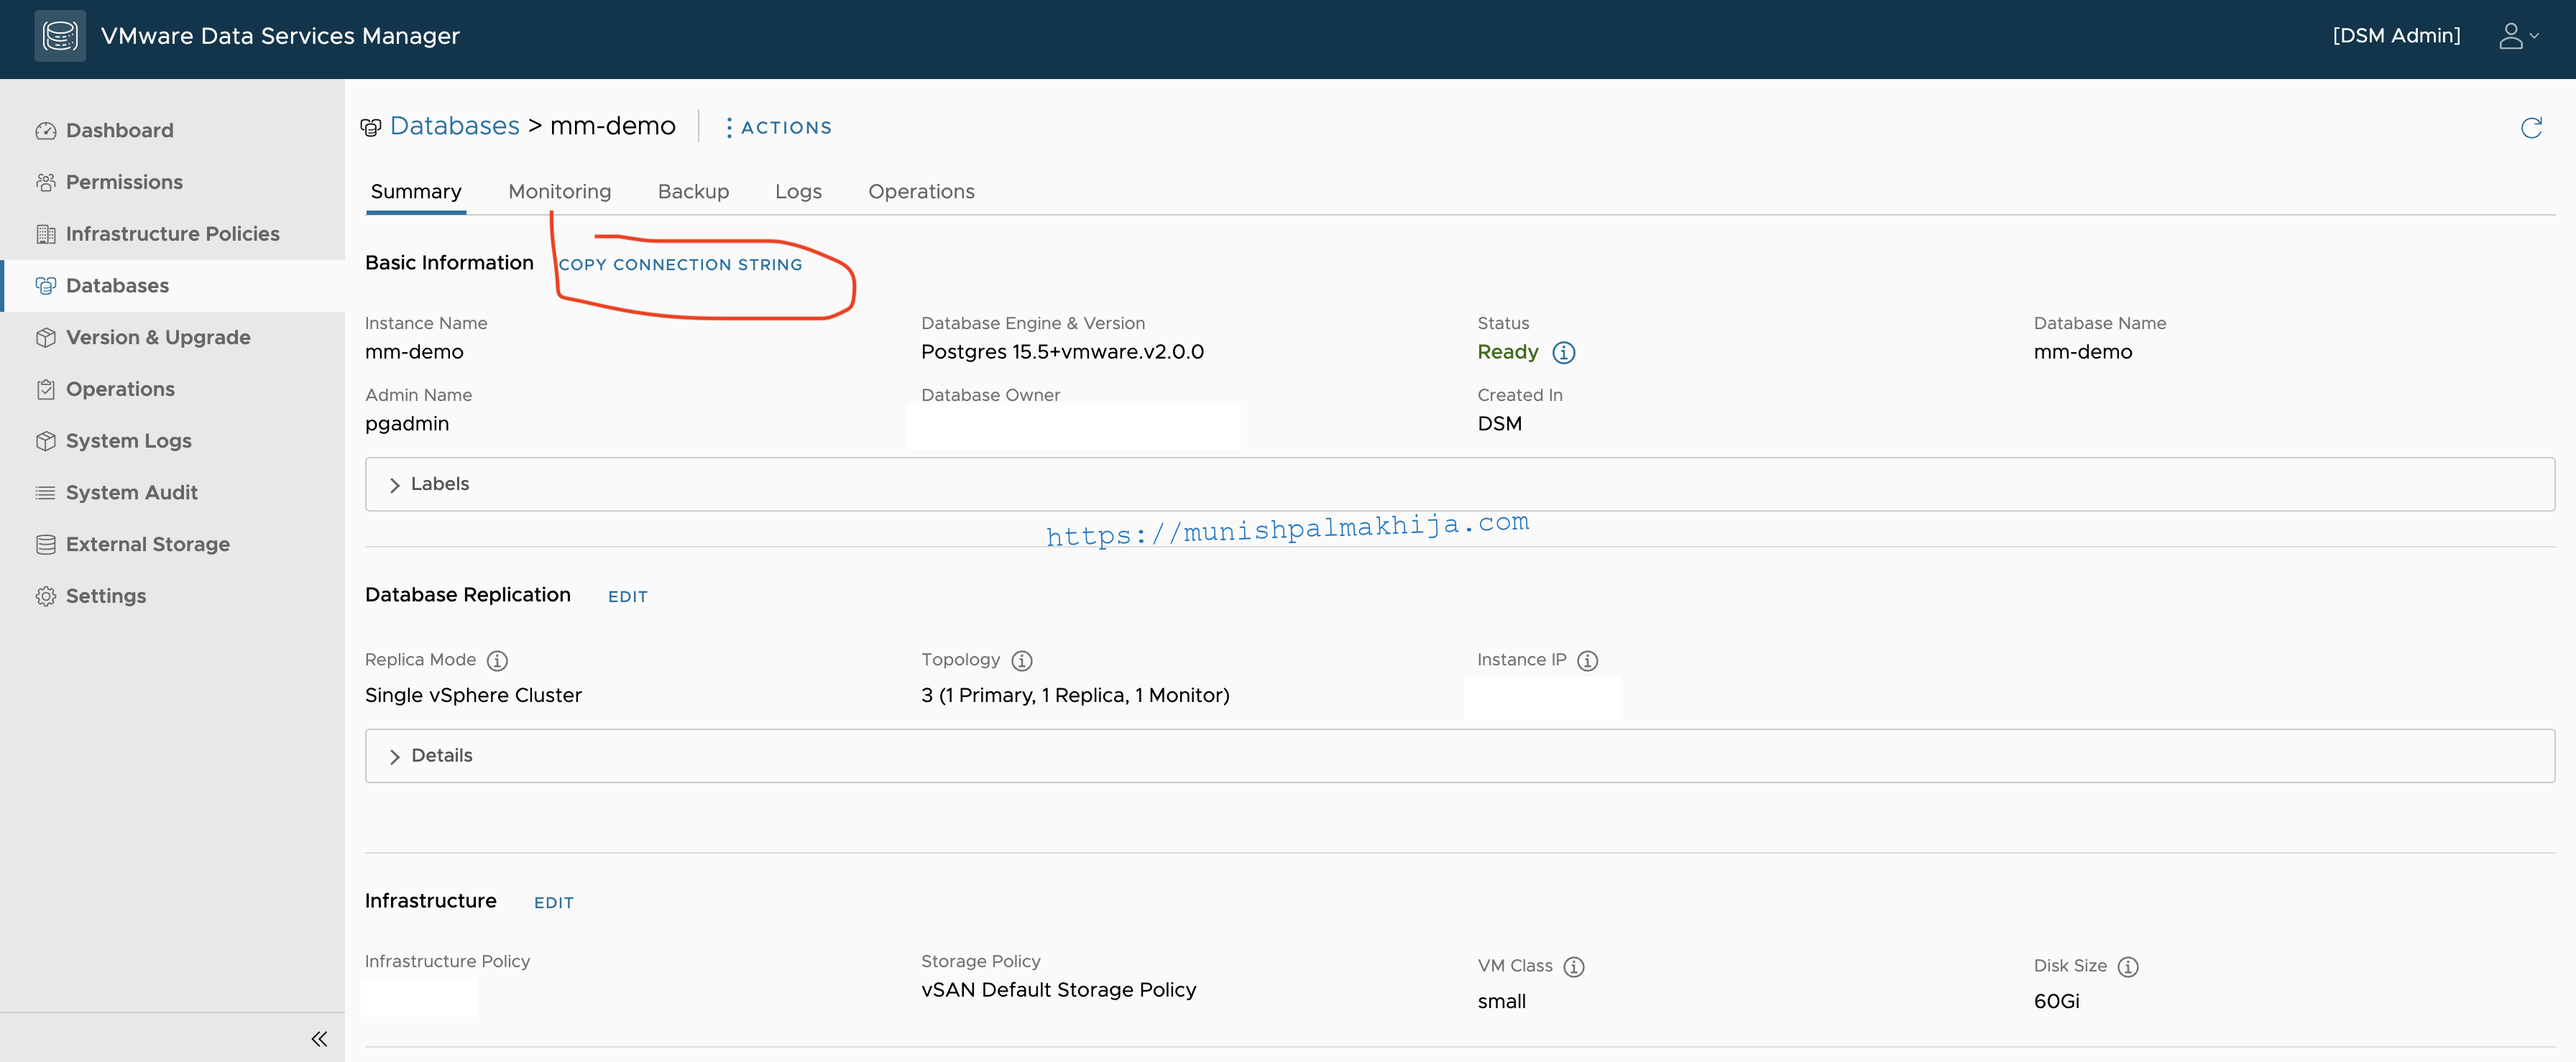
It will trigger the creation of the database which you can monitor in the UI
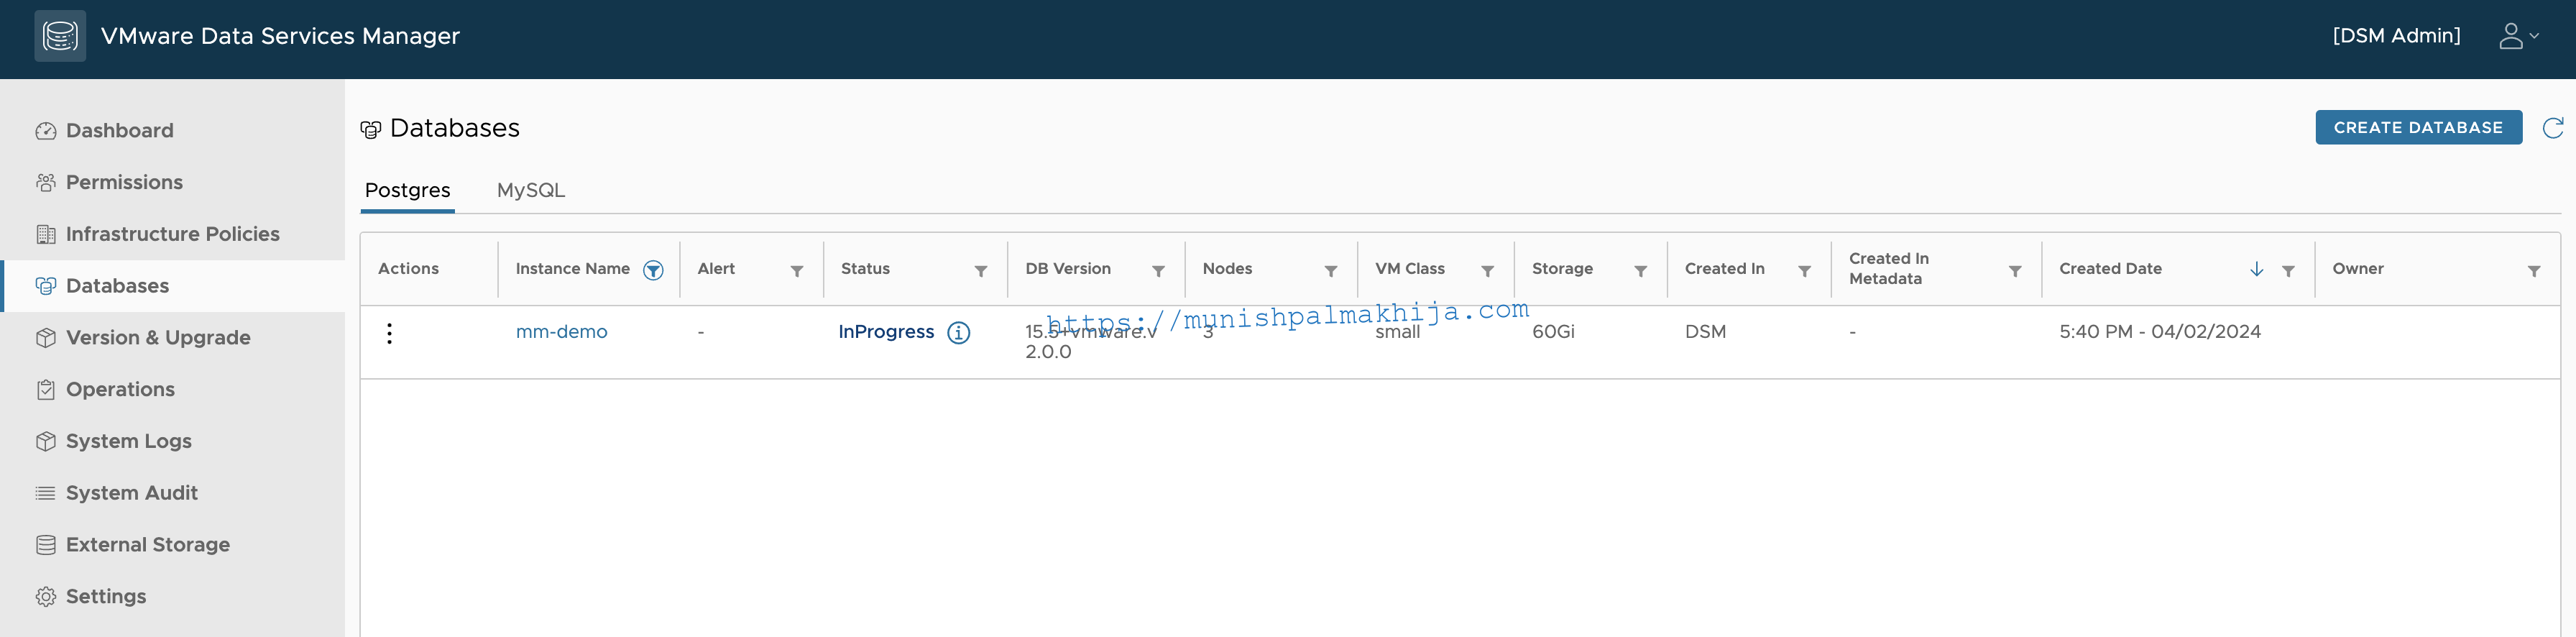

Based on my experience it usually takes 15-20 mins but it can vary a bit. Once created you can verify the details and connect to the DB by copying the connection string
Create a Database using the VMware Data Services Manager Kubernetes API
VMware Data Services Manager exposes Kubernetes APIs which enables you to automate the provisioning, management, and monitoring of the data services
Step 1 – Getting the kubeconfig for DSM API
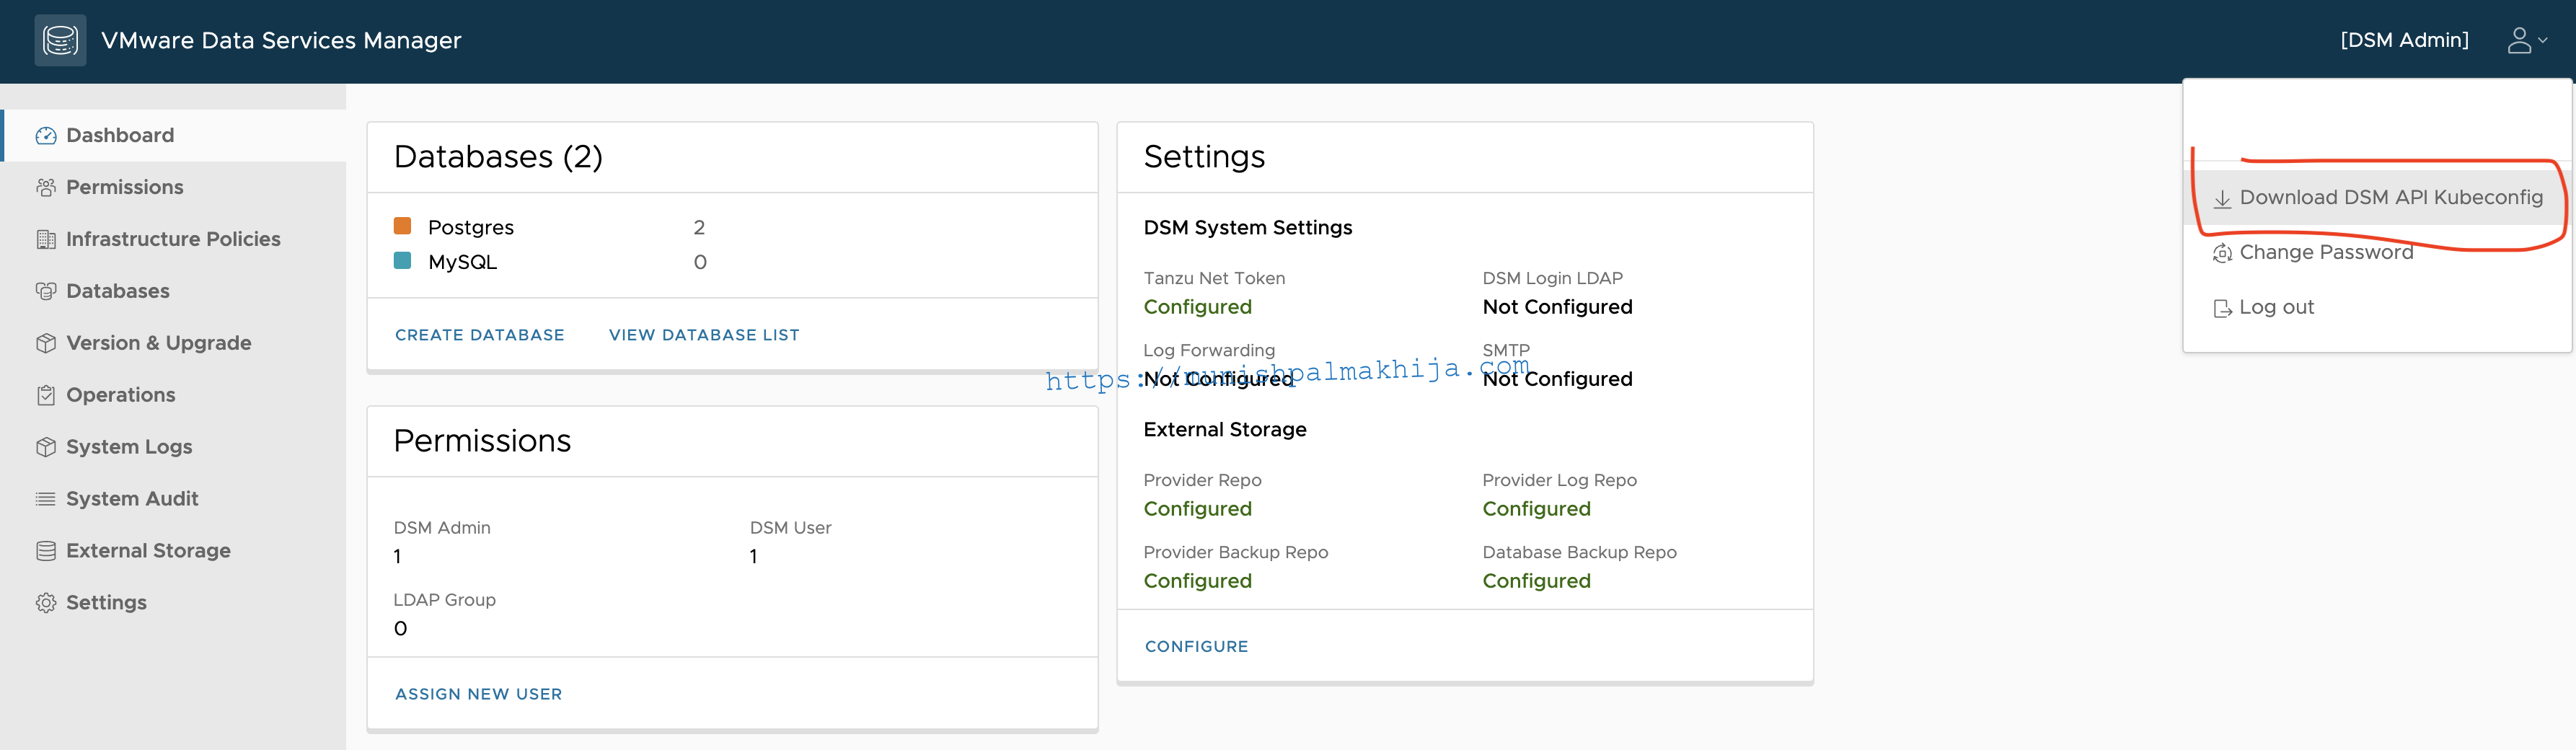
Login to DSM UI, Click on the Person icon on the top right, and Download DSM API kubeconfig.
You will need this configuration for the kubectl client to talk to the DSM API server.
Step 2 – Configure kubectl client
Next, you will need to export KUBECONFIG to be consumed by kubectl
export KUBECONFIG=/path-to-file/kubeconfig-gateway.yaml
Step 3 – Execute API commands using kubectl
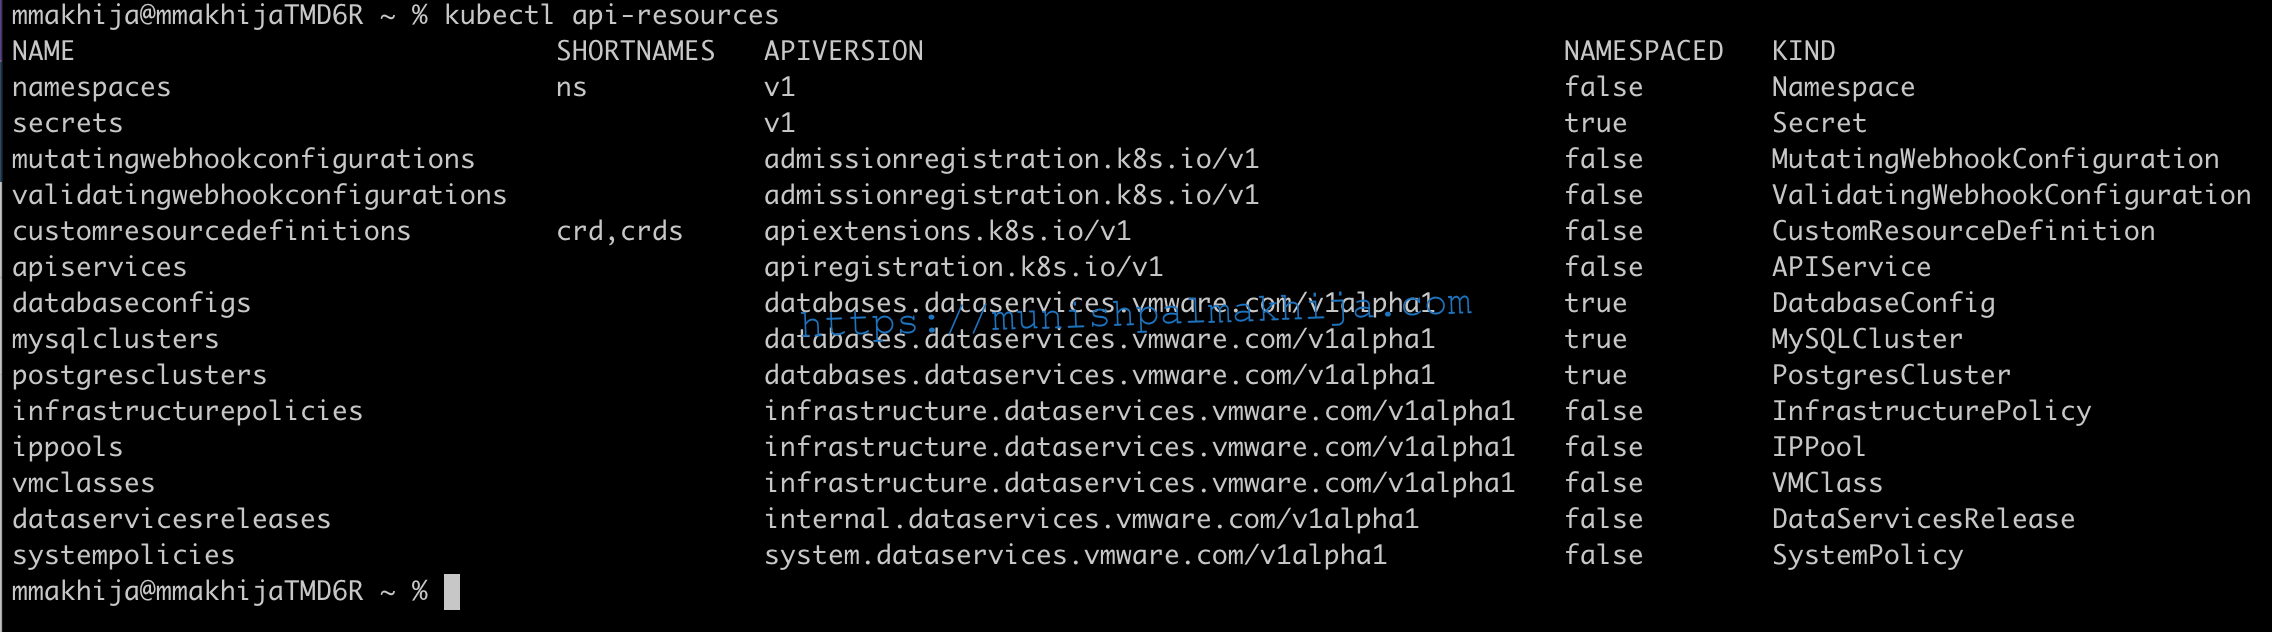
You can verify API resources exposed by using the following command
kubectl api-resources
Verify the existing postgres cluster using the following command
kubectl get postgrescluster
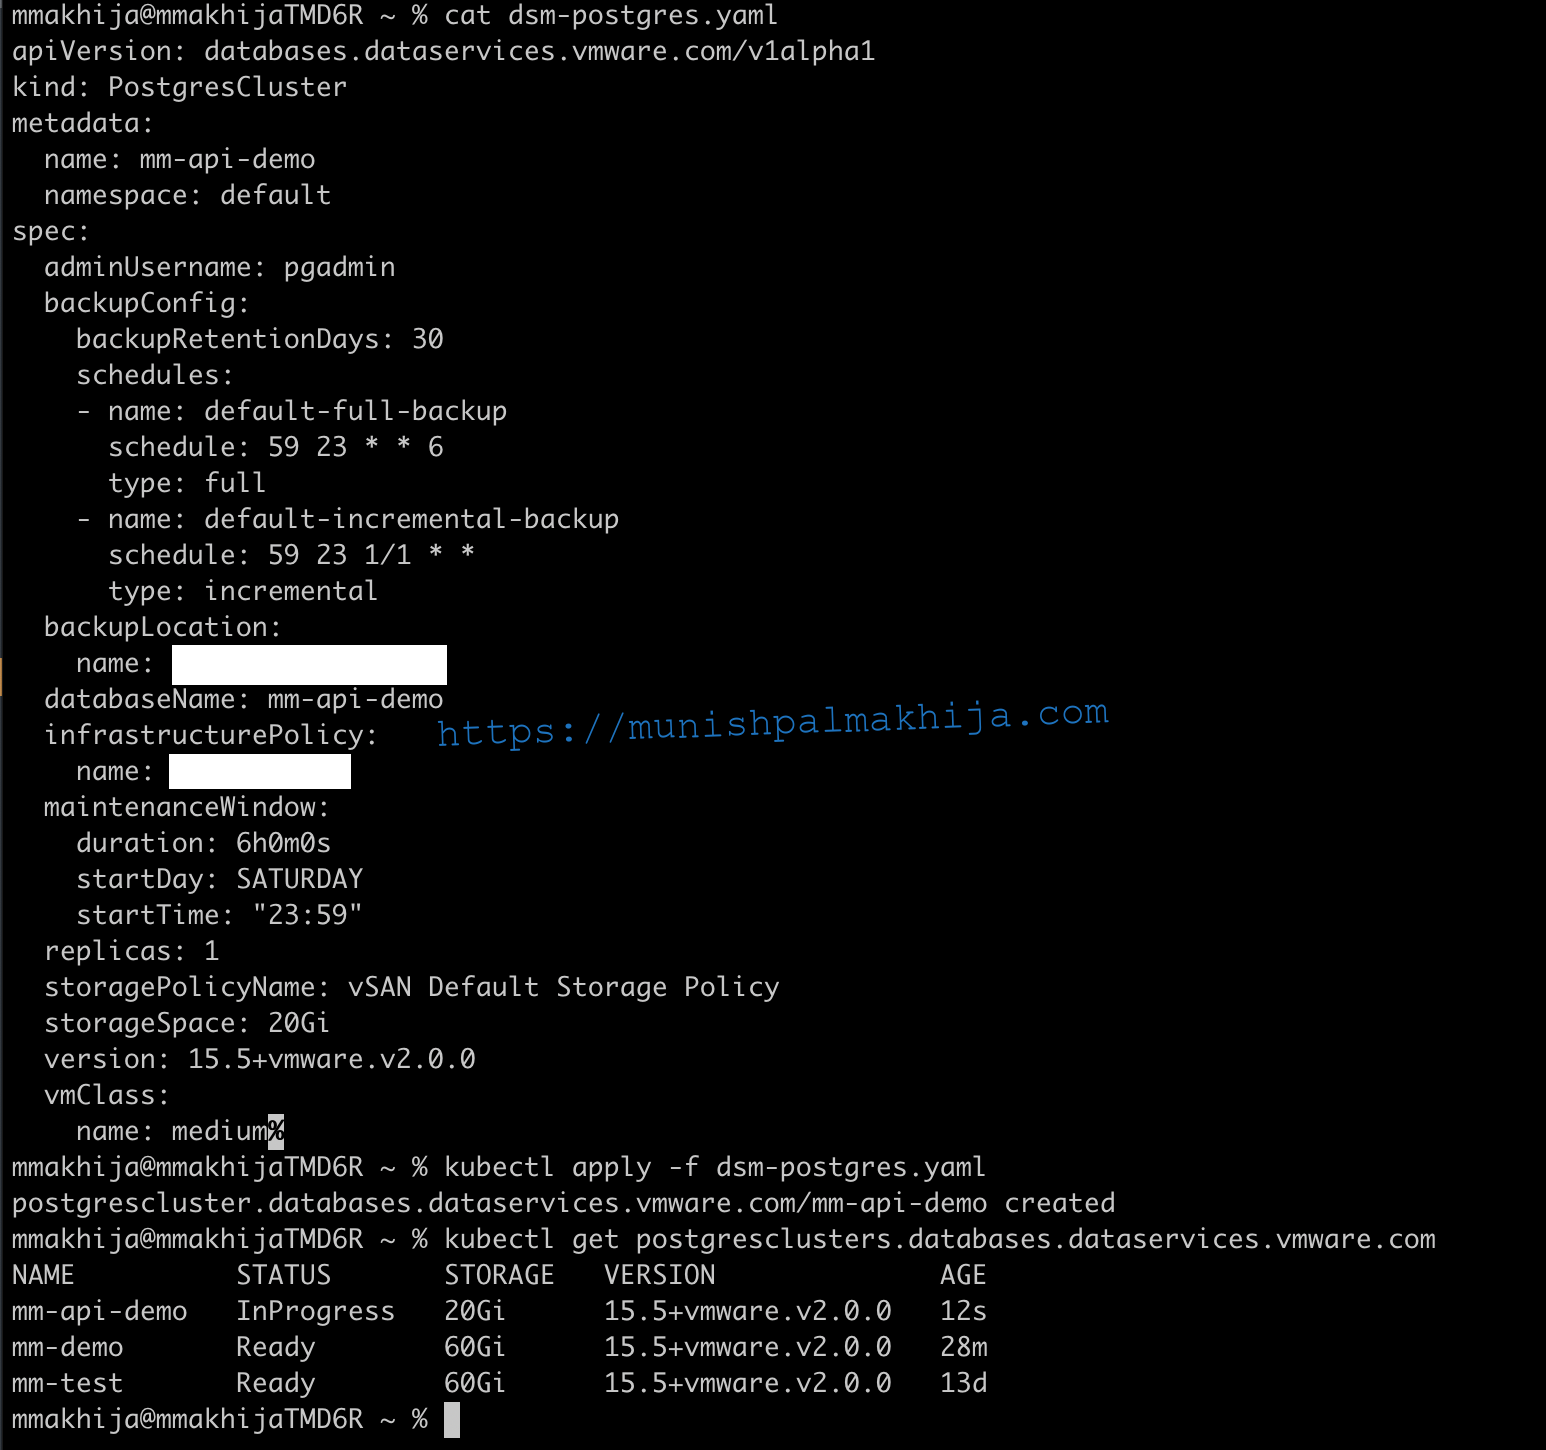
Create yaml file to deploy Postgres Cluster.
You can refer to the following document for sample config
Create Postgres cluster by applying yaml file


Hope this blog series has helped get an understanding of the configuration required for VMware Data Services Manager to provide Database as a Service on vSphere