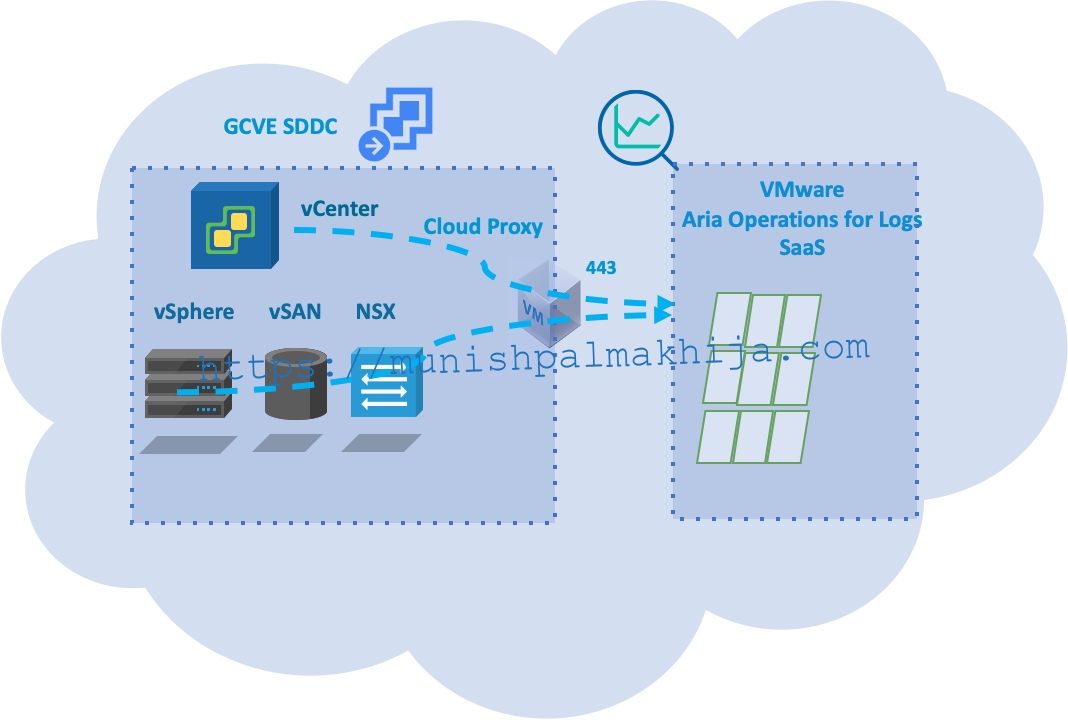
In the May ’23 release of VMware Aria for Operations Logs SaaS added support for Logs from Google Cloud VMware Engine (GCVE)
These logs include all the SDDC logs to support compliance and troubleshooting use cases. With the addition of support for GCVE logs, VMware Aria Operations for Logs offers a unified view of logs from all major VMware Clouds in a single place.
In this blog, I describe the procedure to forward logs from GCVE SDDC
Prerequisites
Following are the pre-requisites for forwarding logs from GCVE SDDC to vRealize Log Insight Cloud
- Verify that outgoing HTTPS traffic is allowed for the Cloud Proxy with access through the firewall to:
- Deploy & Configure Cloud Proxy virtual machine with a hostname that meets the following criteria:
- The hostname is valid.
- The hostname can be resolved through DNS.
- The hostname is reachable from the ESXi host with GCVE SDDC
- Access to Google Cloud console
- To elevate VMware Engine Privileges https://cloud.google.com/vmware-engine/docs/private-clouds/howto-elevate-privilege
- Fetch cloudowner@gve.local credentials
Configuration Steps
The configuration instructions assume that users have all the required permission to perform the following tasks:
- Elevate VMware Engine Privileges
- Prepare Solution User
- Deploy a Cloud Proxy,
- Integrate vSphere with vRealize Log Insight Cloud
- Create a Node Profile with NSX-T
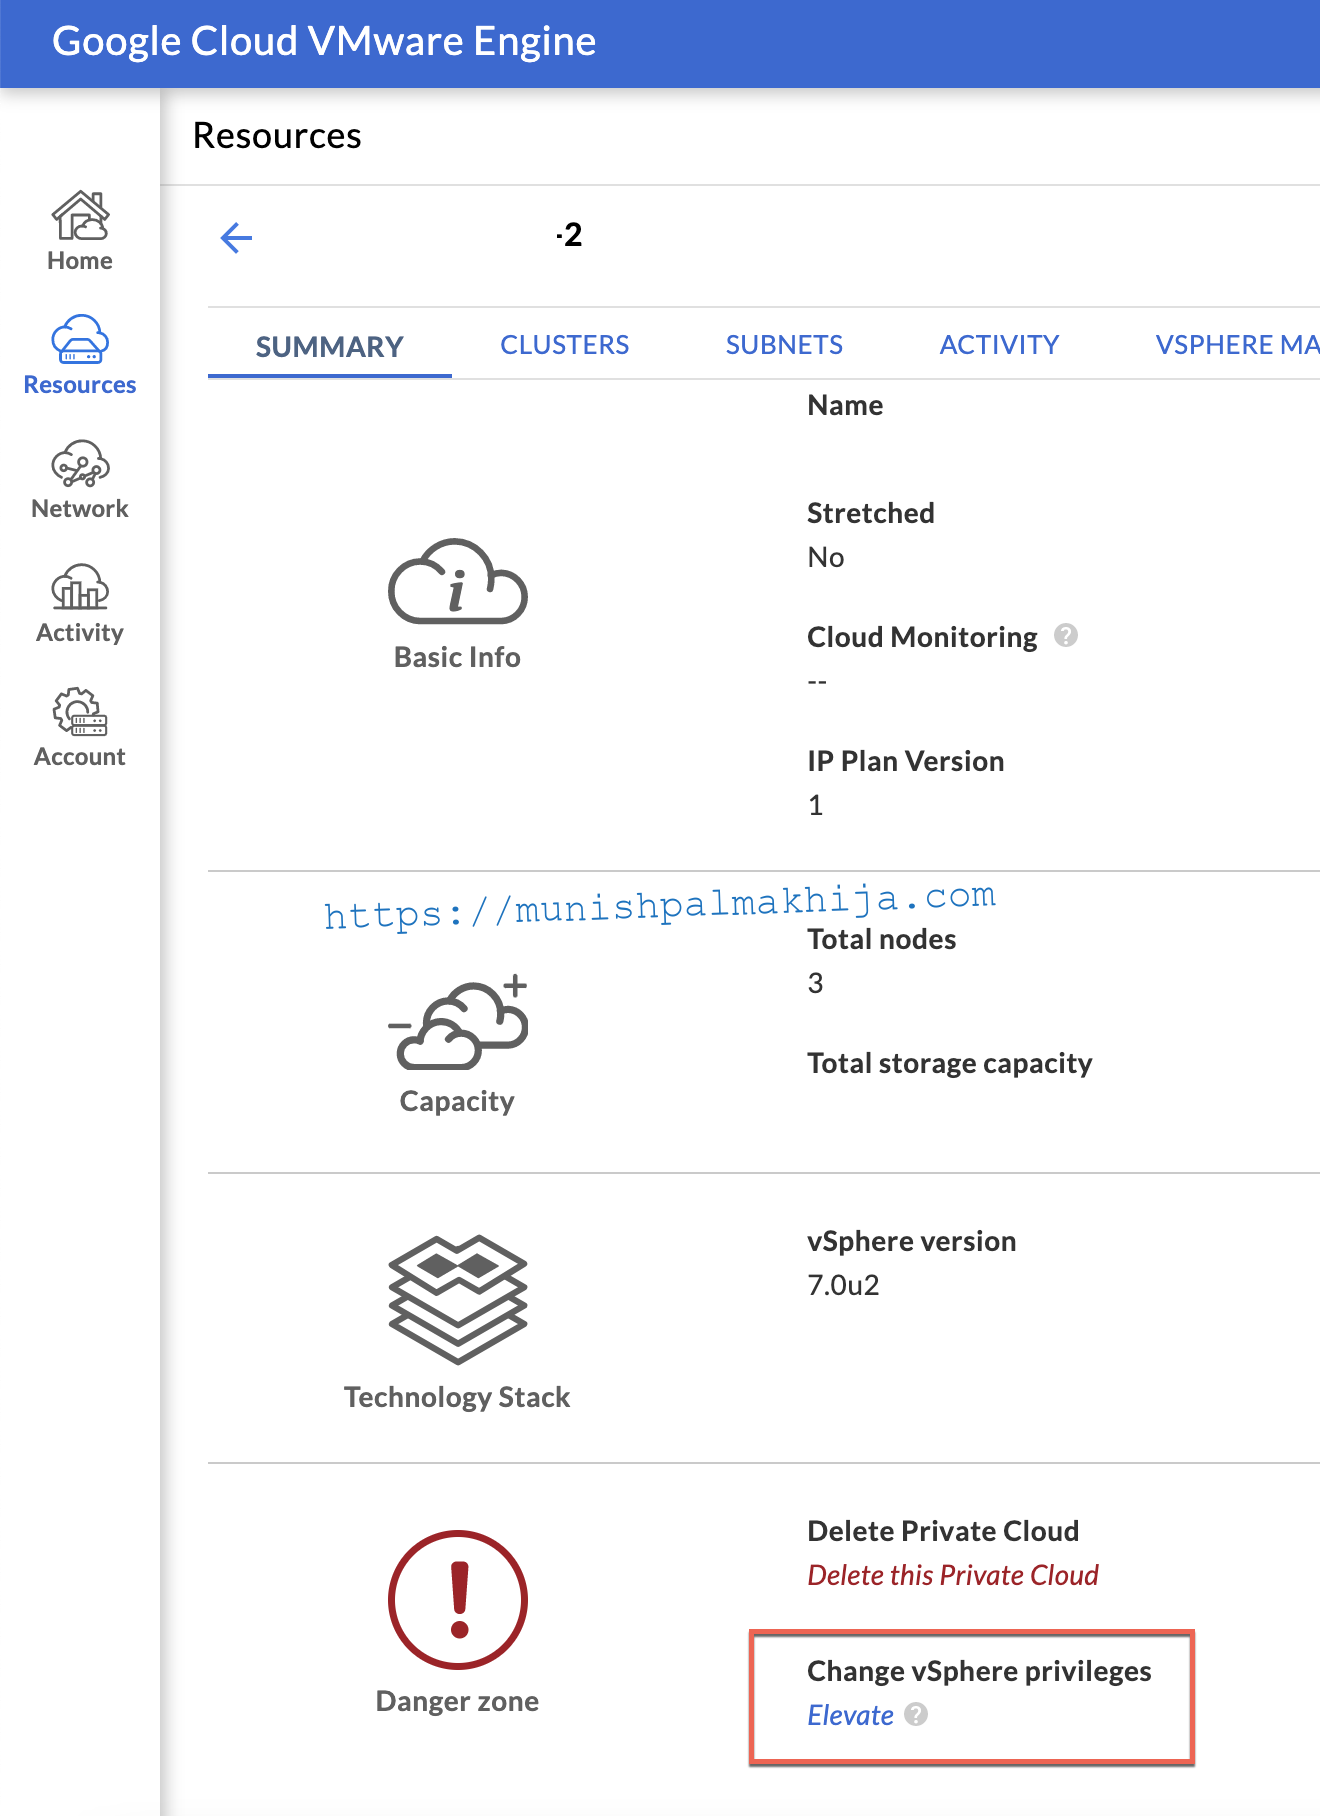
Elevate VMware Engine Privileges
- Access the VMware Engine portal
- Open the Resources page.
- Select the private cloud for which you want to elevate privileges.
- On the Summary page, under Change vSphere privileges, click Elevate.
- Select the vSphere user type. To use a configured identity source like Active Directory, choose Remote identity and enter the user and domain in the user principal name (UPN) format (for instance, user@domain).
- Select the elevation time interval from the list. Choose the shortest time interval that lets you complete the task.
- Select the checkbox to confirm that you understand the risks.
- Click Confirm.
Reference Documentation https://cloud.google.com/vmware-engine/docs/private-clouds/howto-elevate-privilege
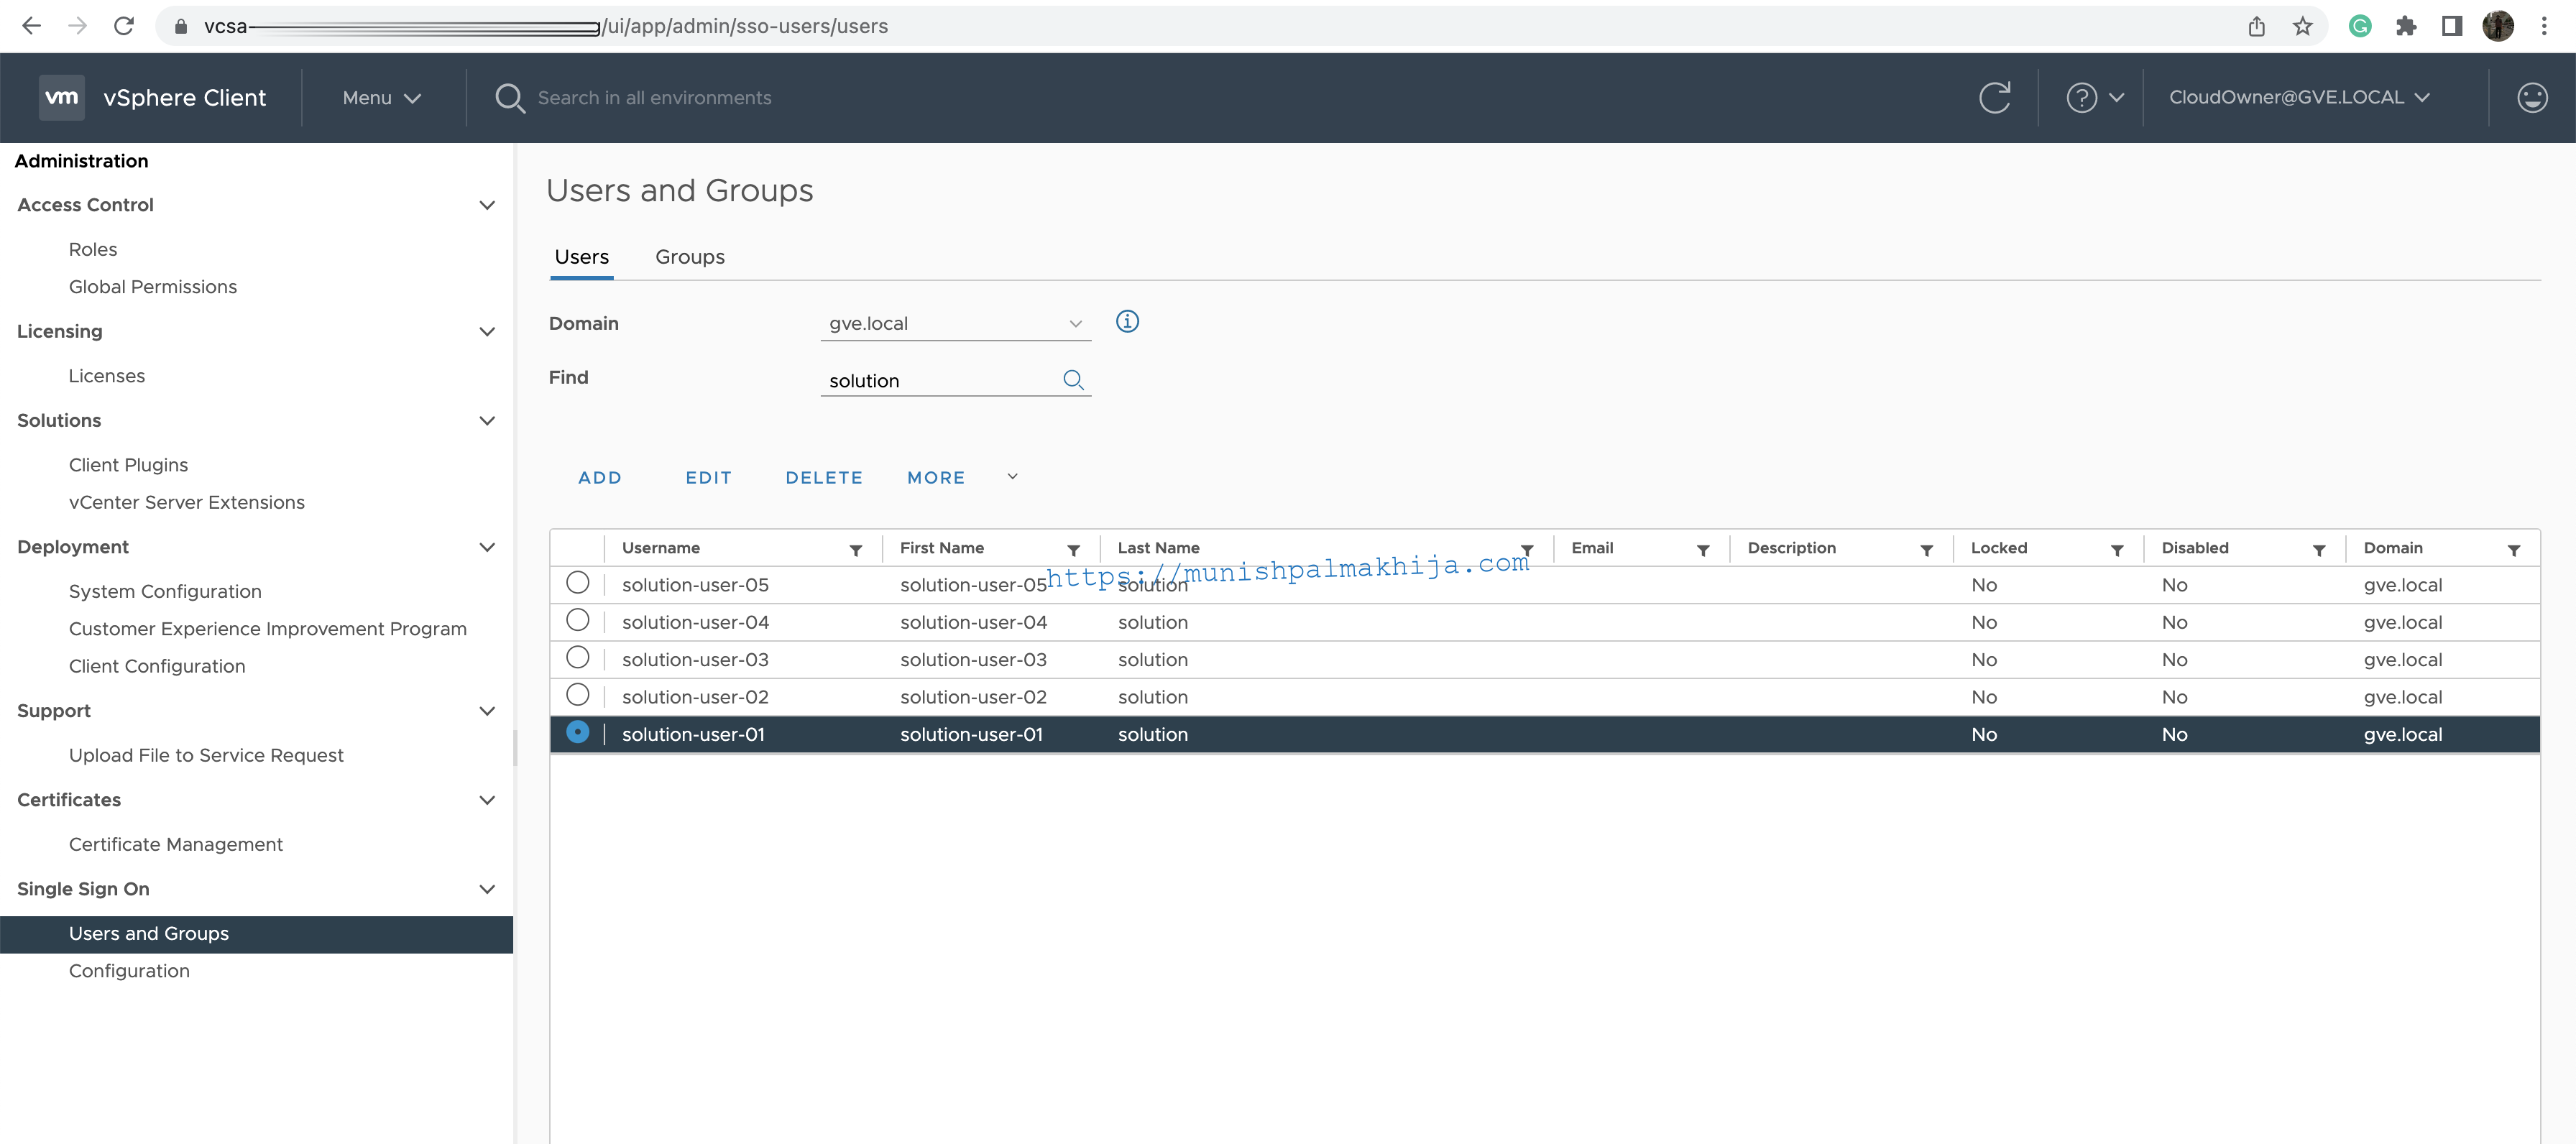
Prepare Solution User
- Elevate your privileges in vSphere. Elevating your privileges through VMware Engine lets you perform user management functions in vSphere.
- Access the vSphere client using the account that has elevated privilege.
- Go to Menu > Administration > Single Sign On > Users and Groups.
- From the main panel, select the gve.local domain and select the desired solution user account.
- Click Edit.
- Enter a strong password in the Password and Confirm Password fields. Optionally, add the name of your tool or product as the description
Reference Documentation https://cloud.google.com/vmware-engine/docs/vmware-platform/howto-solution-user-accounts
Deploy a Cloud Proxy for vRealize Log Insight Cloud
Follow these steps to deploy a Cloud Proxy for vRealize Log Insight Cloud:
Step 1
Navigate to ‘Configuration -> Cloud Proxies’ in vRealize Log Insight Cloud.
Step 2
Click ‘Add Proxy -> New’, The Install Cloud Proxy dialog box appears. Click Download OVA for downloading the OVA to deploy the Cloud Proxy. Leave this dialog box open, as you will need it later.
Step 3
Navigate to your VMware vSphere Web Client data center of Oracle Cloud and click the name of your vCenter cluster. In the drop-down menu, select Deploy OVF Template.
Step 4
In the Deploy OVF Template form, click Select template, then Local File. Paste the path to the OVA Cloud Proxy file you downloaded. Click Next.
Step 5
Enter the required details in the wizard, including the One Time Key (OTK) listed in the Install Cloud Proxy dialog box in vRealize Log Insight Cloud.
Step 6
Once deployed, you will need to Power ON the VM.
Step 7
Once the VM is Powered On, please wait for a couple of minutes. You can navigate back to the Cloud Proxy Page and validate once it shows up with green tick mark, which means it is Ready.
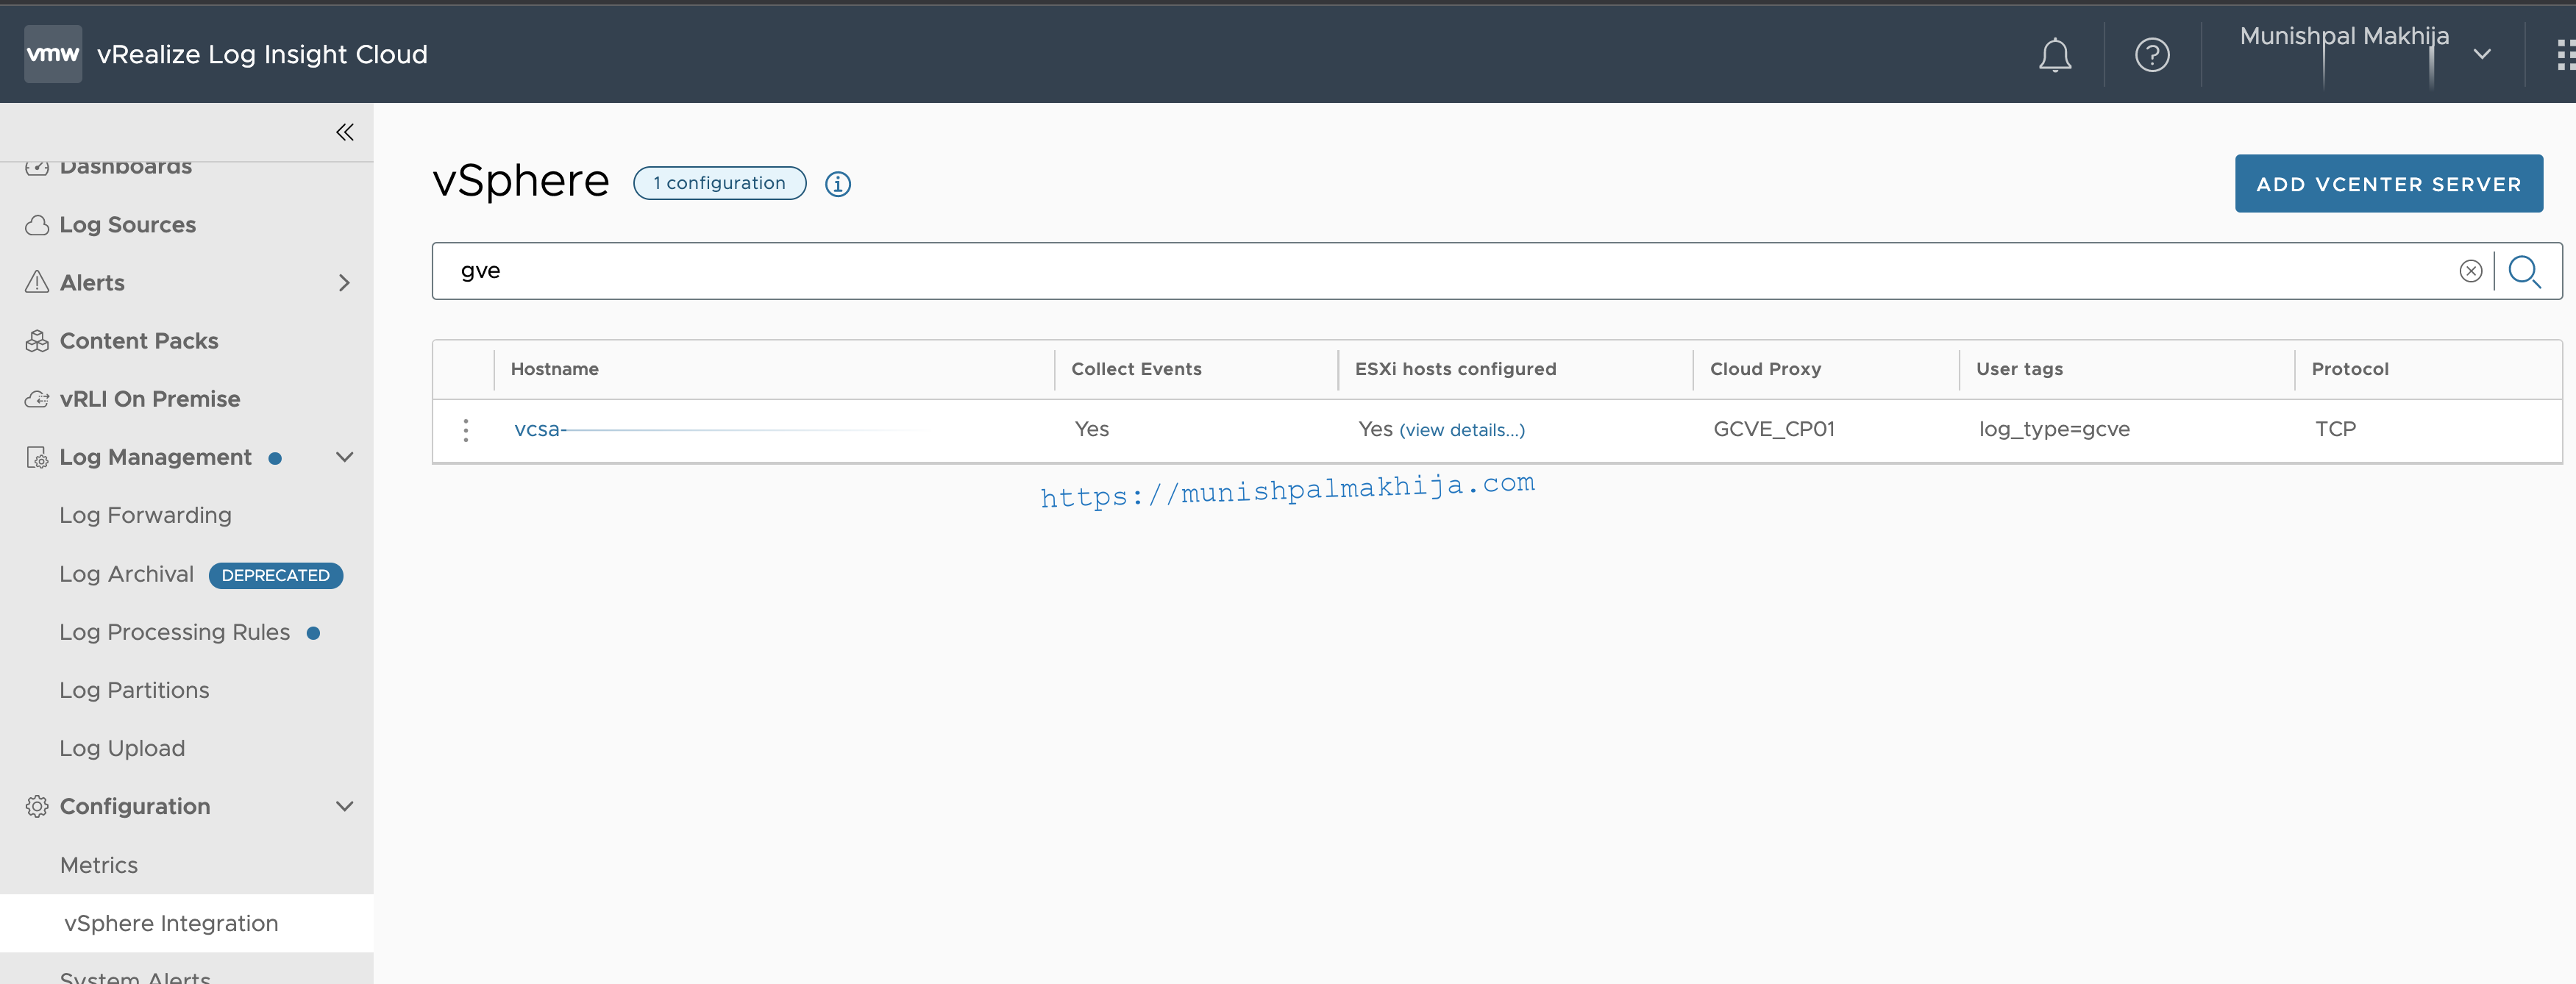
Integrate vRealize Log Insight Cloud with vSphere
Follow these steps to integrate vRealize Log Insight Cloud with vSphere to forward logs from vCenter and ESXi hosts:
Step 1
Navigate to ‘Configuration -> vSphere Integration’ in vRealize Log Insight Cloud.
Step 2
Click Add vCenter Server.
Step 3
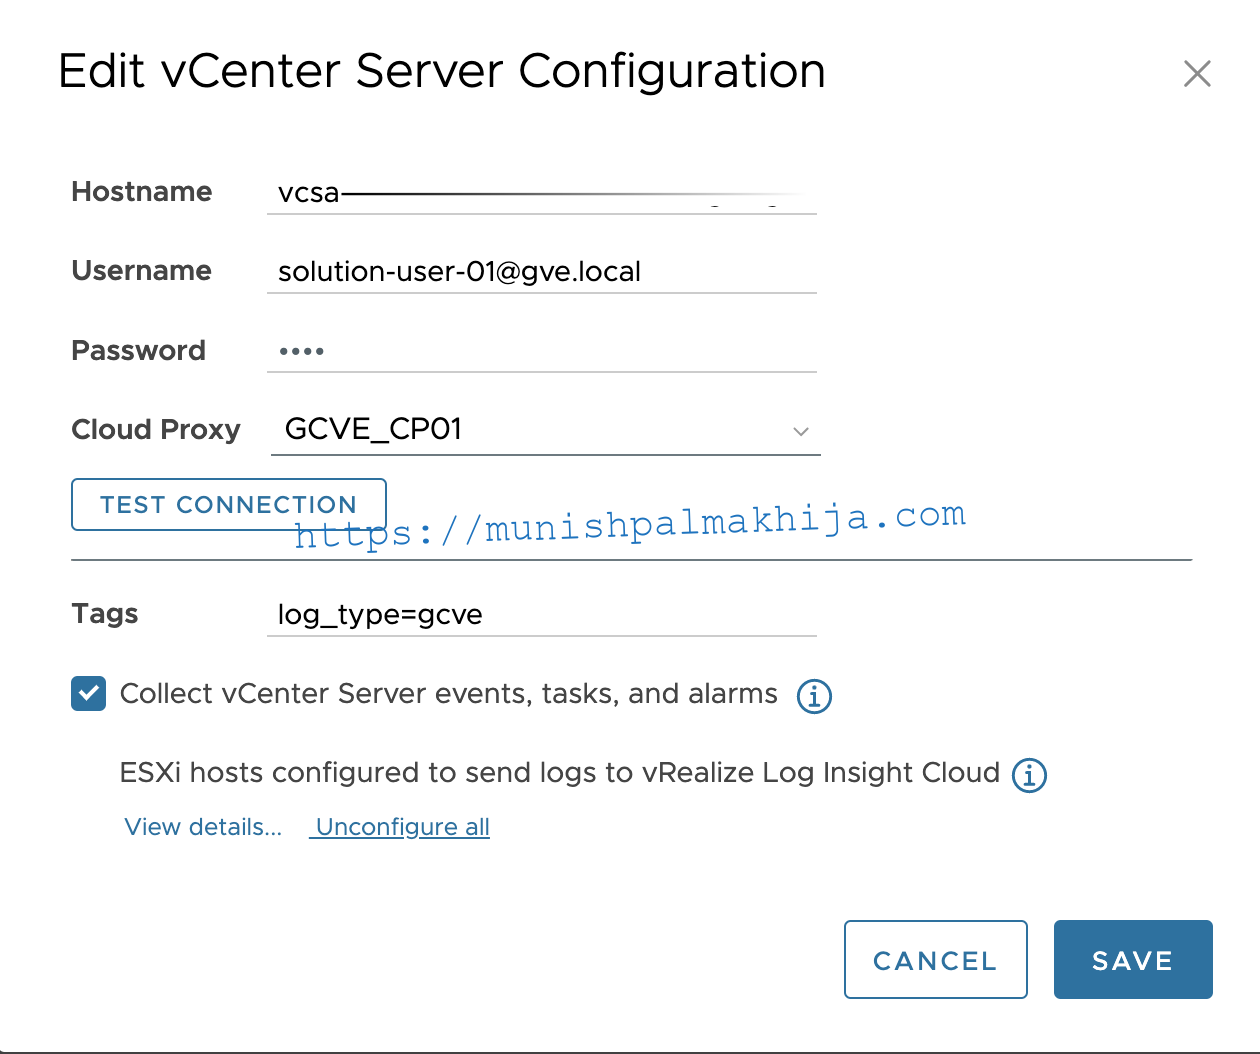
Enter the required details in the dialog box, select the Cloud Proxy that is deployed in the Deploy a Cloud Proxy for vRealize Log Insight Cloud section and click the required logs checkbox.
Note – Please use solution user credentials as configured above
Step 4
Click Test Connection and Save
asd
Configure a Node Profile for NSXT logs
Follow these steps to configure a node profile with NSX-T to forward logs from NSX-T components such as Manager and Controllers:
Step 1
Login to NSX Manager with admin privileges.
Step 2
Navigate to ‘System -> Fabric -> Profiles -> Node Profiles -> All NSX Nodes’ in the Name column.
Step 3
Click Edit to configure the time zone and NTP servers.
Step 4
In the Syslog Servers section, click Add to add a Syslog server and enter the required details in the dialog box.
Step 5
Add an SNMPv2c community and an SNMPv3 user respectively under v2c, v3 in the SNMP Polling section.
Step 6
Add an SNMPv2c and an SNMPv3 trap configuration respectively under v2c, v3 in the SNMP Traps section.
Step 7
Once the NSX-T setup is done, logs will start flowing into vRealize Log Insight Cloud.
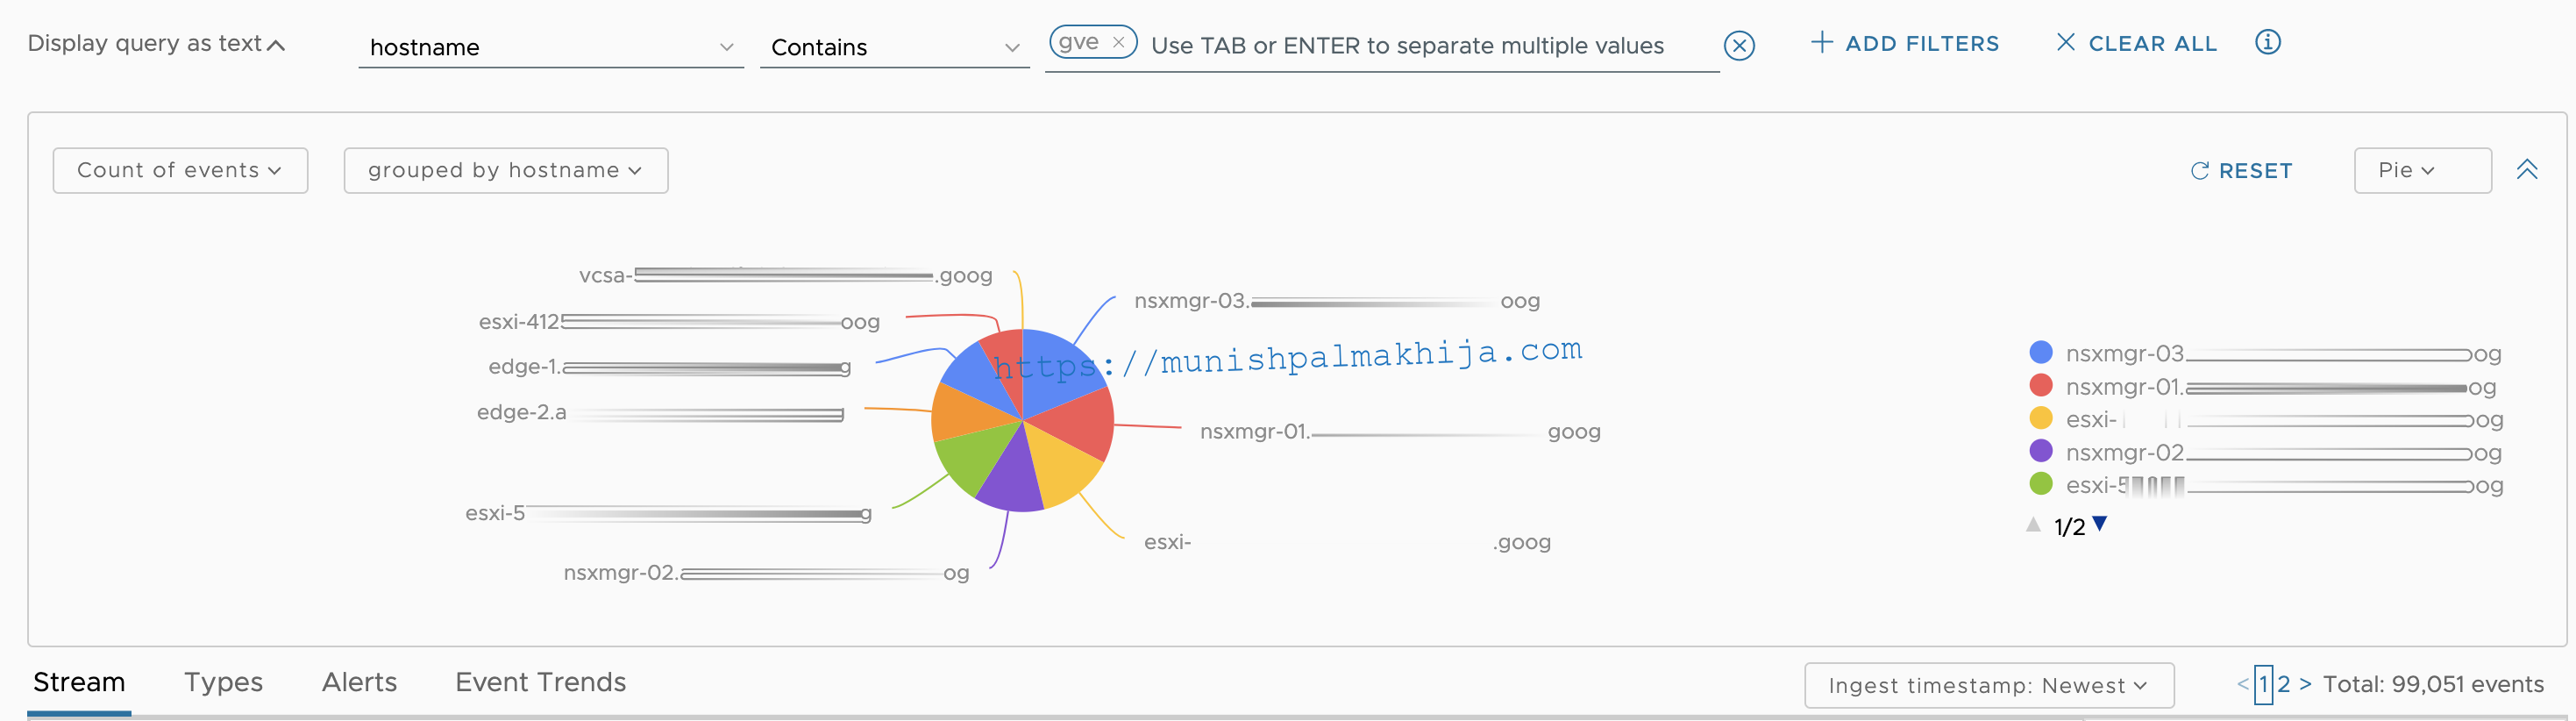
Verify Logs
Search for logs in the vRealize Log Insight Cloud Explore Logs page
Sample filter
Related Articles