
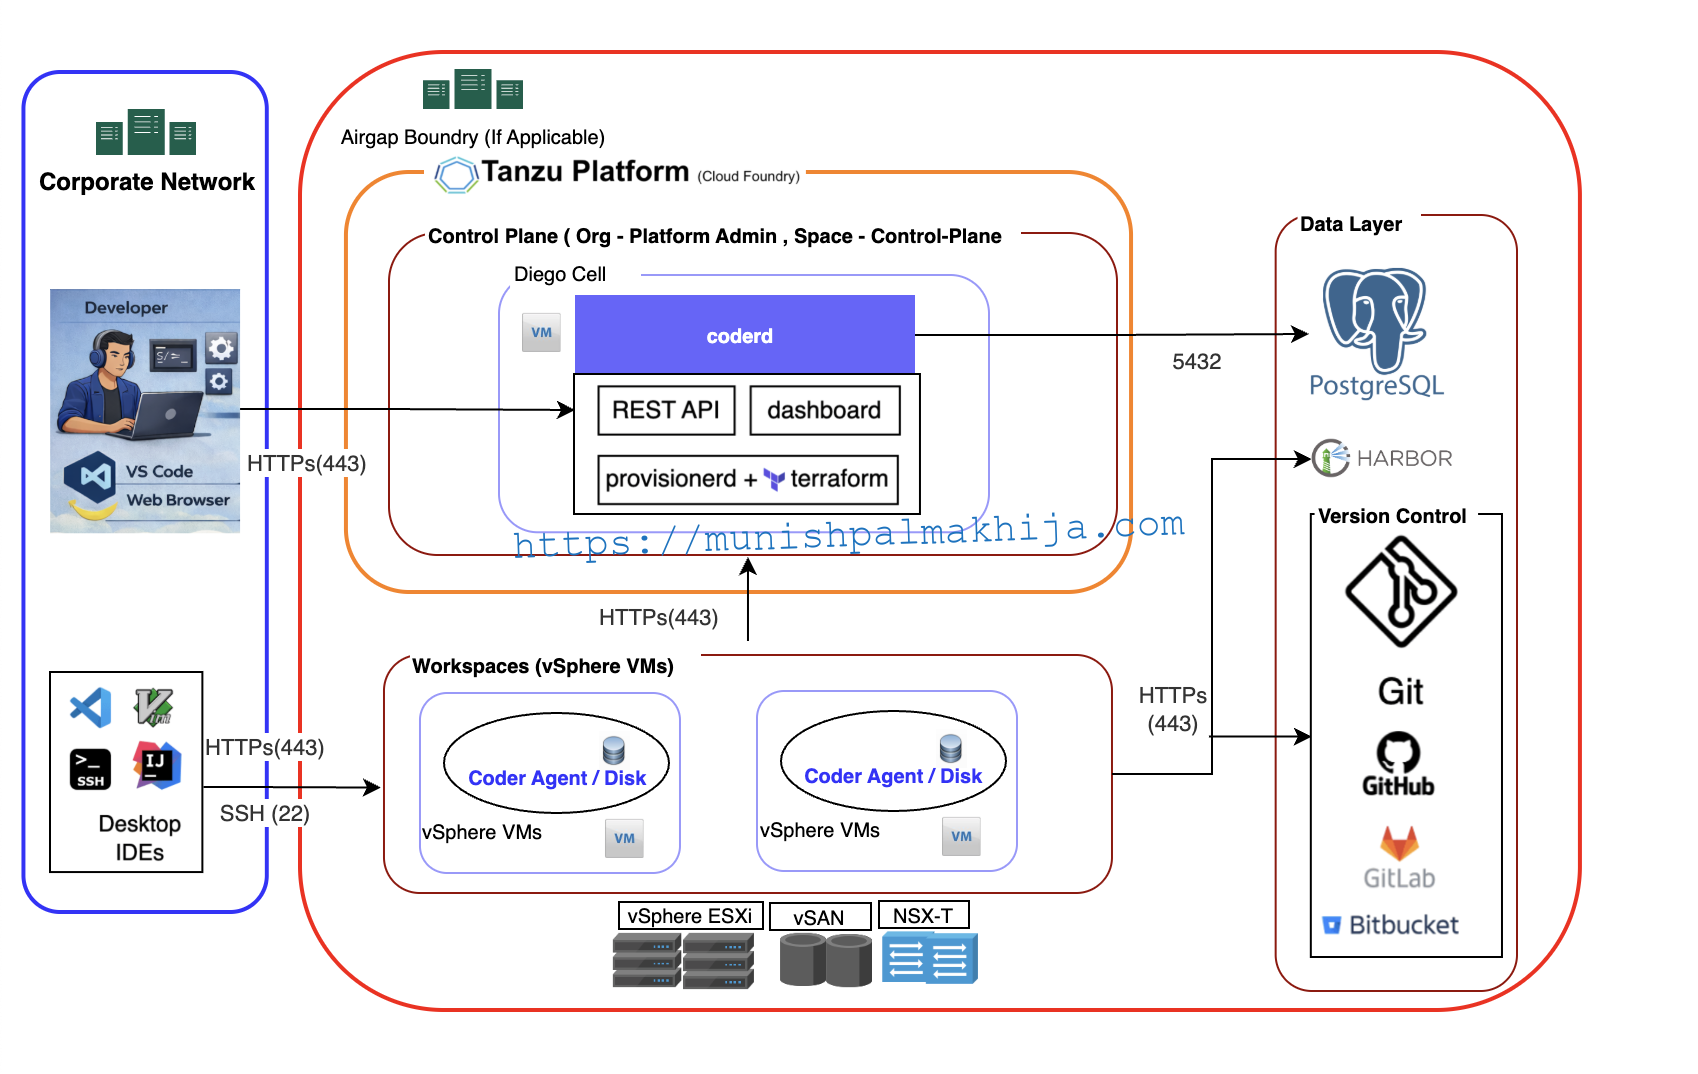
Modern platform engineering teams are increasingly focused on improving developer productivity while maintaining strong governance and infrastructure control. One effective way to achieve this is by offering self-service developer virtual machines (VMs) powered by existing VMware vSphere environments.
Instead of manually provisioning VMs or relying on long-lived shared environments, developers can create their own Ubuntu-based workspaces in minutes — directly from a browser or IDE — while platform teams retain full control over templates, networking, and lifecycle management.
In this blog, we explore how Coder can deliver on-demand, secure, and repeatable developer workspaces as vSphere virtual machines.
What is Coder?
Coder is a platform for cloud development environments (CDEs). Instead of running IDEs and tooling on a developer’s laptop, Coder provisions full development environments in the cloud—accessible via browser or local IDEs like VS Code.
Each developer workspace is:
- Ephemeral or persistent (your choice)
- Isolated and secure
- Defined as code
- Reproducible across teams
Why vSphere Admins Love VM-based Coder Workspaces on vSphere
VM-based Coder Workspaces on vSphere can be useful when:
- Self-Service Provisioning of On-Demand / Ephemeral VMs
- Developers require full system access (Docker-in-Docker, Kind, systemd, kernel modules)
- Your organization already has mature vSphere operations and governance
- Full isolation at the OS level, ideal for strict security needs
Coder treats each VM as a workspace while still providing:
- Browser and local IDE support (VS Code, JetBrains)
- Centralized access control and auditability
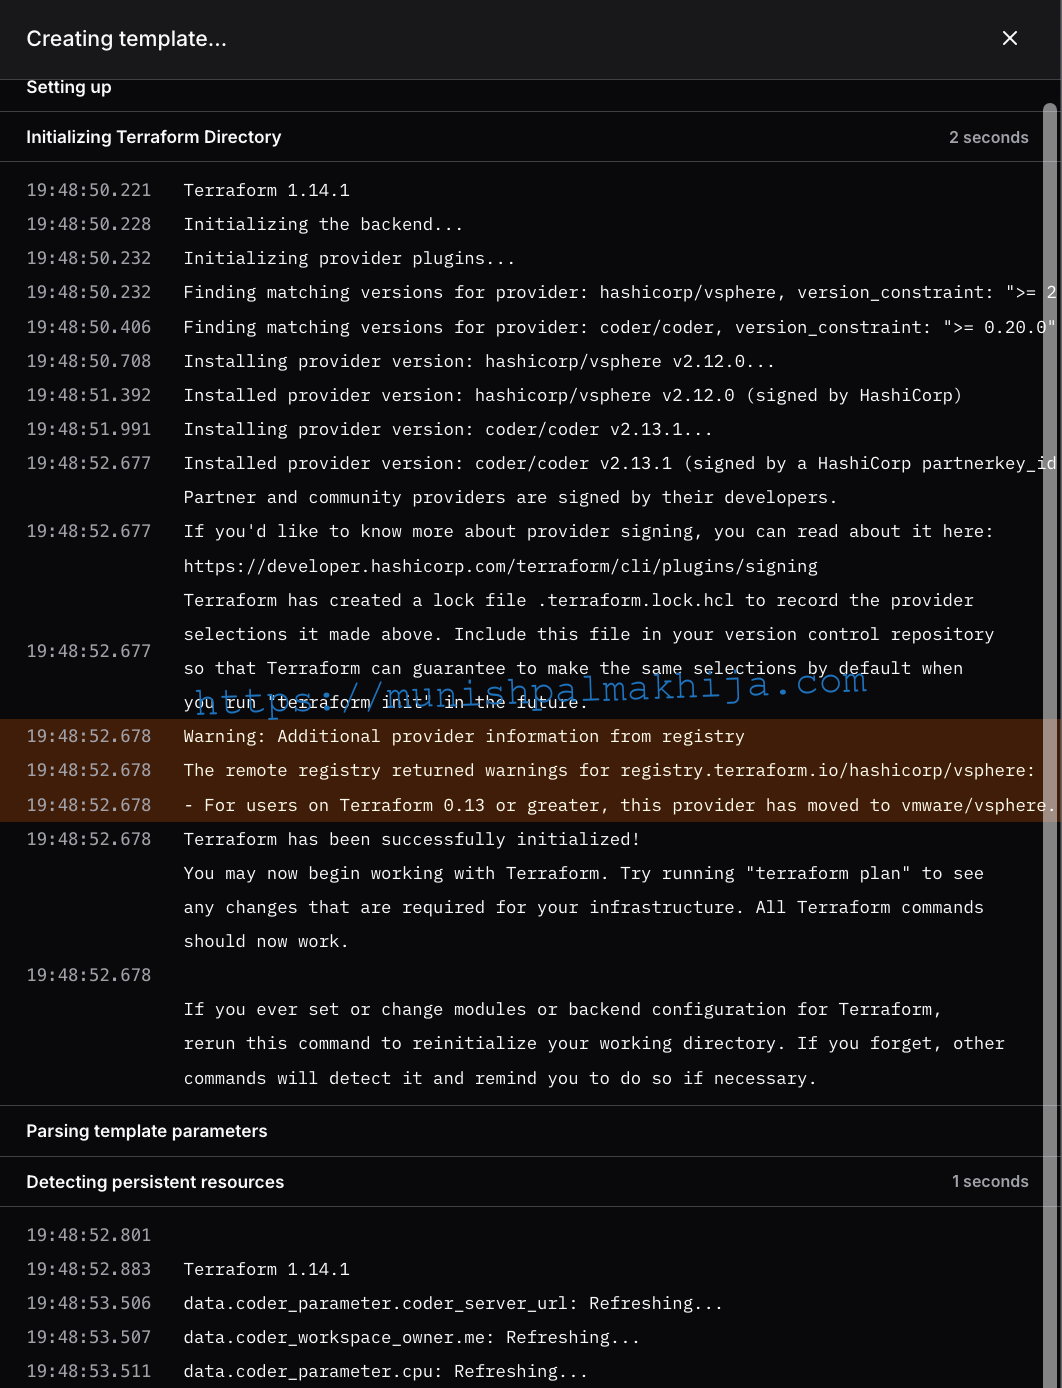
High-level Architecture for Coder on vSphere
At a high level:
- Coder Control Plane runs centrally
- A Coder workspace template uses the vSphere provider
When a developer creates a workspace:
- A VM is cloned from an Ubuntu template
- Cloud-init configures the VM
- The Coder agent starts and registers the workspace
The most critical prerequisite here is a well-prepared Ubuntu VM template.
Understanding the Deployment Process
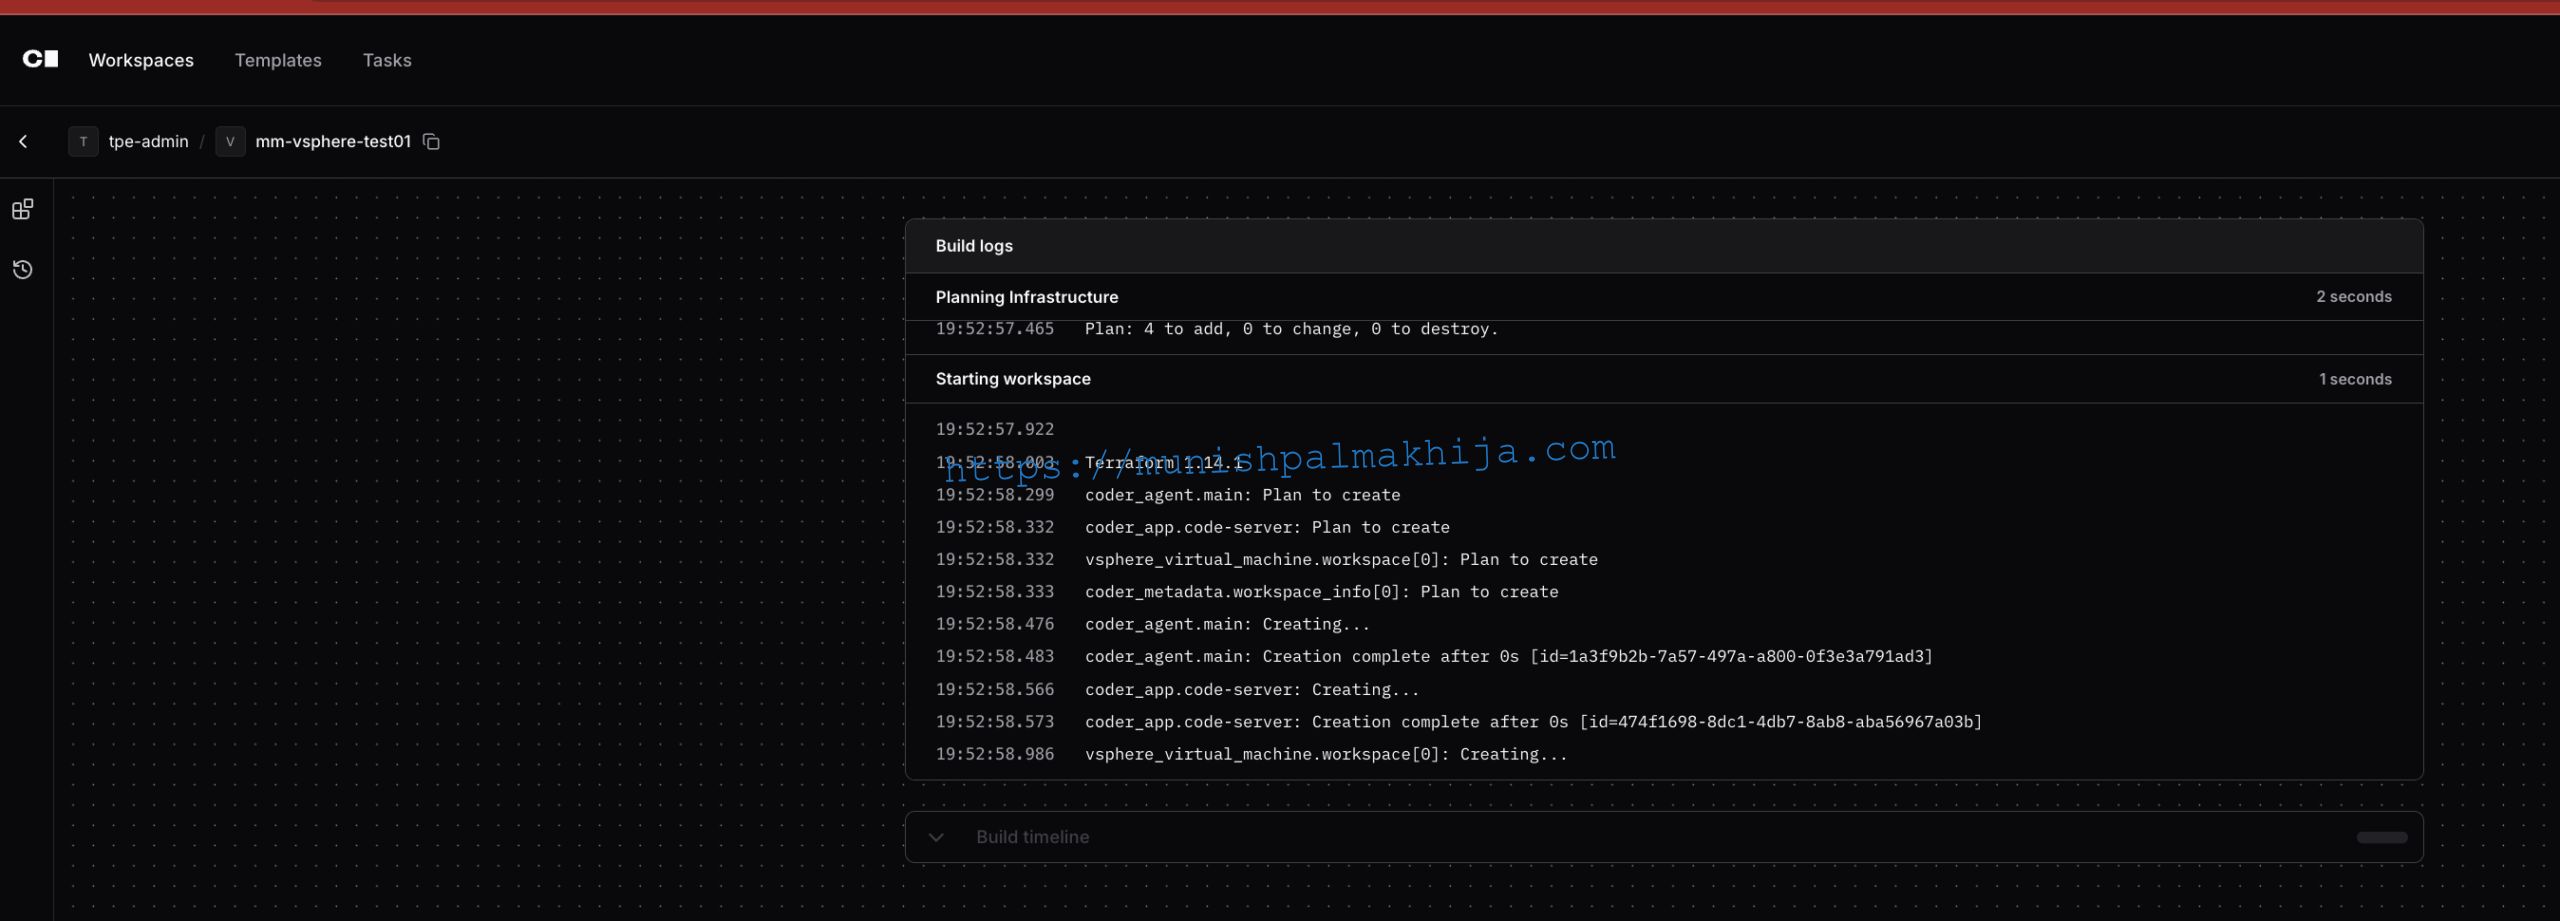
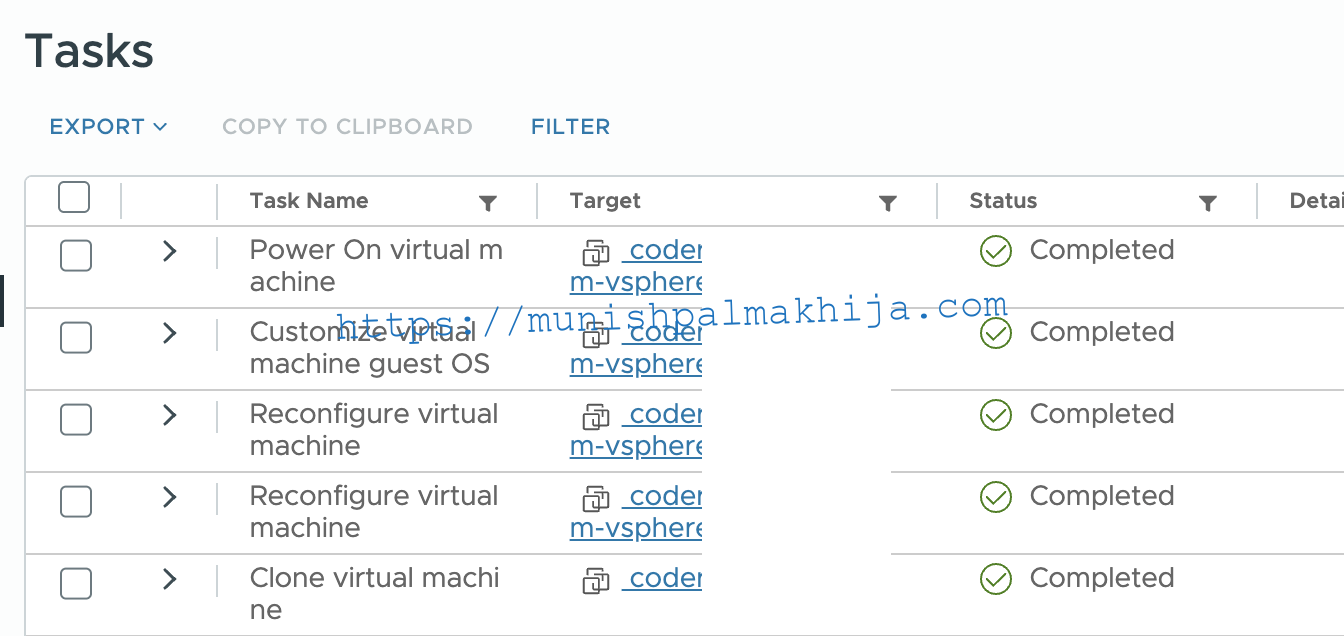
When a workspace is created, the following happens automatically:
1. VM Cloning
Terraform clones a new VM from your Ubuntu template with:
– Customizable CPU cores (2, 4, 6, or 8)
– Customizable memory (2, 4, 8, or 16 GB)
– Customizable disk size (20-500 GB)
– Unique hostname based on workspace name
2. Cloud-init Initialization
On first boot, cloud-init:
– Reads configuration from vSphere guestinfo properties
– Sets up environment variables for the Coder agent
– Creates installation scripts
– Configures systemd services
3. Coder Agent Installation
A systemd service automatically:
– Downloads the Coder agent binary from your Coder server
– Installs and configures the agent
– Connects the workspace to your Coder server
– Starts the agent service
4. Code-Server Installation
code-server is automatically:
– Downloaded and installed
– Started on port 13337
– Configured for browser-based VS Code access
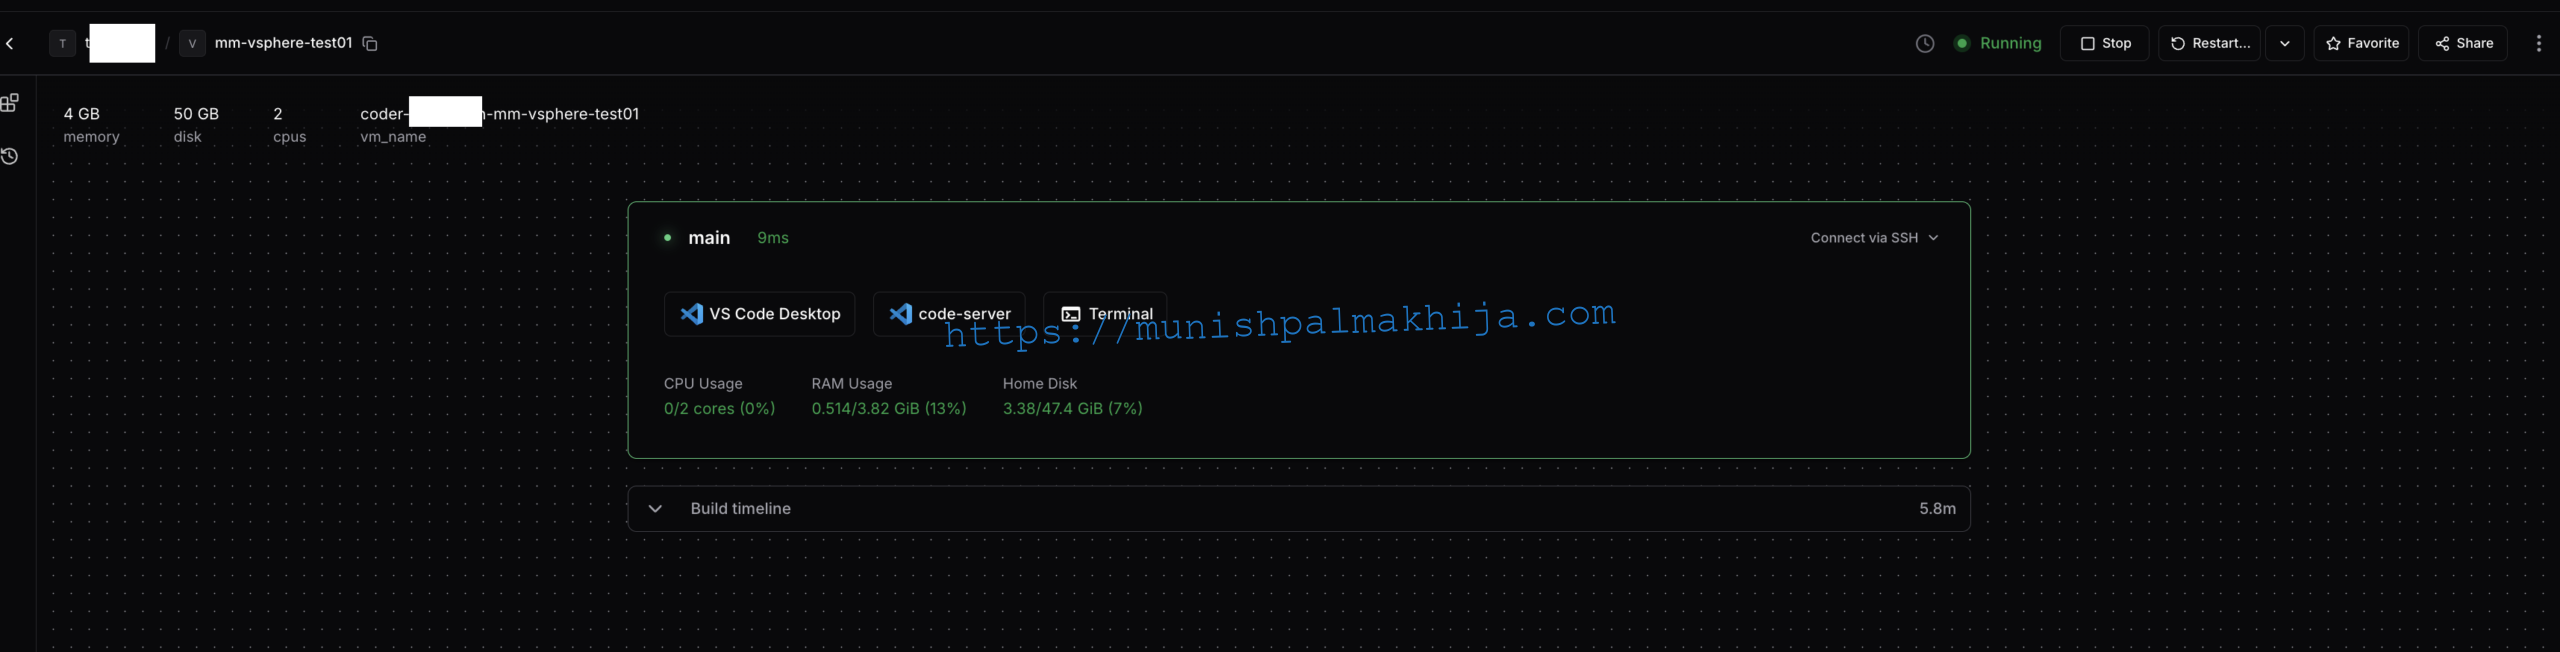
5. Workspace Ready
Once complete, developers can:
– Access VS Code through their browser
– Use SSH to connect directly to the VM
– Access all development tools and resources
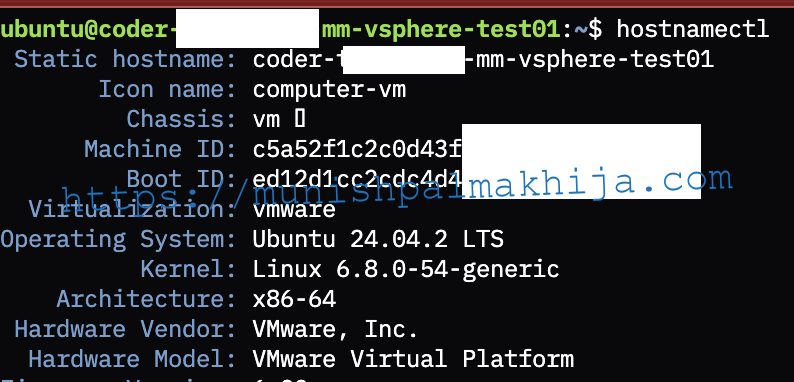
Preparing the Ubuntu Template
The foundation of a successful Coder workspace deployment is a properly configured Ubuntu template. This template will be cloned for each workspace, so it needs to be set up correctly from the start.
Step 1: Install Ubuntu on a VM
1. **Create a New VM** in vSphere:
– Allocate sufficient resources (2 CPU, 4GB RAM, 50GB disk minimum)
– Attach the Ubuntu Server ISO or OVA
– Configure network settings
2. **Install Ubuntu Server**:
– Follow the standard Ubuntu installation process
– Create a user account (we’ll use `ubuntu` as the default)
– Enable SSH during installation by modifying /etc/ssh/sshd_config
3. **Initial System Updates**:
bash
sudo apt-get update
sudo apt-get upgrade -y
Step 2: Install Required packages
Install common dependencies such as Cloud-init and VMware tools. It is essential for automatic VM configuration. It reads configuration data from vSphere guestinfo properties and applies it on first boot.
1. **Install Cloud-init and VMware Tools**:
sudo apt-get install -y cloud-init open-vm-tools
2. **Configure VMware Datasource**:
Create a configuration file to tell cloud-init to read from VMware guestinfo:
This configuration tells cloud-init to:
– Prioritize the VMware datasource
– Fall back to None if VMware data isn’t available
– Use the VMware datasource type for reading guestinfo properties
sudo mkdir -p /etc/cloud/cloud.cfg.d
sudo tee /etc/cloud/cloud.cfg.d/99_vmware.cfg > /dev/null <<‘EOF’
datasource_list: [VMware, None]
datasource:
VMware:
type: vmware
EOF
3. **Enable Services**:
sudo systemctl enable cloud-init
sudo systemctl enable cloud-init-local
sudo systemctl enable cloud-init-config
sudo systemctl enable cloud-init-final
sudo systemctl enable open-vm-tools
Step 3: Configure User Access
The Coder template expects a user with passwordless sudo access. Configure this for the `ubuntu` user:
1. **Set Up Passwordless Sudo**:
echo “ubuntu ALL=(ALL) NOPASSWD:ALL” | sudo tee /etc/sudoers.d/ubuntu
sudo chmod 0440 /etc/sudoers.d/ubuntu
2. **Ensure Home Directory Exists**:
sudo mkdir -p /home/ubuntu
sudo chown ubuntu:ubuntu /home/ubuntu
sudo chmod 755 /home/ubuntu
Step 4: Install Base Packages
Install essential packages that the Coder agent and code-server will need:
sudo apt-get install -y curl wget git vim net-tools ca-certificates
These packages provide:
– **curl/wget**: For downloading the Coder agent and code-server
– **git**: Version control support
– **vim**: Text editor for troubleshooting
– **net-tools**: Network utilities
– **ca-certificates**: SSL certificate support
Step 5: Clean Cloud-init State
Before converting the VM to a template, you must clean all cloud-init state. This ensures that cloud-init will run fresh on each cloned VM:
sudo cloud-init clean –logs
sudo rm -rf /var/lib/cloud/instances/*
sudo rm -rf /var/lib/cloud/data/*
sudo rm -f /var/log/cloud-init*.log
**Important**: This step is critical. If you don’t clean the cloud-init state, cloned VMs may not initialize properly.
Step 6: Convert VM to Template
1. **Shut Down the VM**: Ensure the VM is completely powered off
2. **Convert to Template**: In vSphere, right-click the VM → Template → Convert to Template
3. **Verify Template**: Confirm the template appears in your vSphere inventory
Using the Ubuntu Template in a Coder Workspace
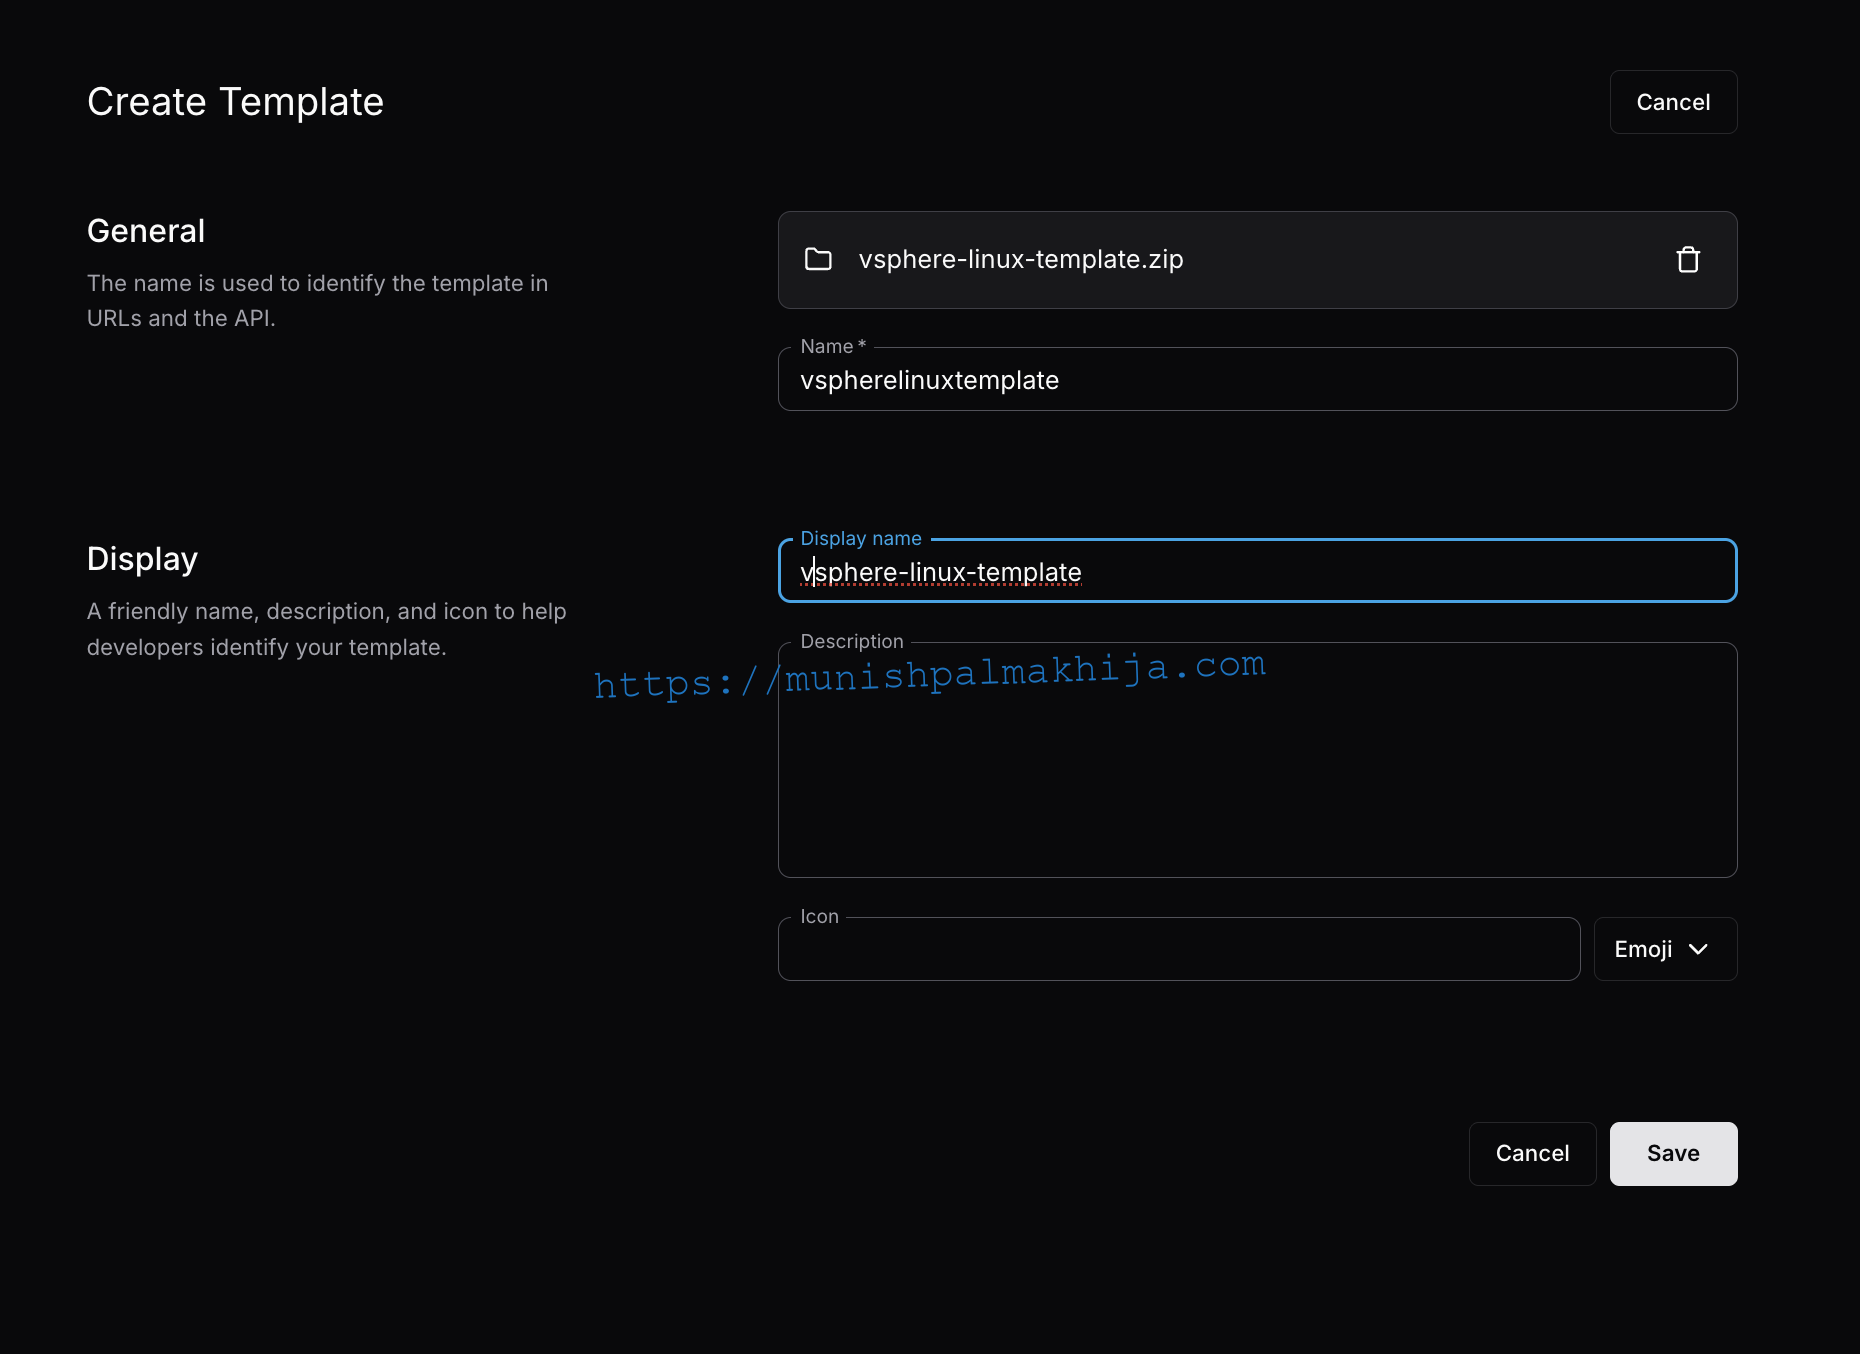
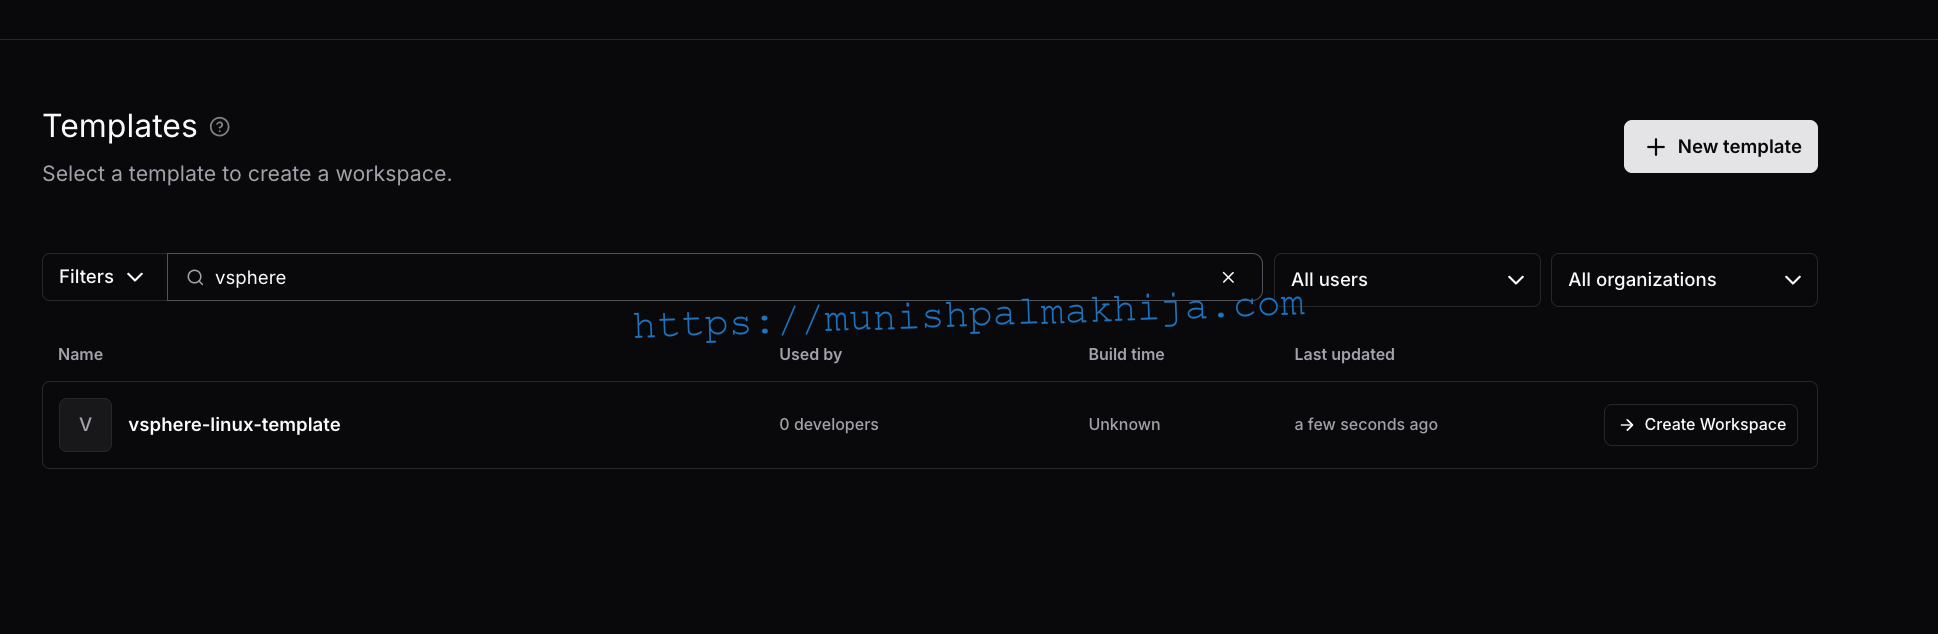
Templates are the core building blocks for workspace creation. They define the tools, runtimes, and startup configuration developers will get when they provision a workspace.
Instead of creating templates from scratch, you can use the vSphere Linux workspace (vsphere-template -linux) as a starting point. This template provisions development workspaces as VMs
To use this template:
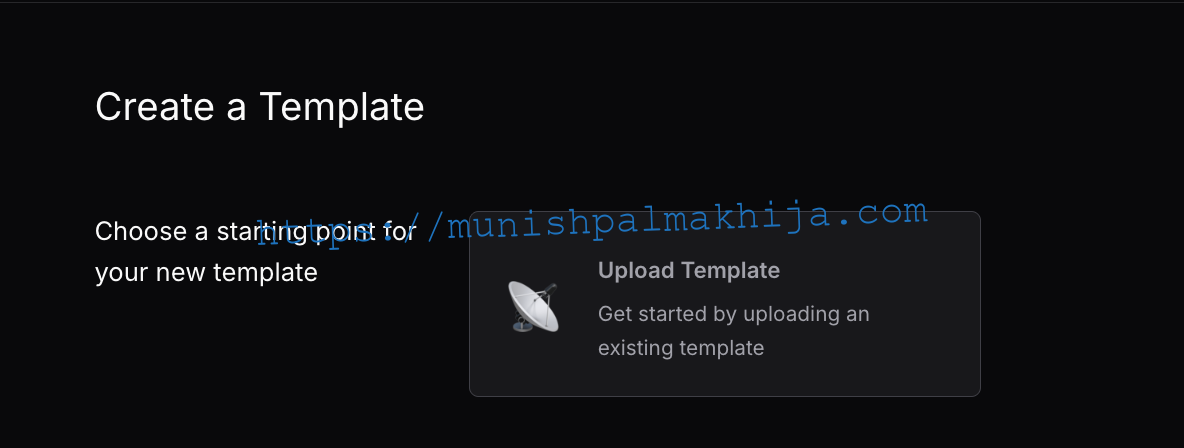
1. **Access Coder**: Log into your Coder server
2. **Navigate to Templates**: Go to Templates → Create Template
3. **Import Template**: Upload or clone the vSphere template repository
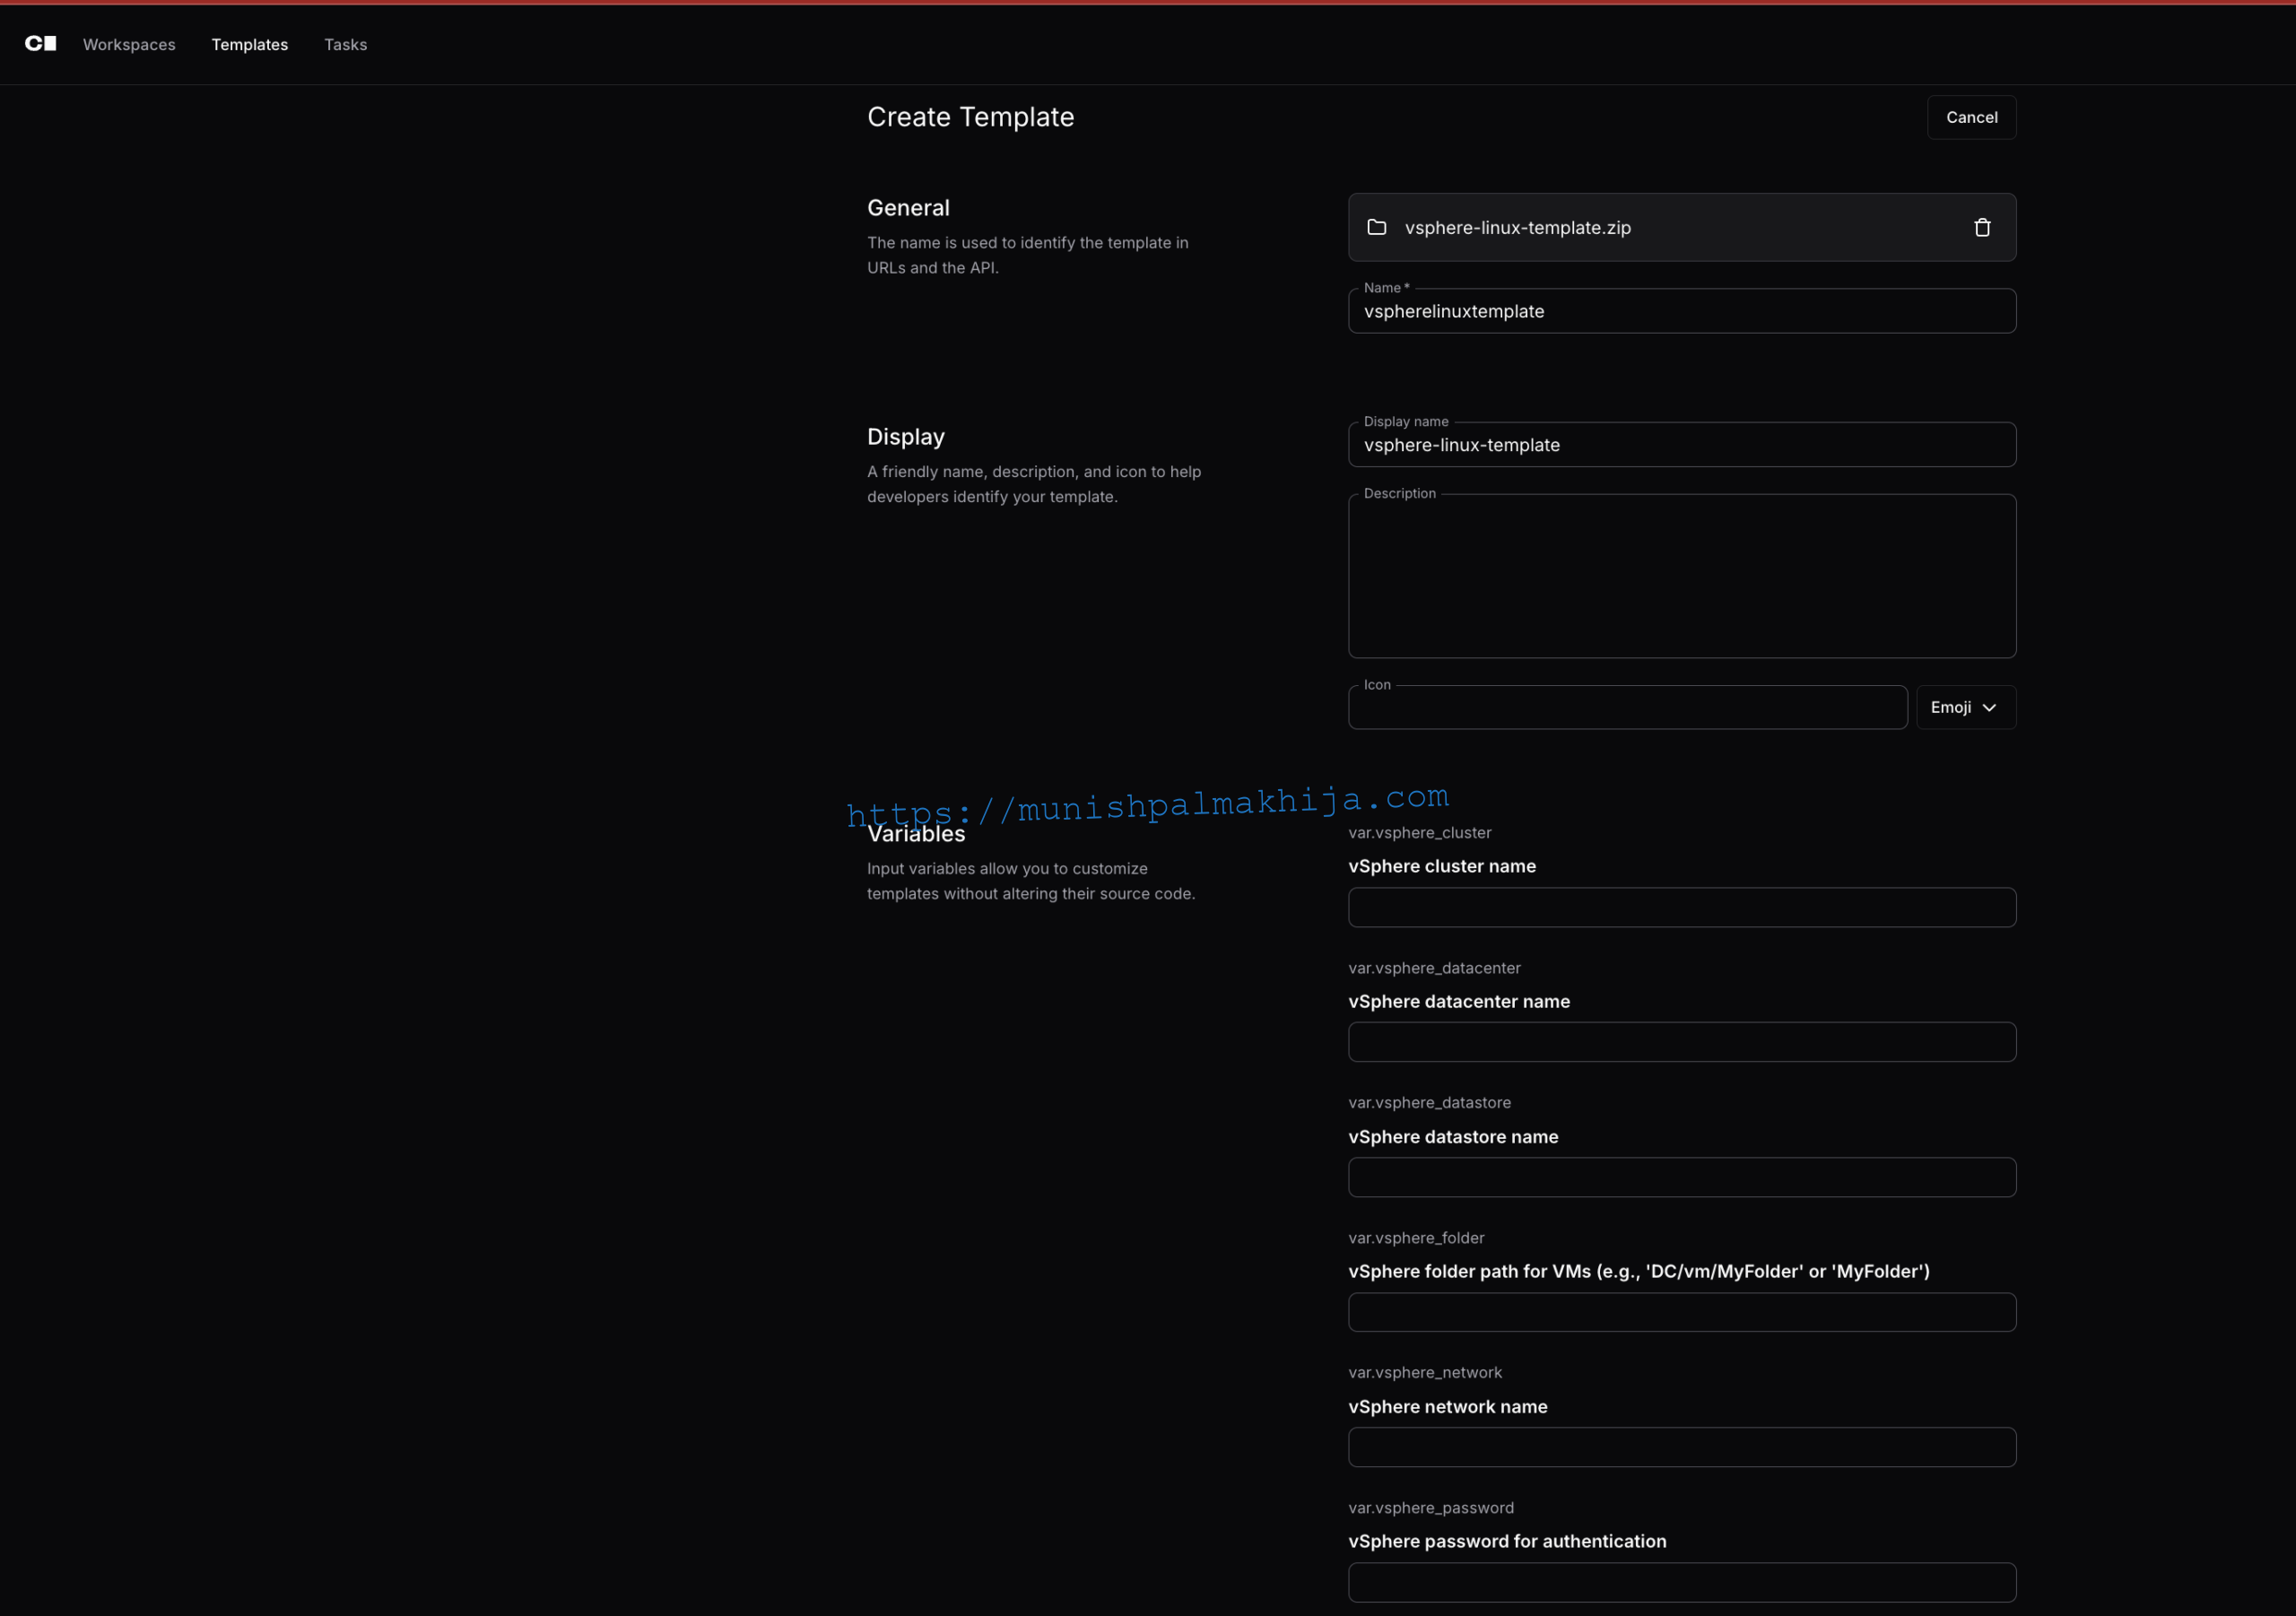
During template import, you’ll need to provide the following vSphere connection details:
– **vSphere Server**: Your vCenter server URL (e.g., `vcenter.example.com`)
– **vSphere Username**: Your vSphere username
– **vSphere Password**: Your vSphere password
– **Datacenter**: The datacenter name where VMs will be deployed
– **Datastore**: The datastore name for VM storage
– **Cluster**: The cluster name where VMs will be provisioned
– **Network**: The network name for VM networking
– **VM Template**: The name of the Ubuntu template you just created
– **Folder** (Optional): vSphere folder path for organizing VMs

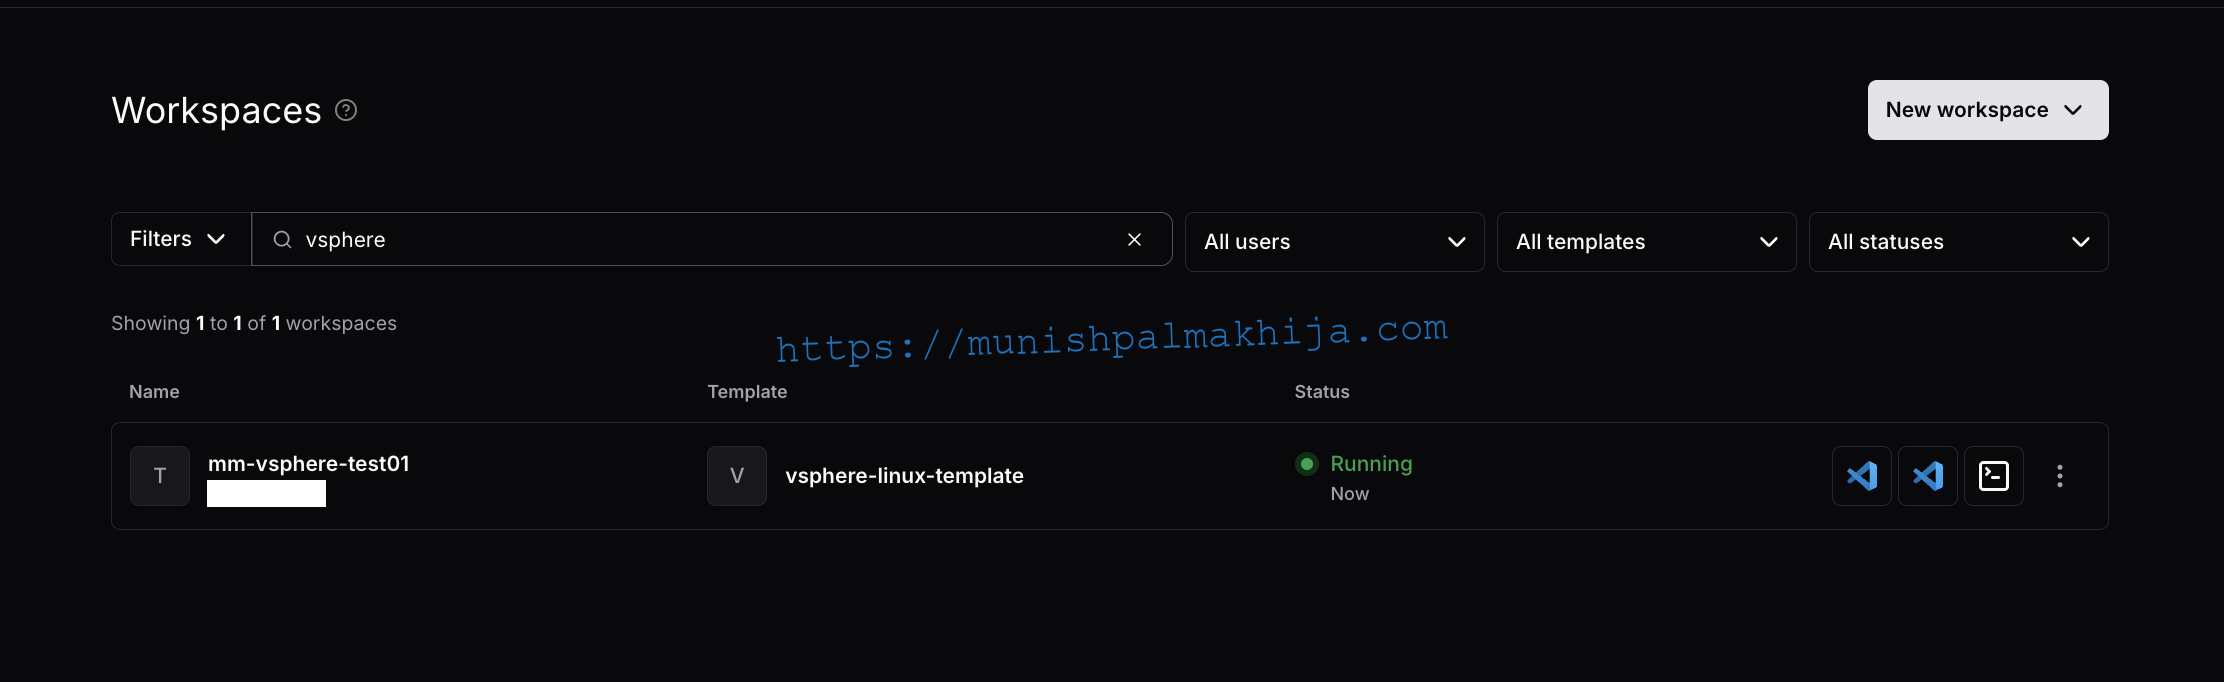
Provisioning Workspaces
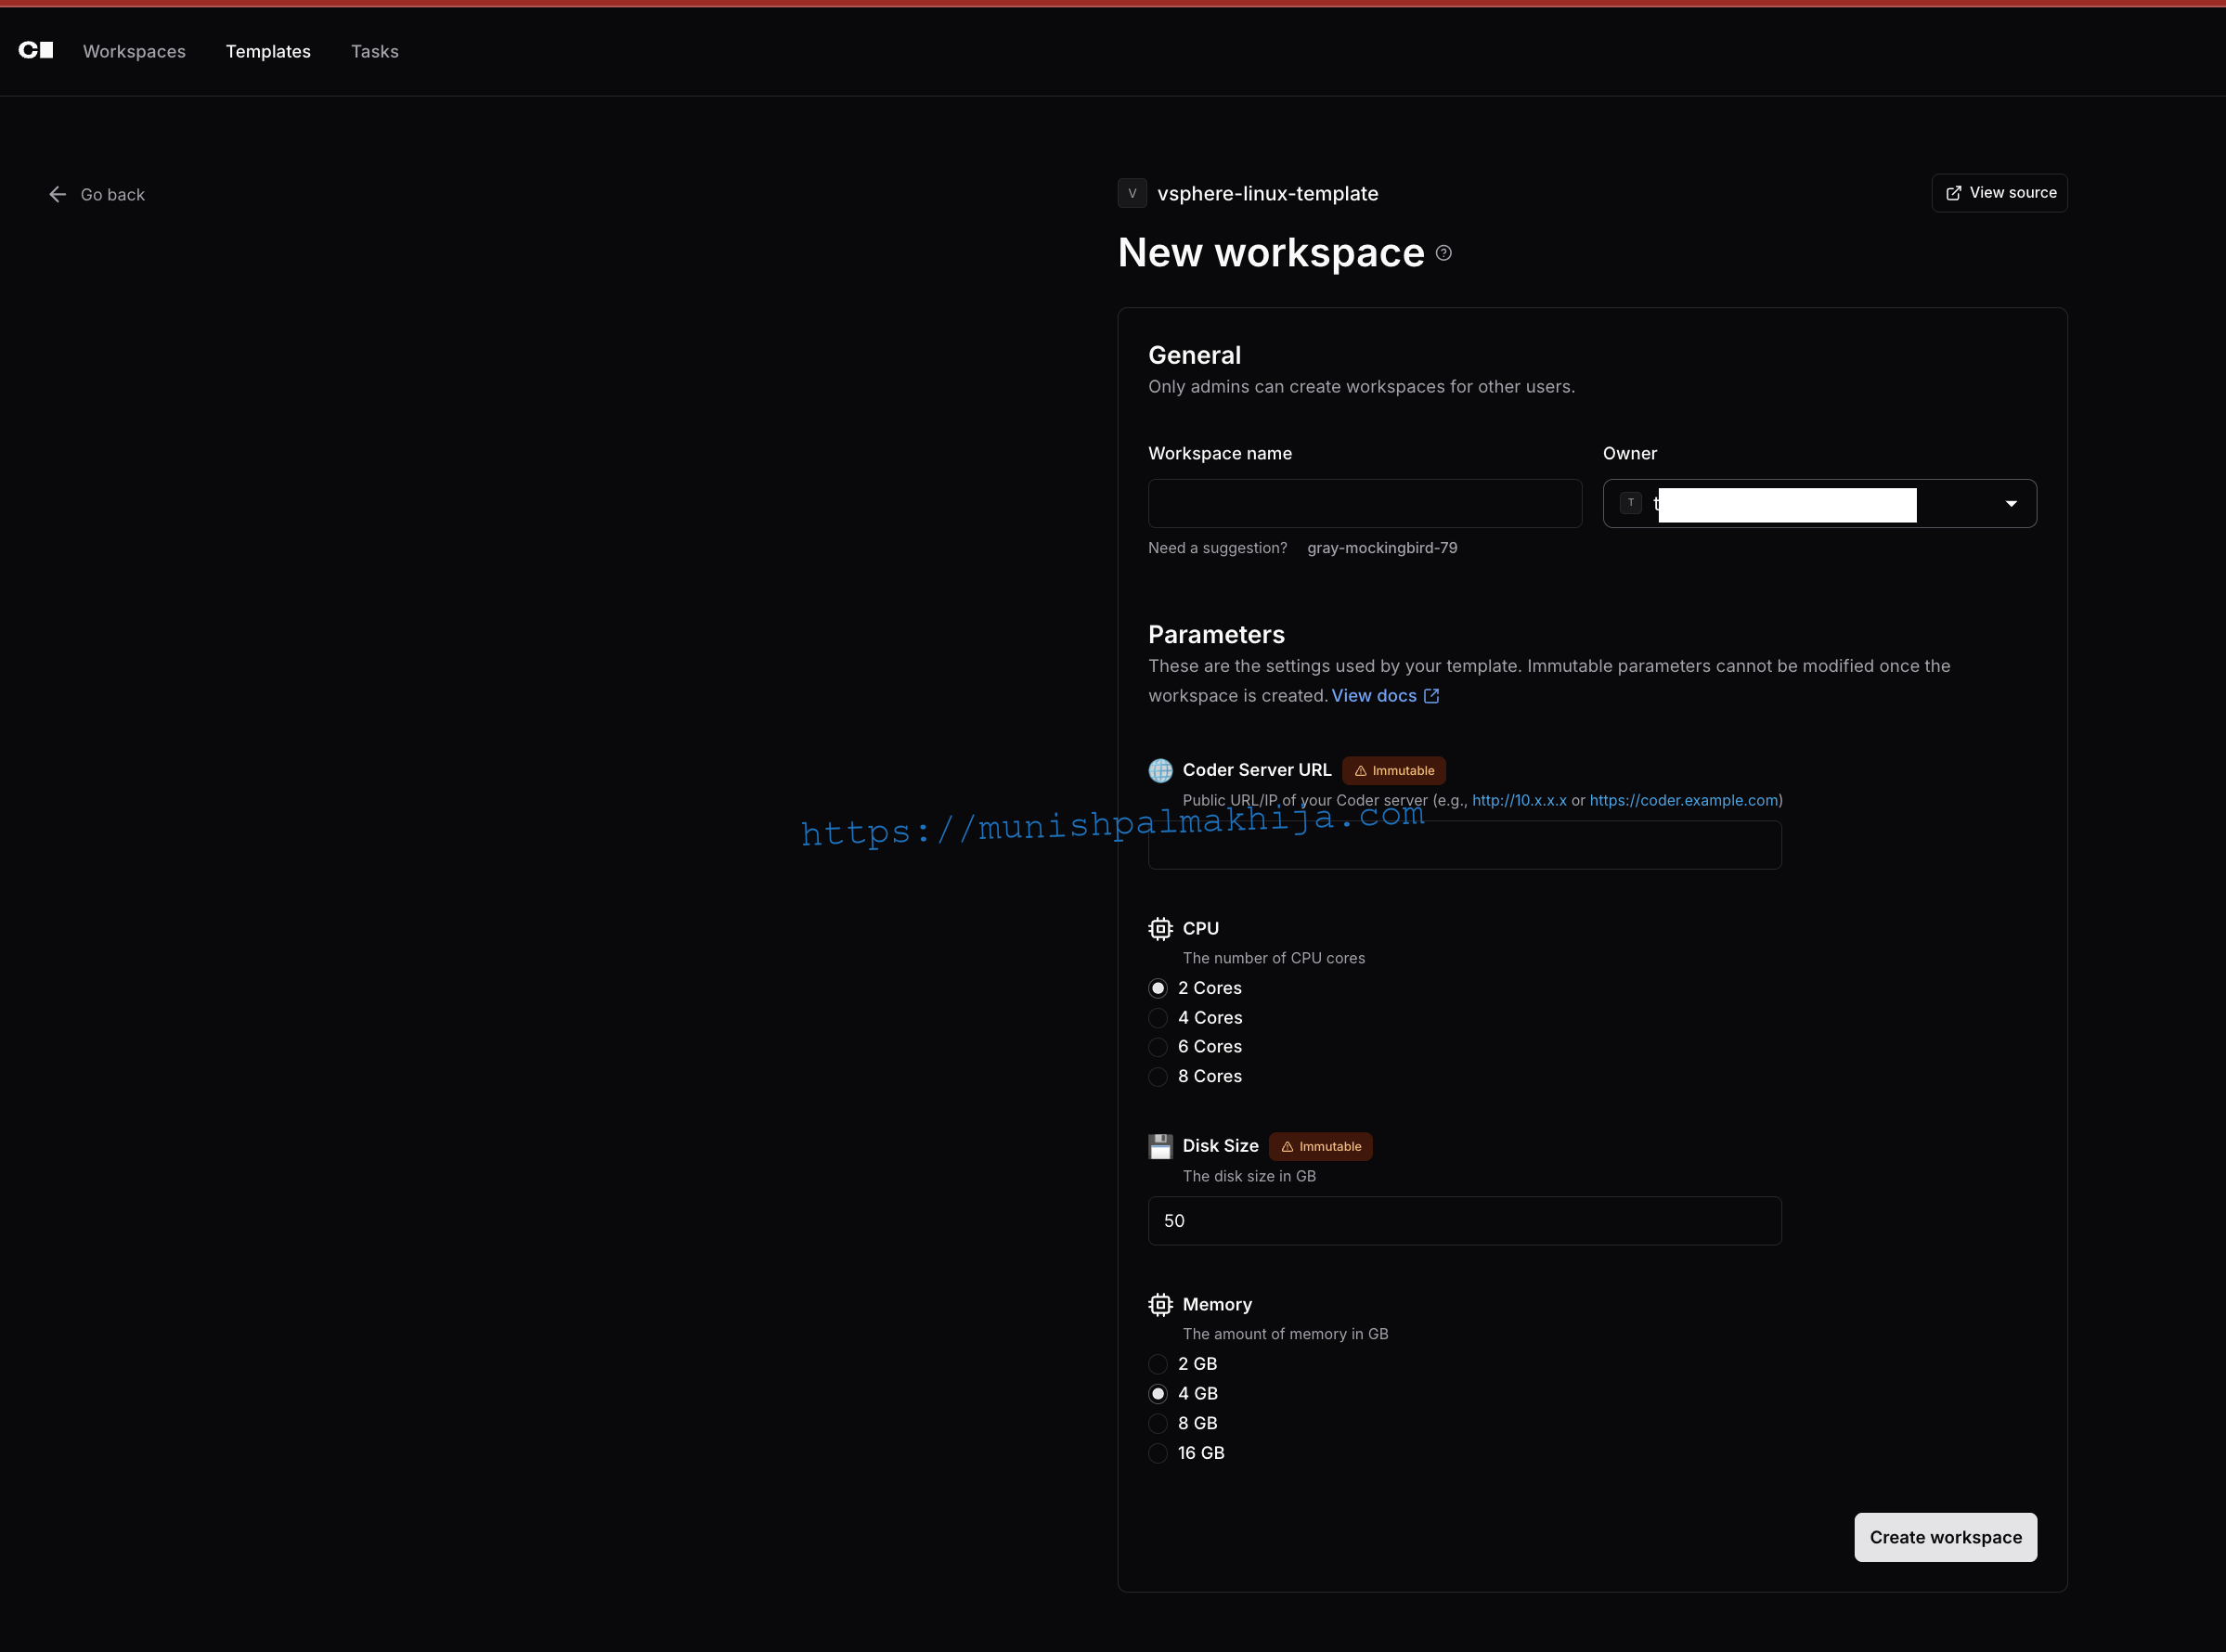
Creating Your First Workspace
1. **Create Workspace**: In Coder, click “Create Workspace.”
2. **Select Template**: Choose your vSphere template
3. **Configure Resources**:
– Select CPU cores (2-8)
– Select memory (2-16 GB)
– Set disk size (20-500 GB)
4. **Set Coder Server URL**: Enter your Coder server URL
5. **Create**: Click “Create” and wait for provisioning
The workspace will be ready in a few minutes. You can monitor the progress in the Coder UI.
Conclusion
Deploying Coder workspaces on vSphere VMs provides a powerful way to leverage your existing VMware infrastructure for development environments.
It can be useful for
- Self-Service Provisioning VMs (VM as a Service in a way :smile)
- Automate the entire lifecycle of vSphere resources—from initial provisioning to updates and decommissioning.
- Consistency and Repeatability – Workspaces are defined using declarative templates, which ensures that every deployment is identical, minimizing configuration.
Unlocking Developer Productivity with Cloud Development Environments on Cloud Foundry with Coder